I feel quite a bit of nostalgia for a few specific arcade machines that were in my local Round Table pizza when I was growing up: The 4-player beat-em-up Teenage Mutant Ninja Turtles, the 3-player racing game Off Road, the super cool 4-game Neo-Geo, and the cocktail cabinet version of Ms. Pac-Man.
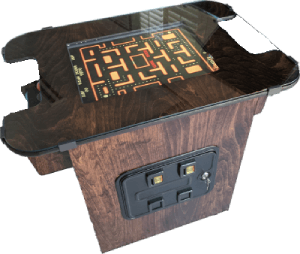
I remember that last one most vividly. Being able to sit and set down your drink while you took a break from the upright machines was such a nice change. This was the cabinet that first got me interested in Ms. Pac-Man and Arkanoid, among other games.
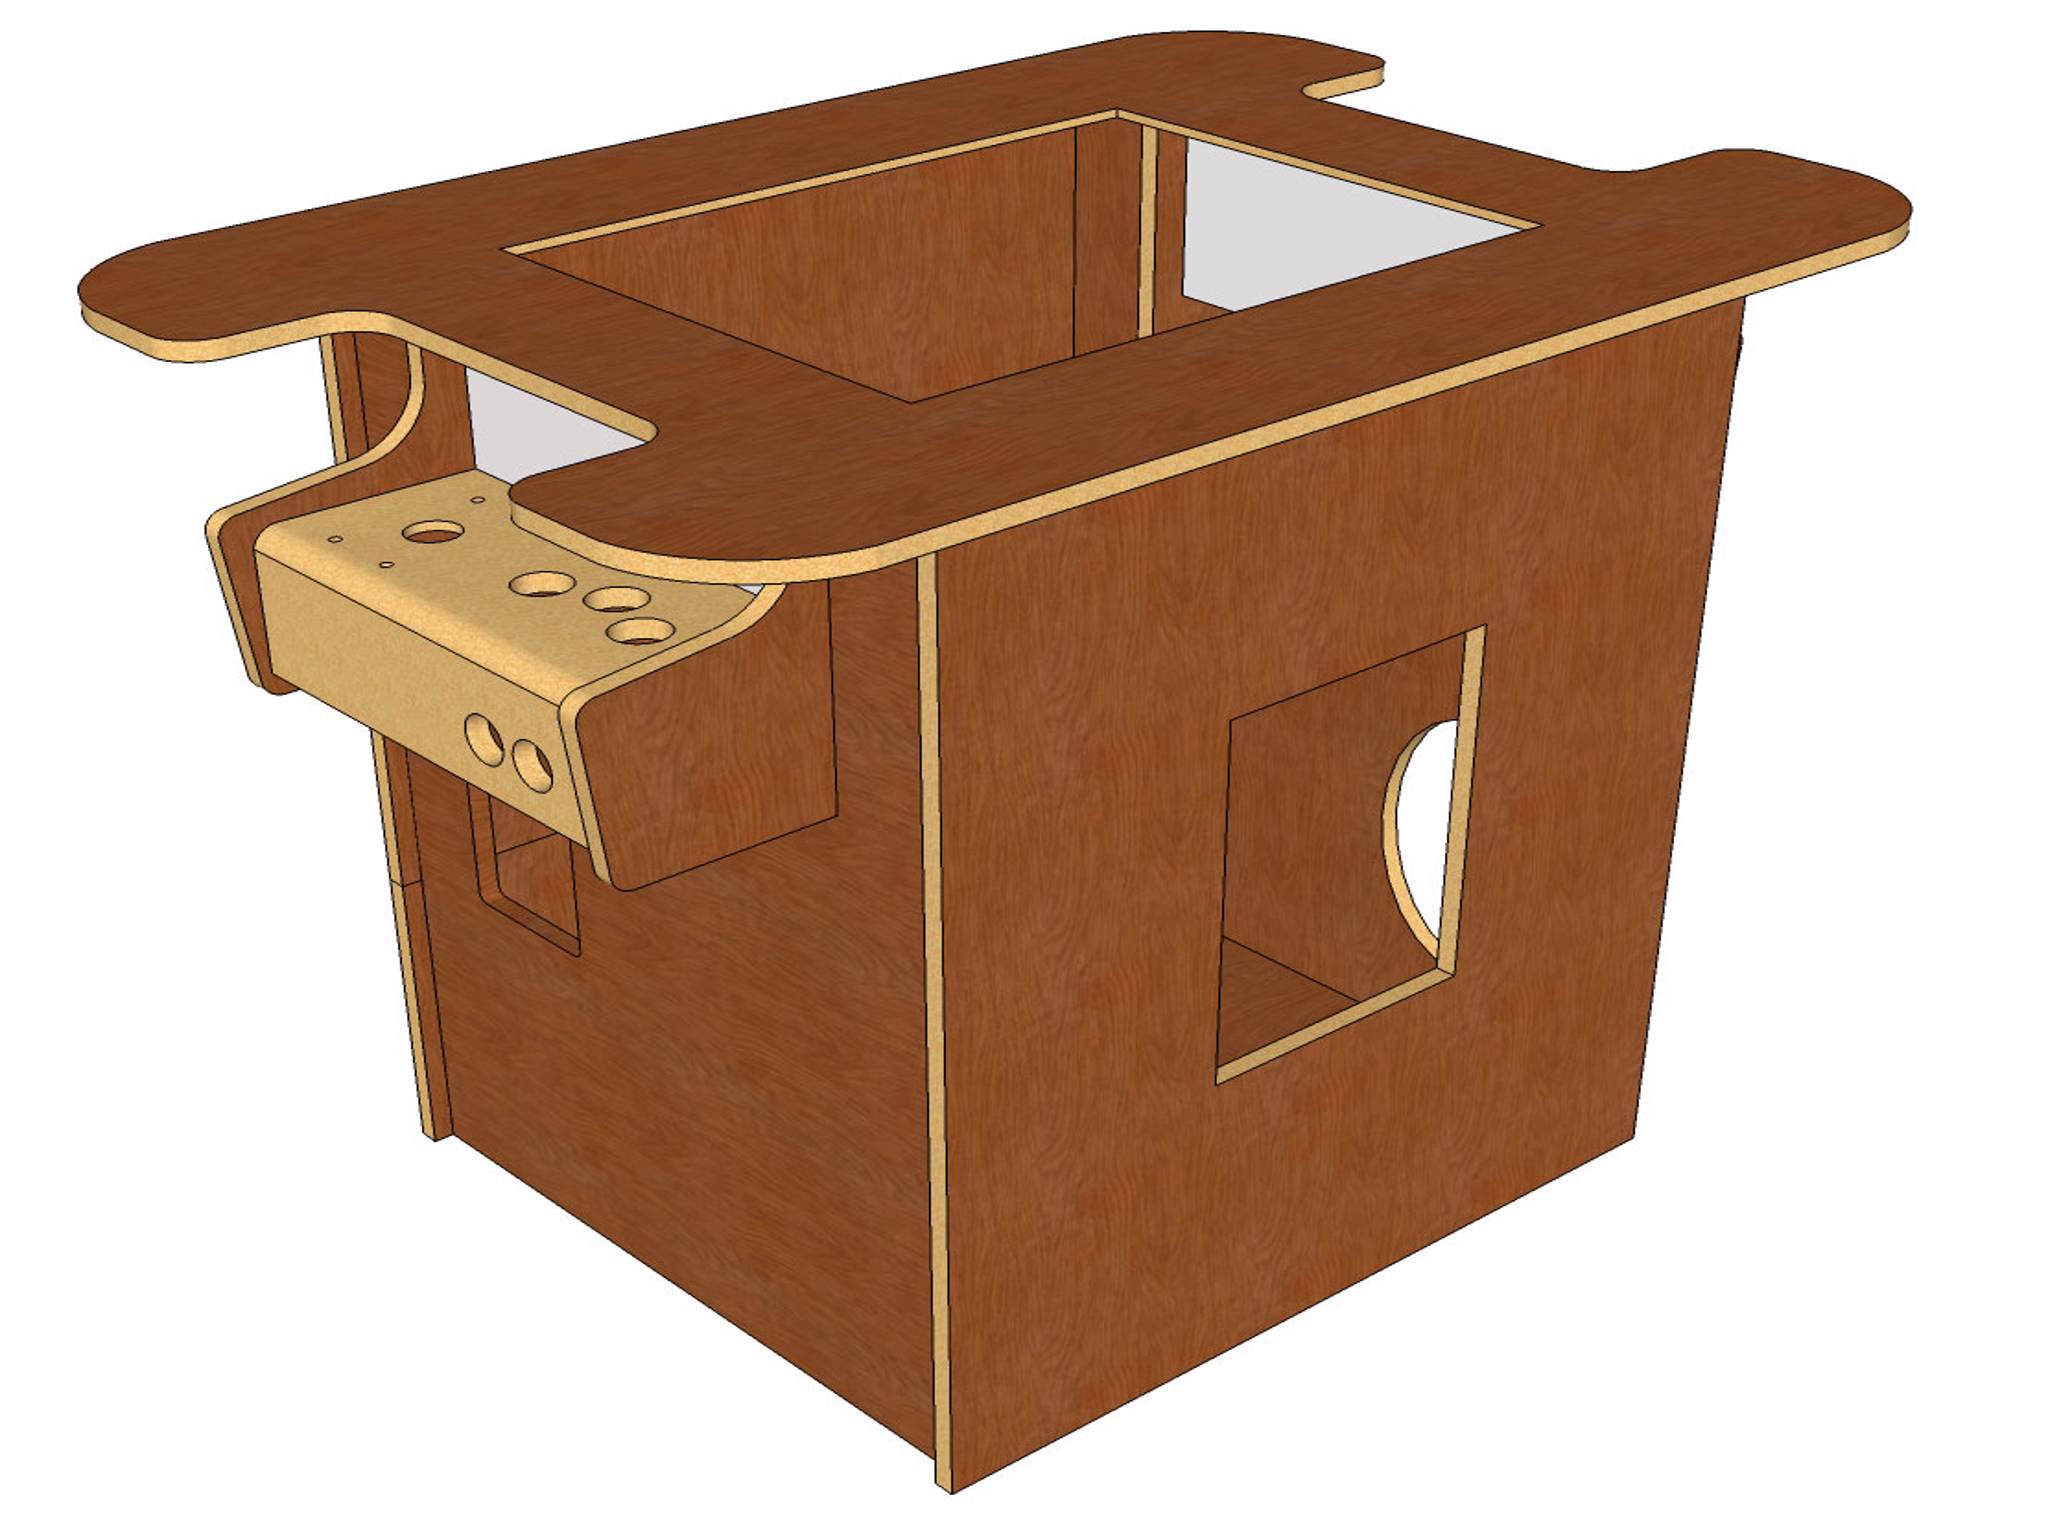
I purchased a flatpack cocktail cabinet kit from Haruman's Customs a couple years ago, which took a backseat to other arcade projects. But recently, I finally had some time to tackle this project.
Cabinet Body
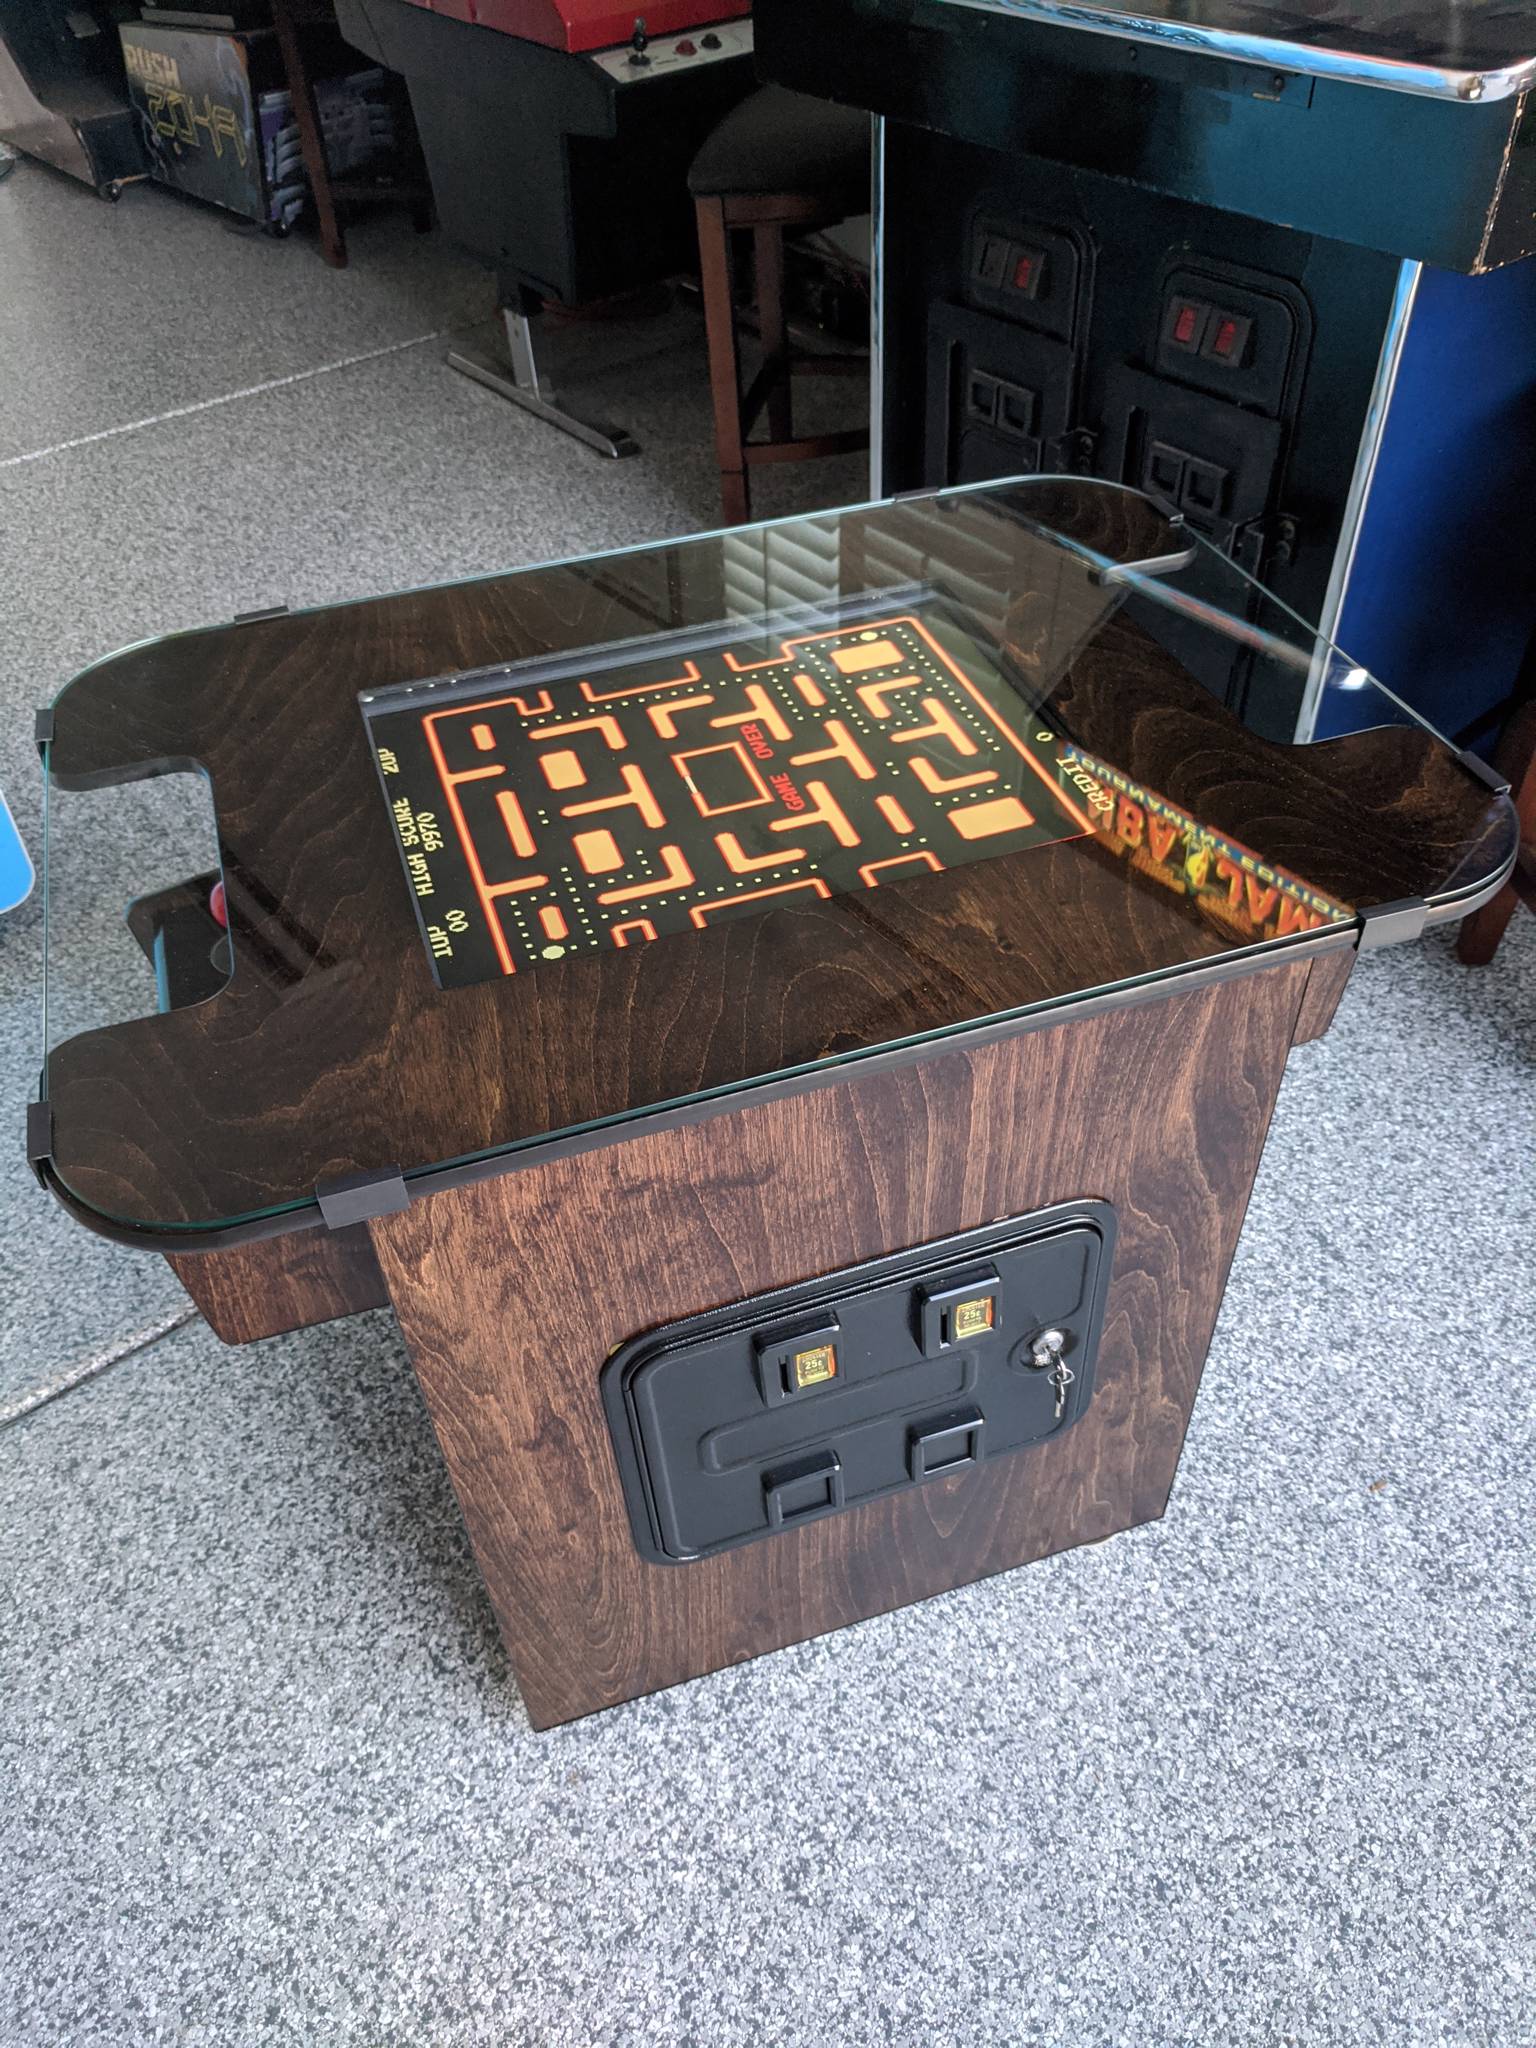
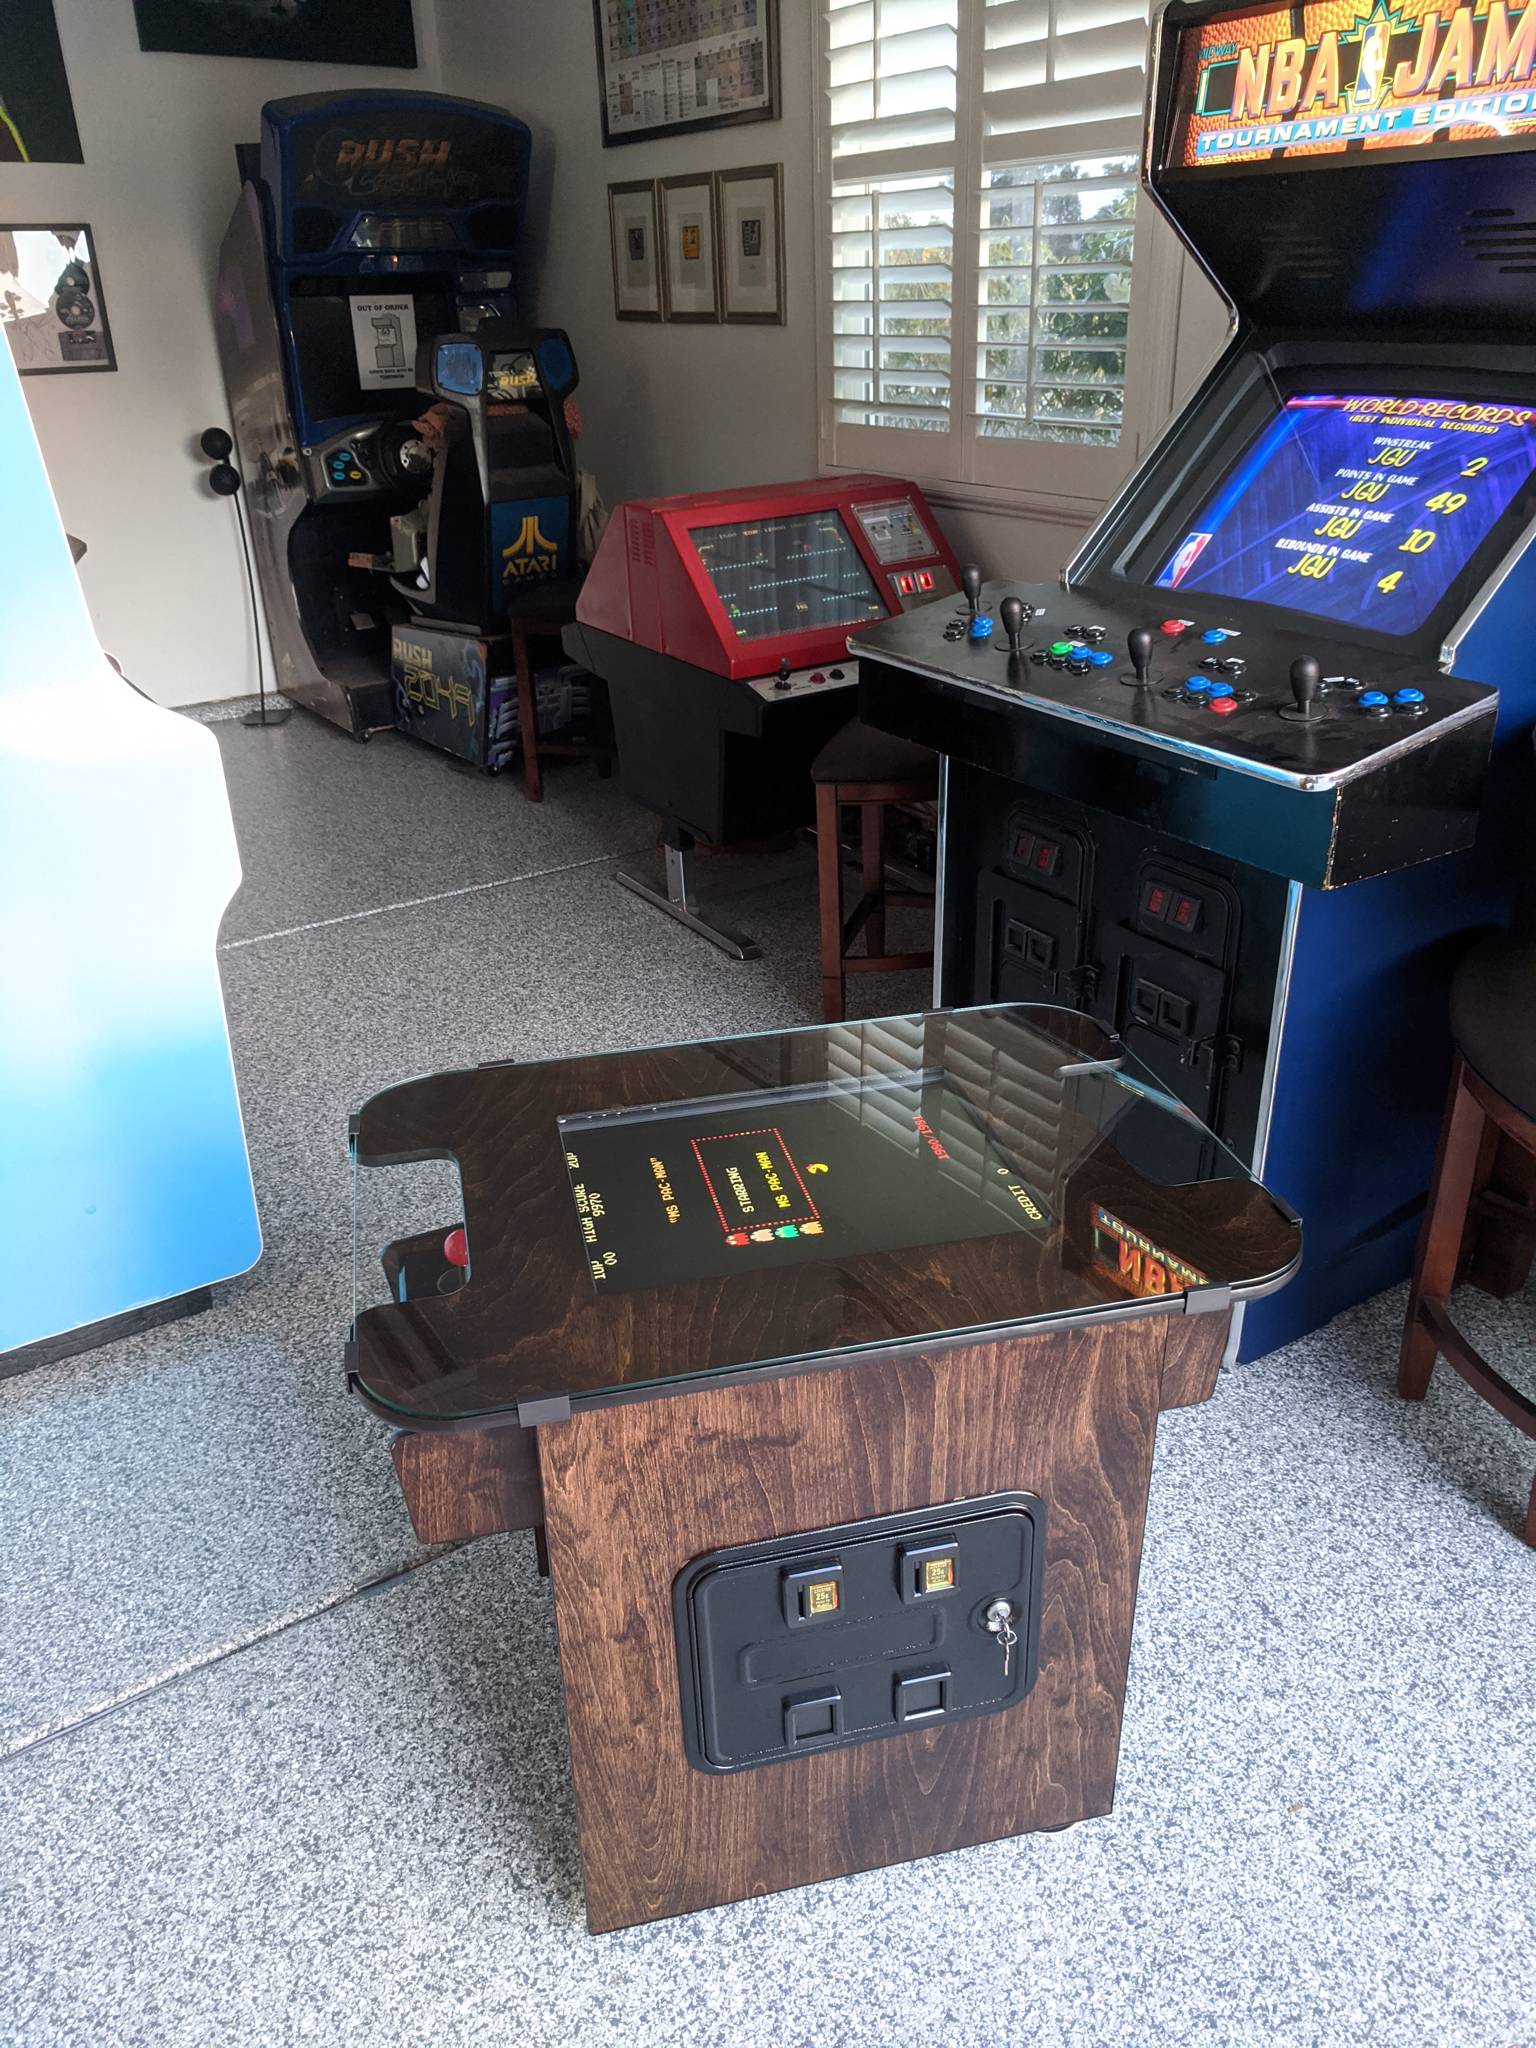
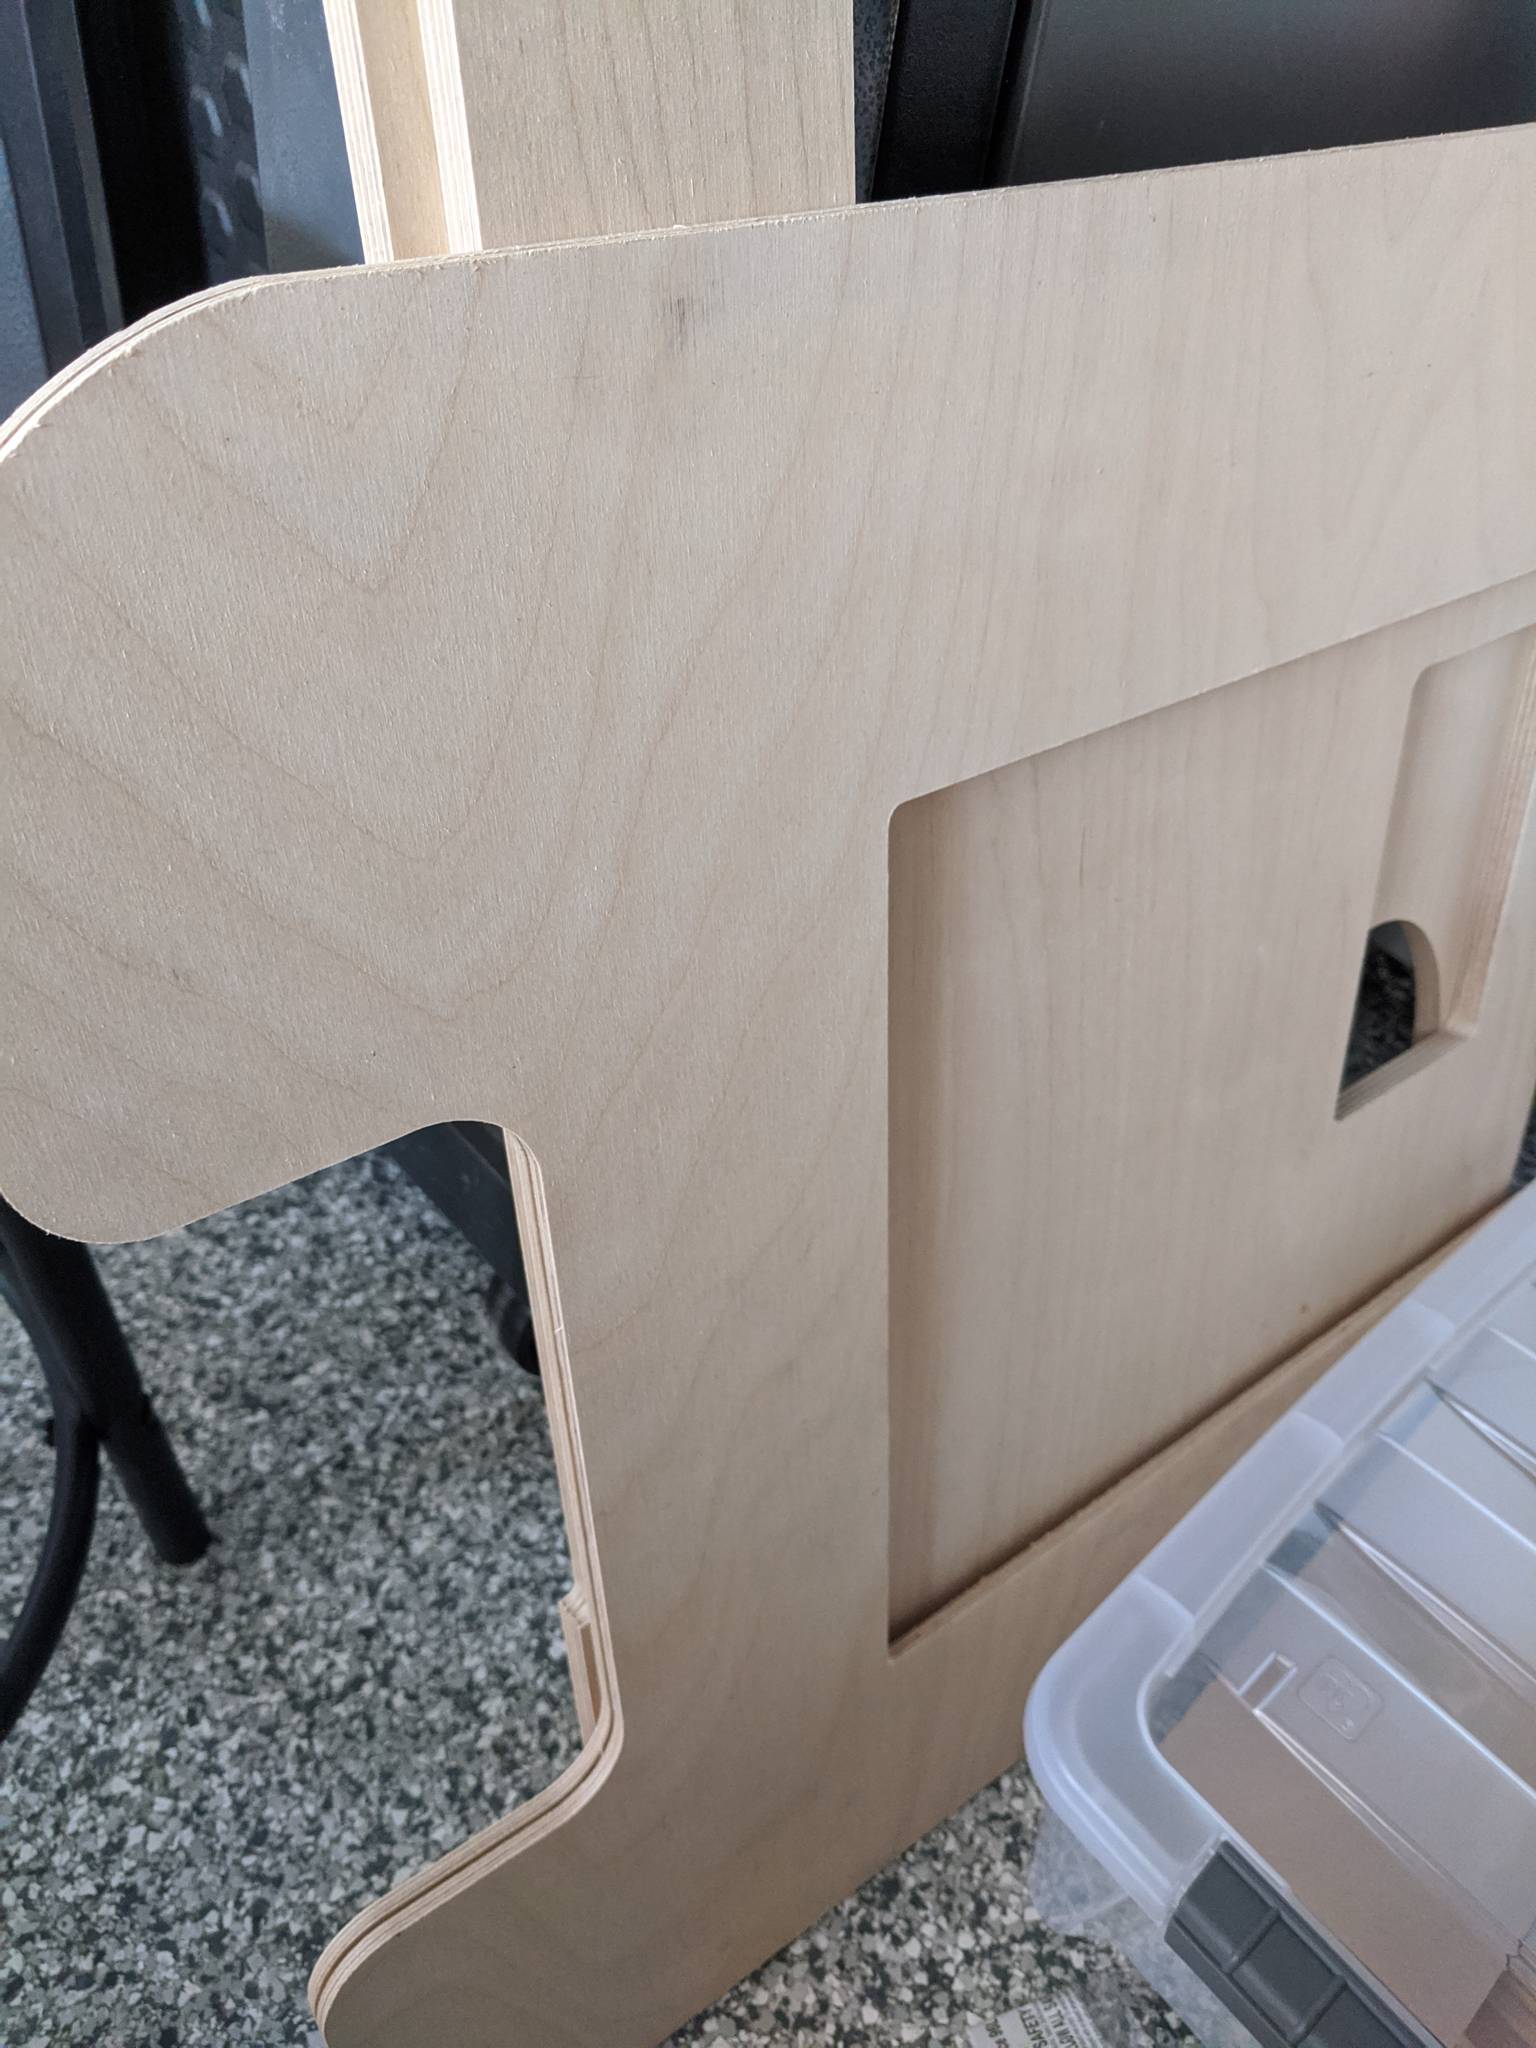
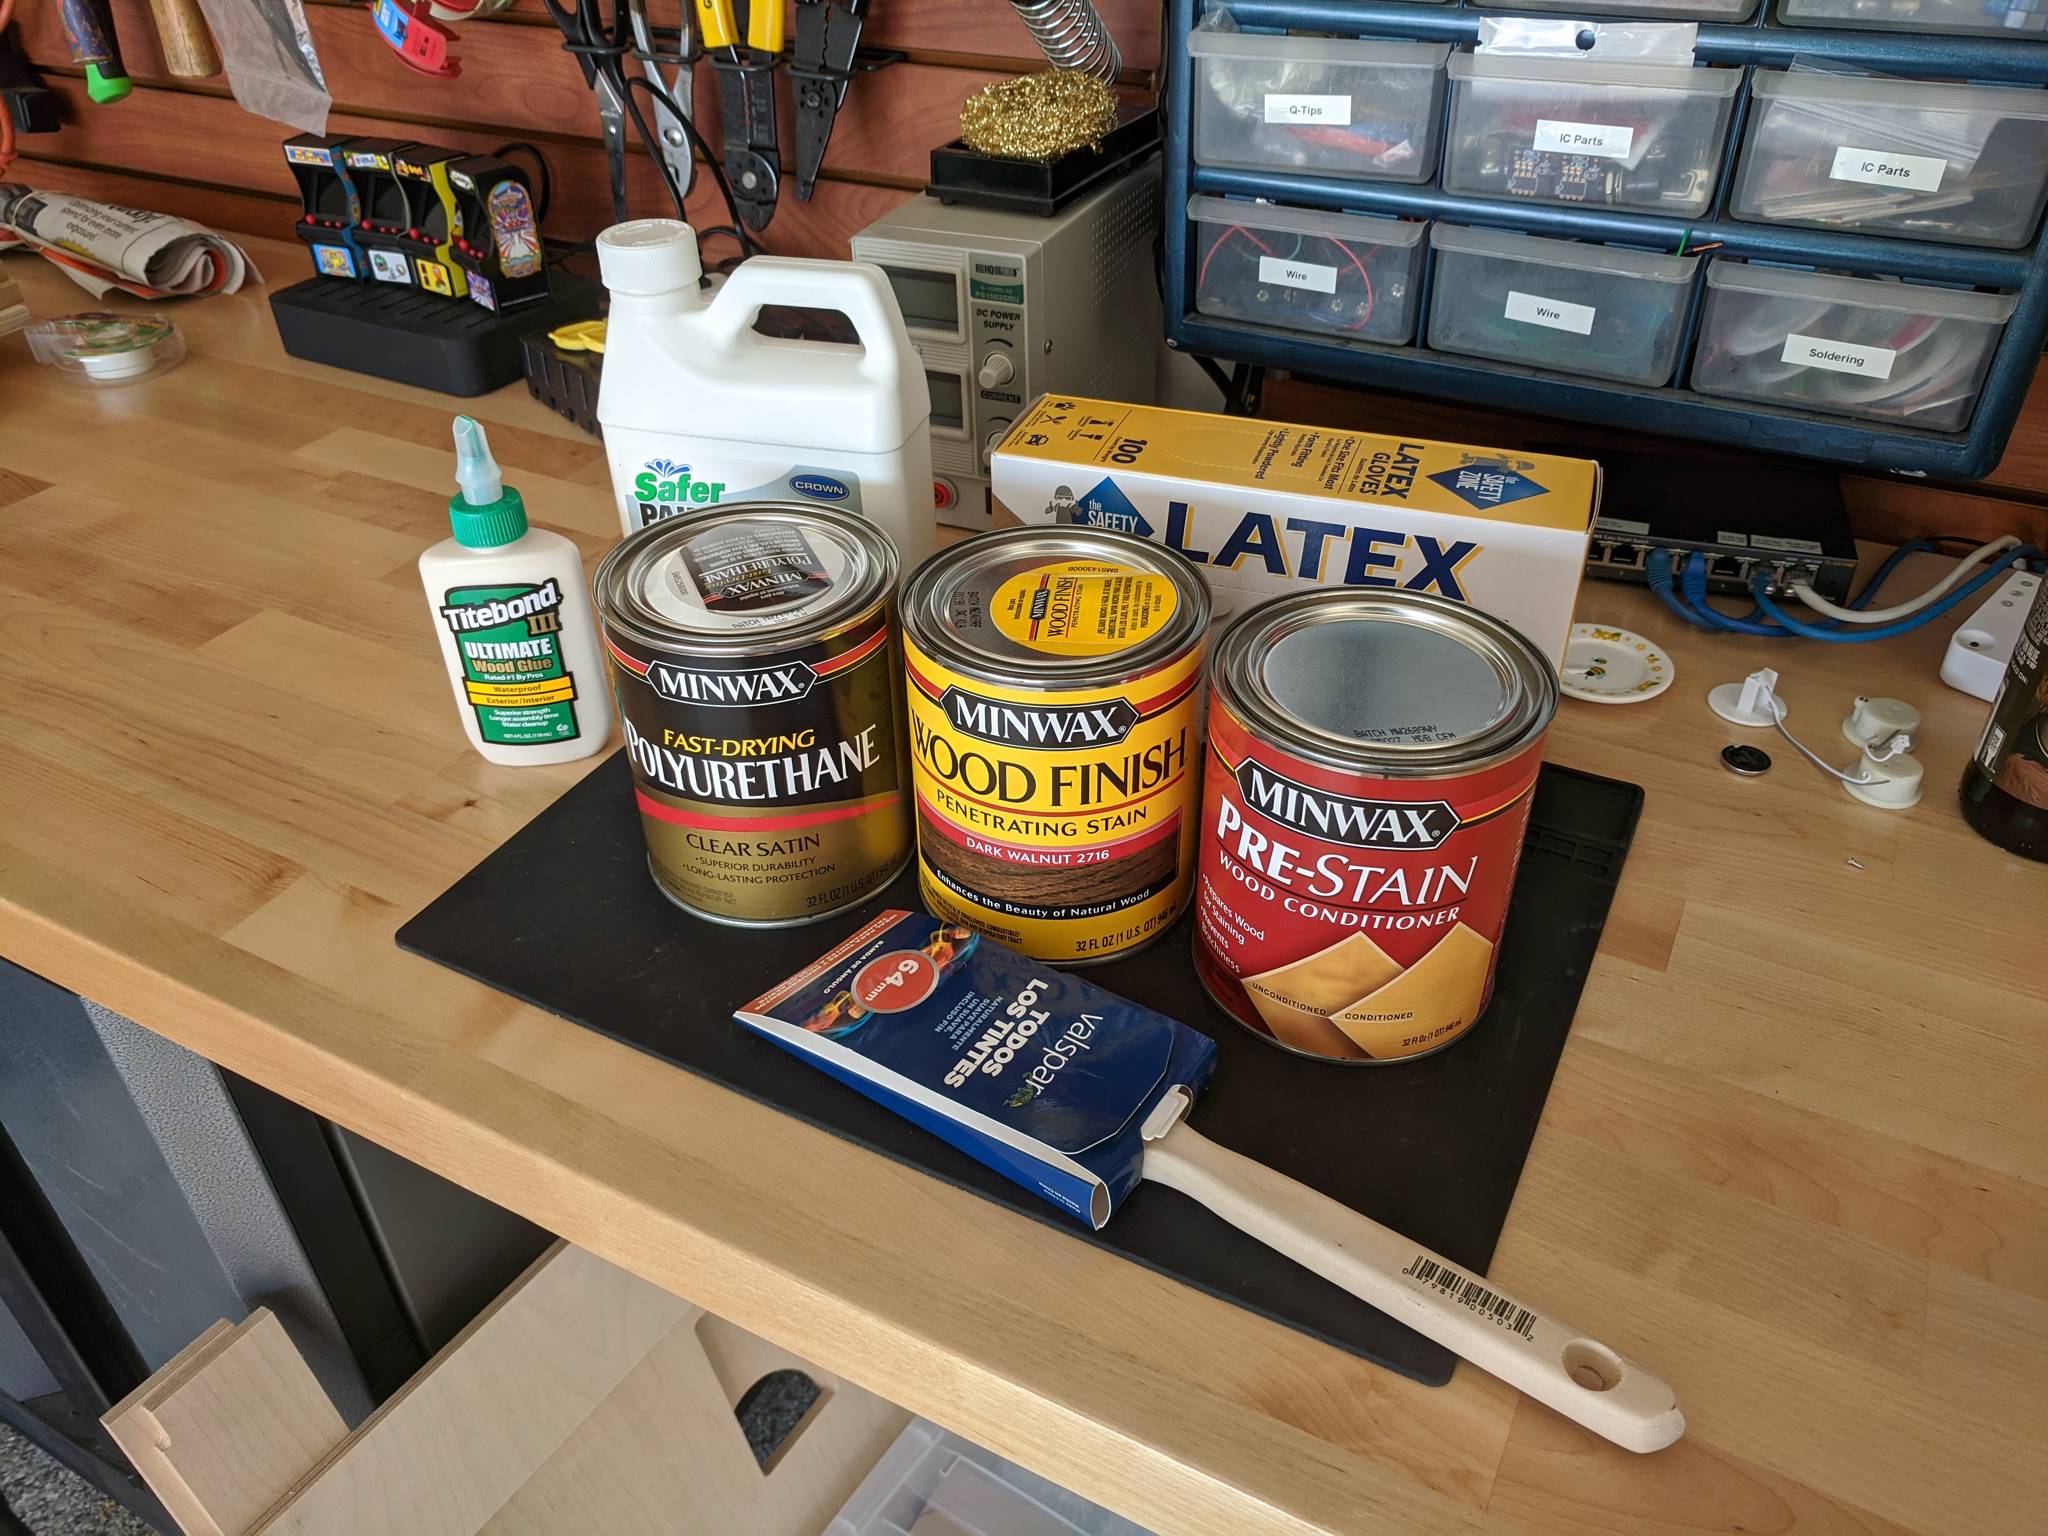
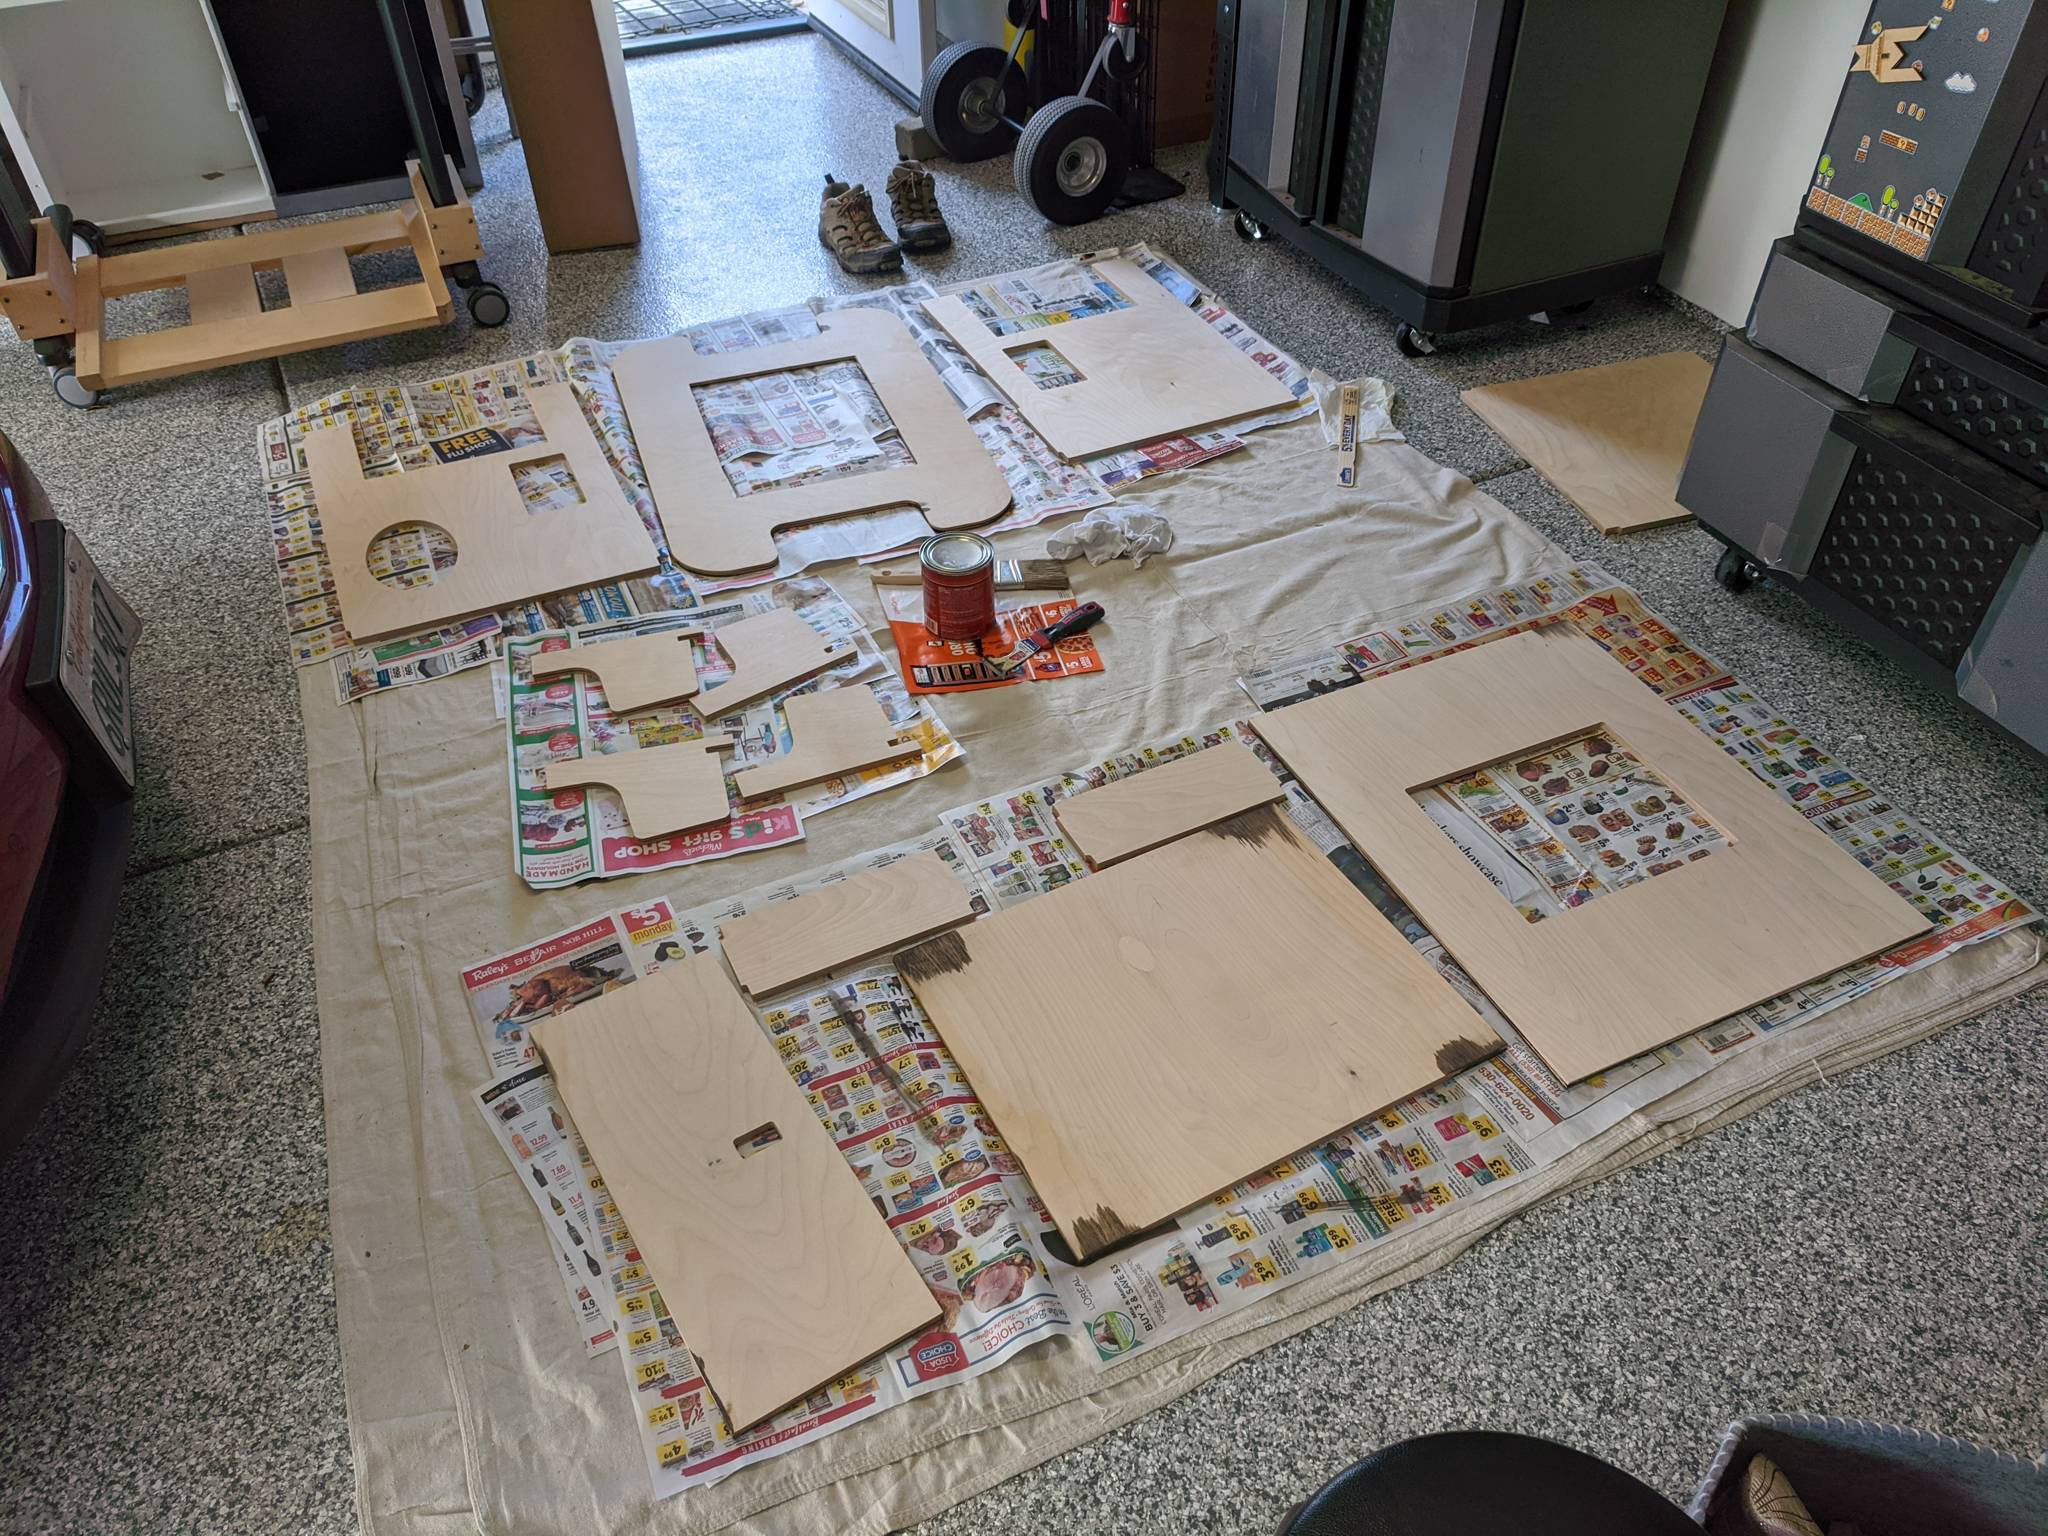
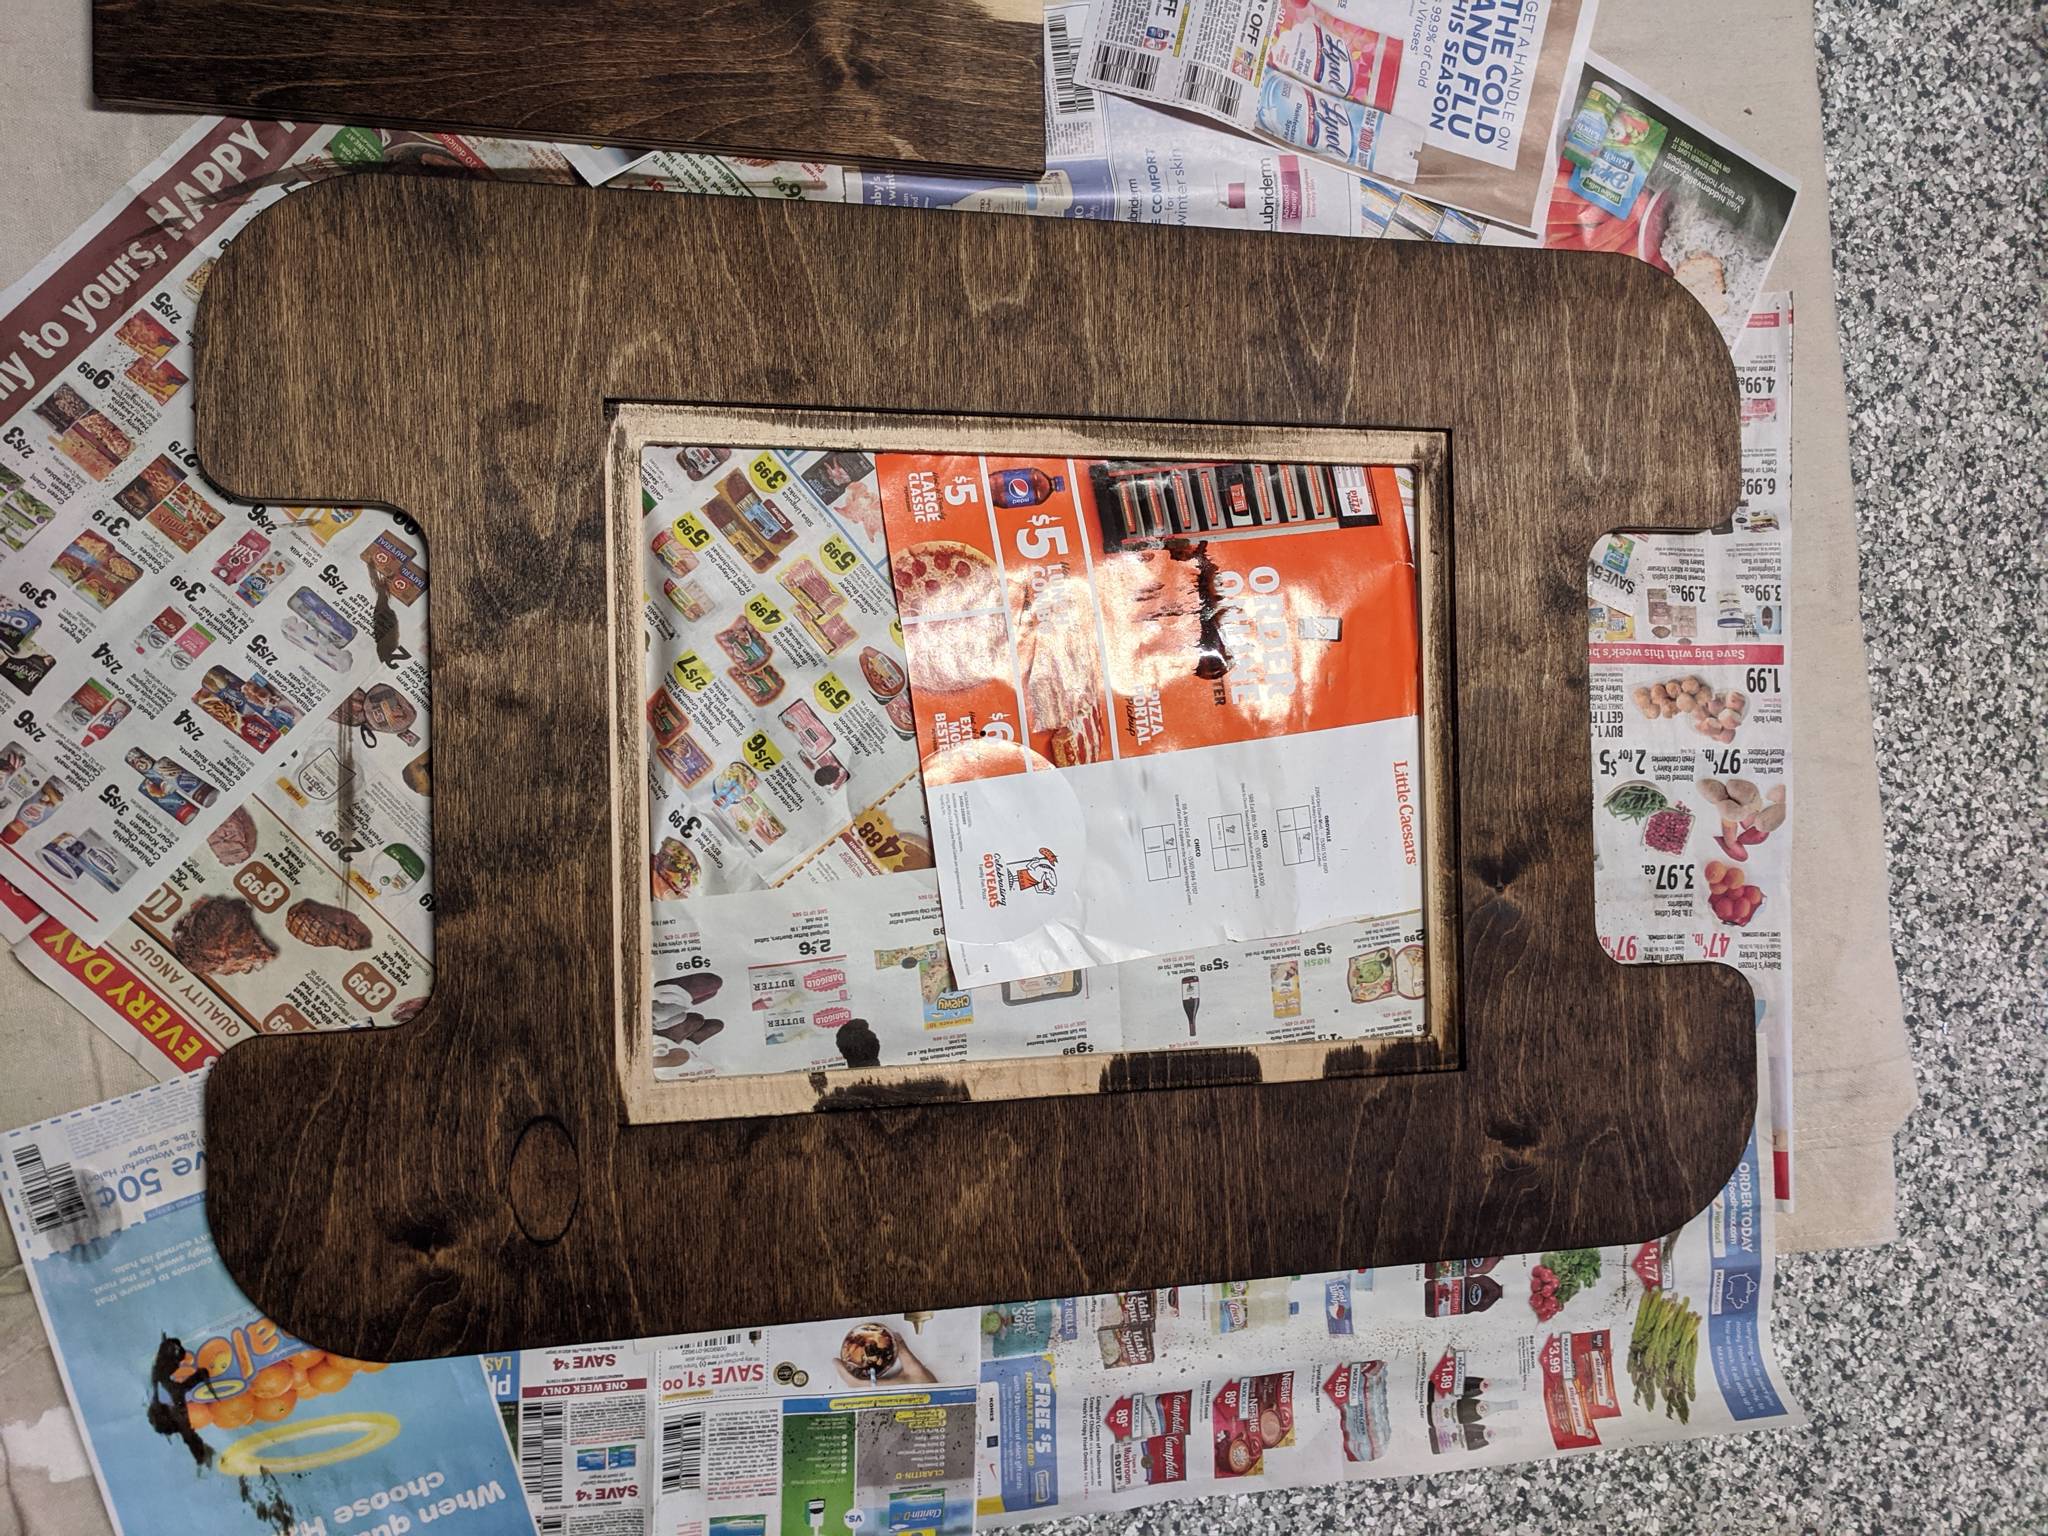
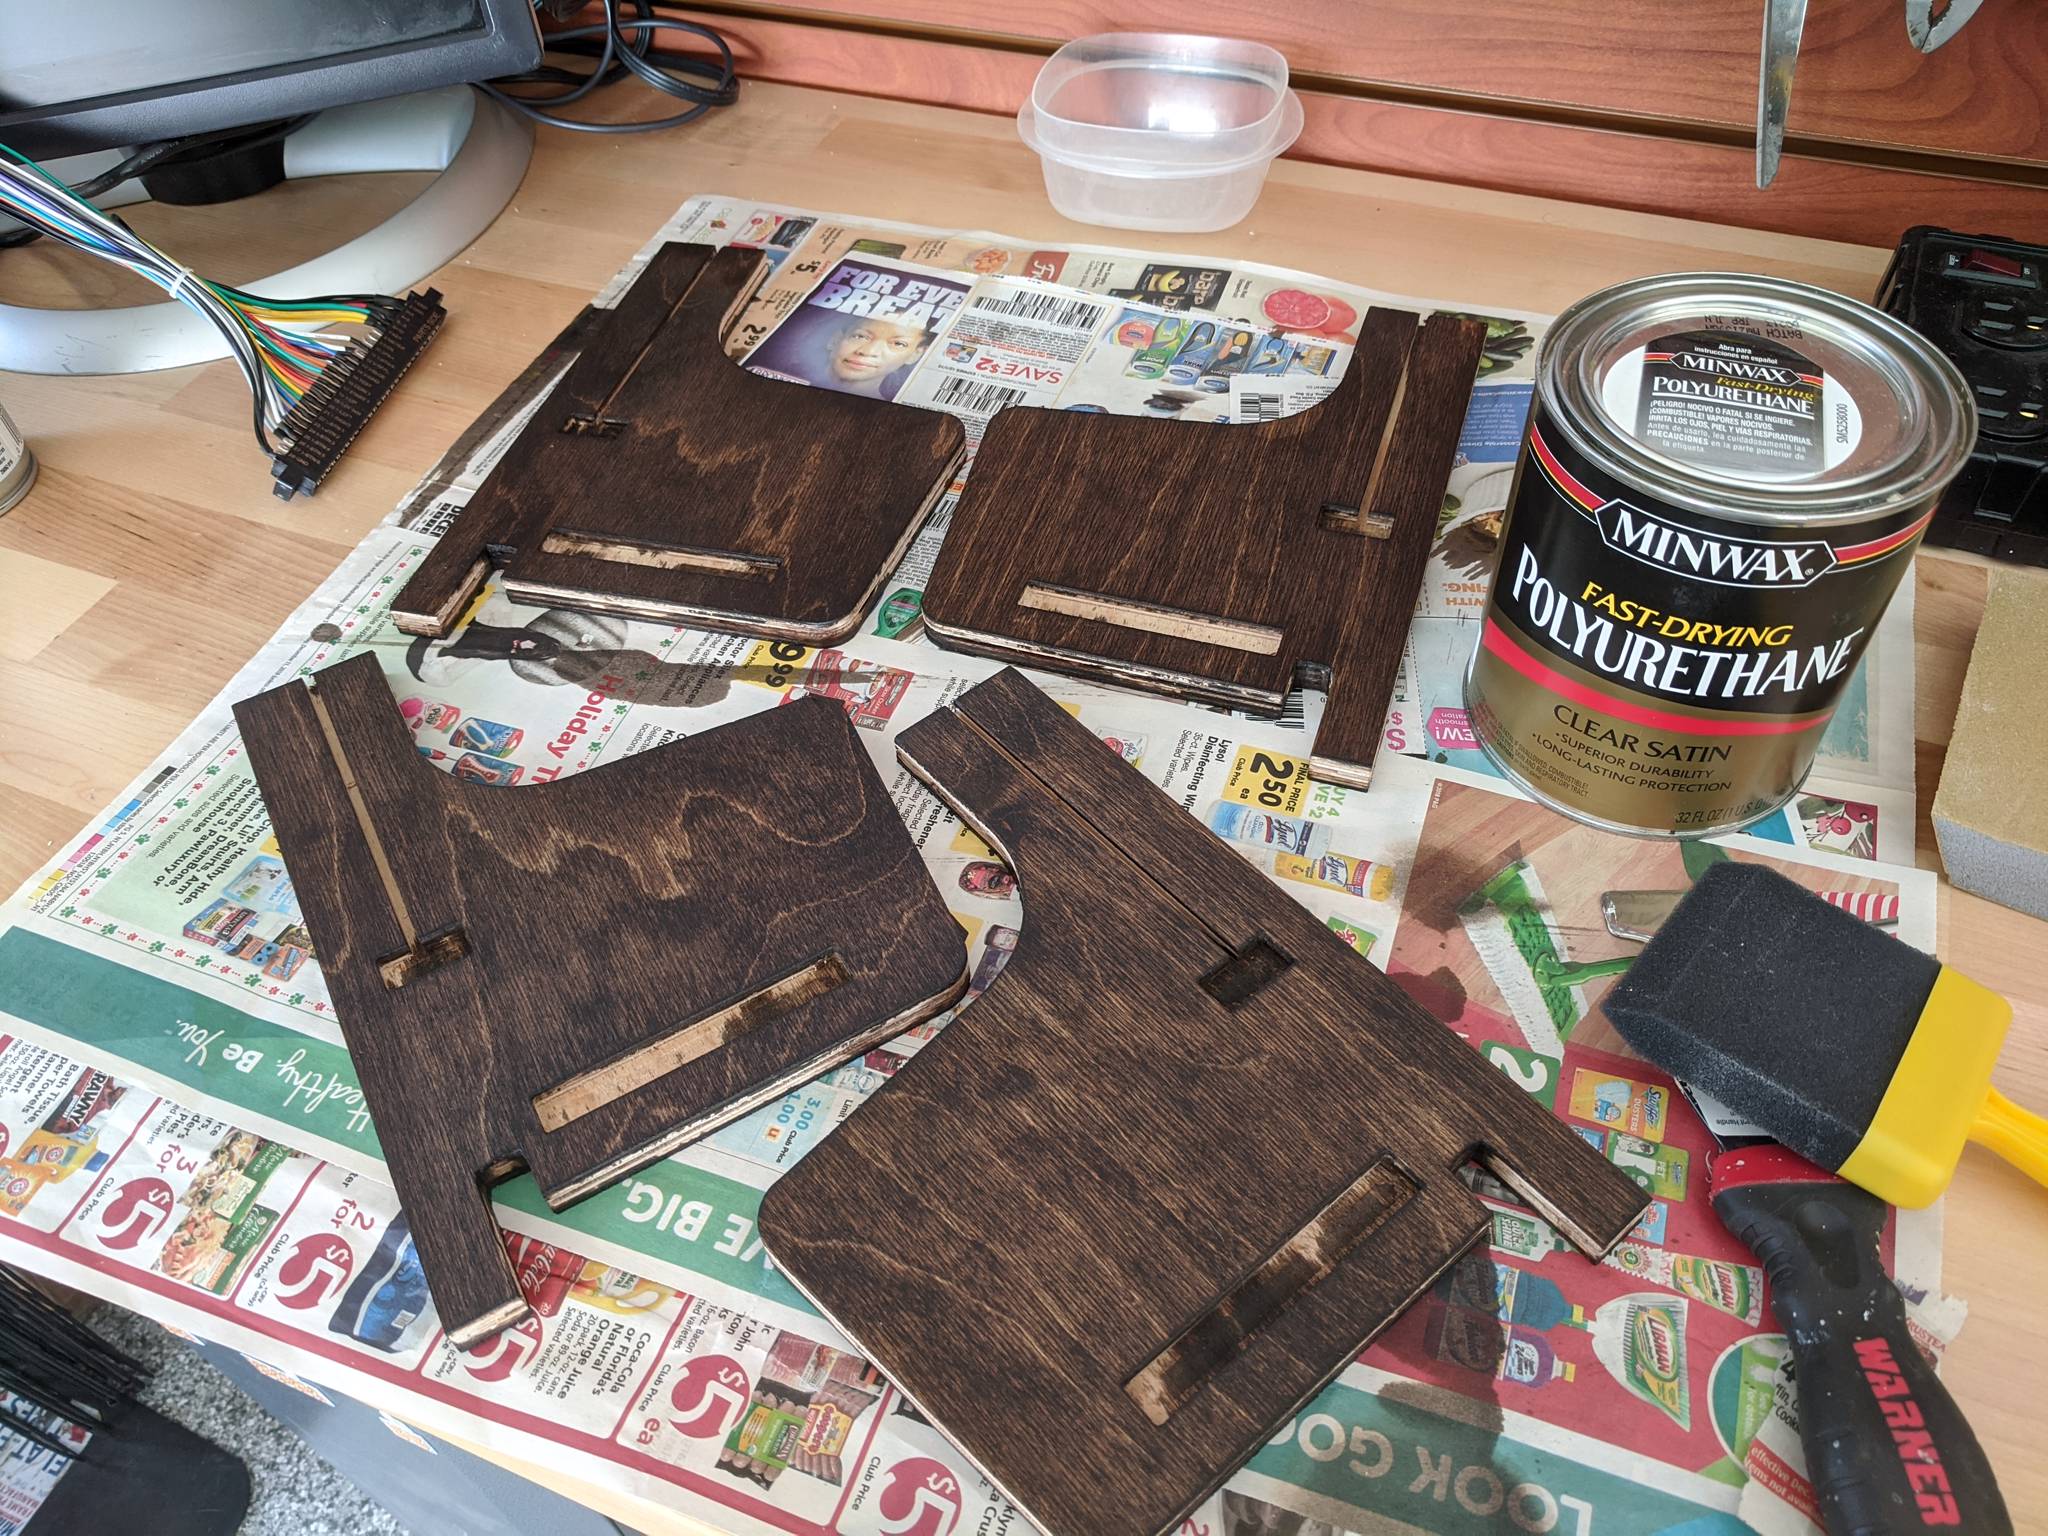
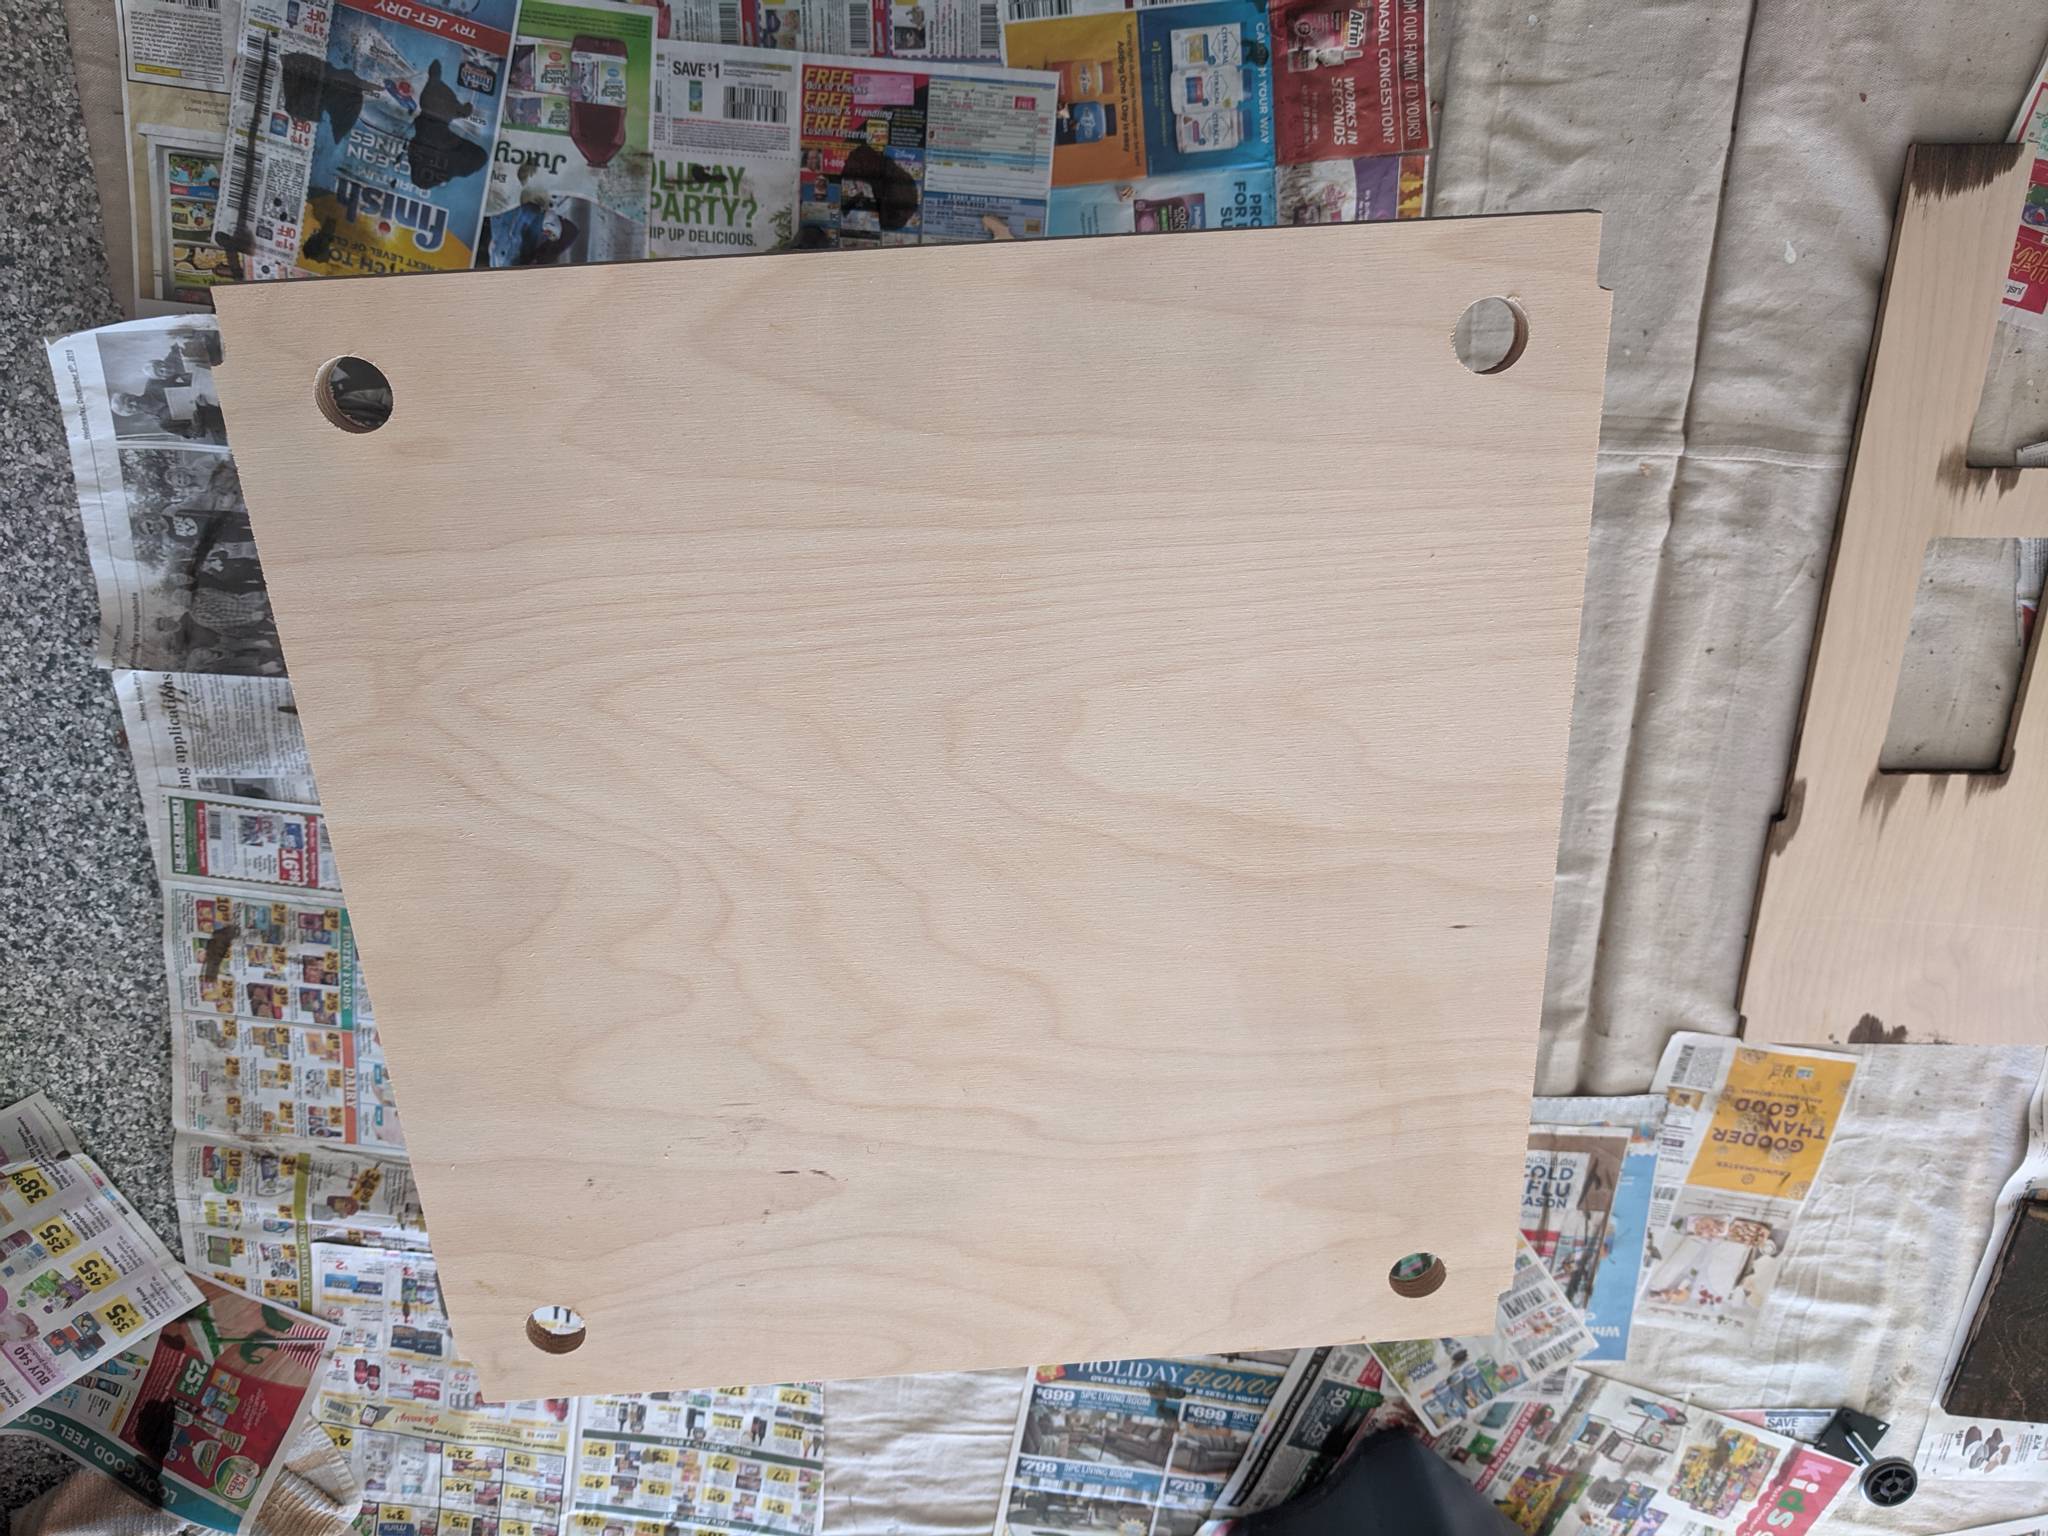
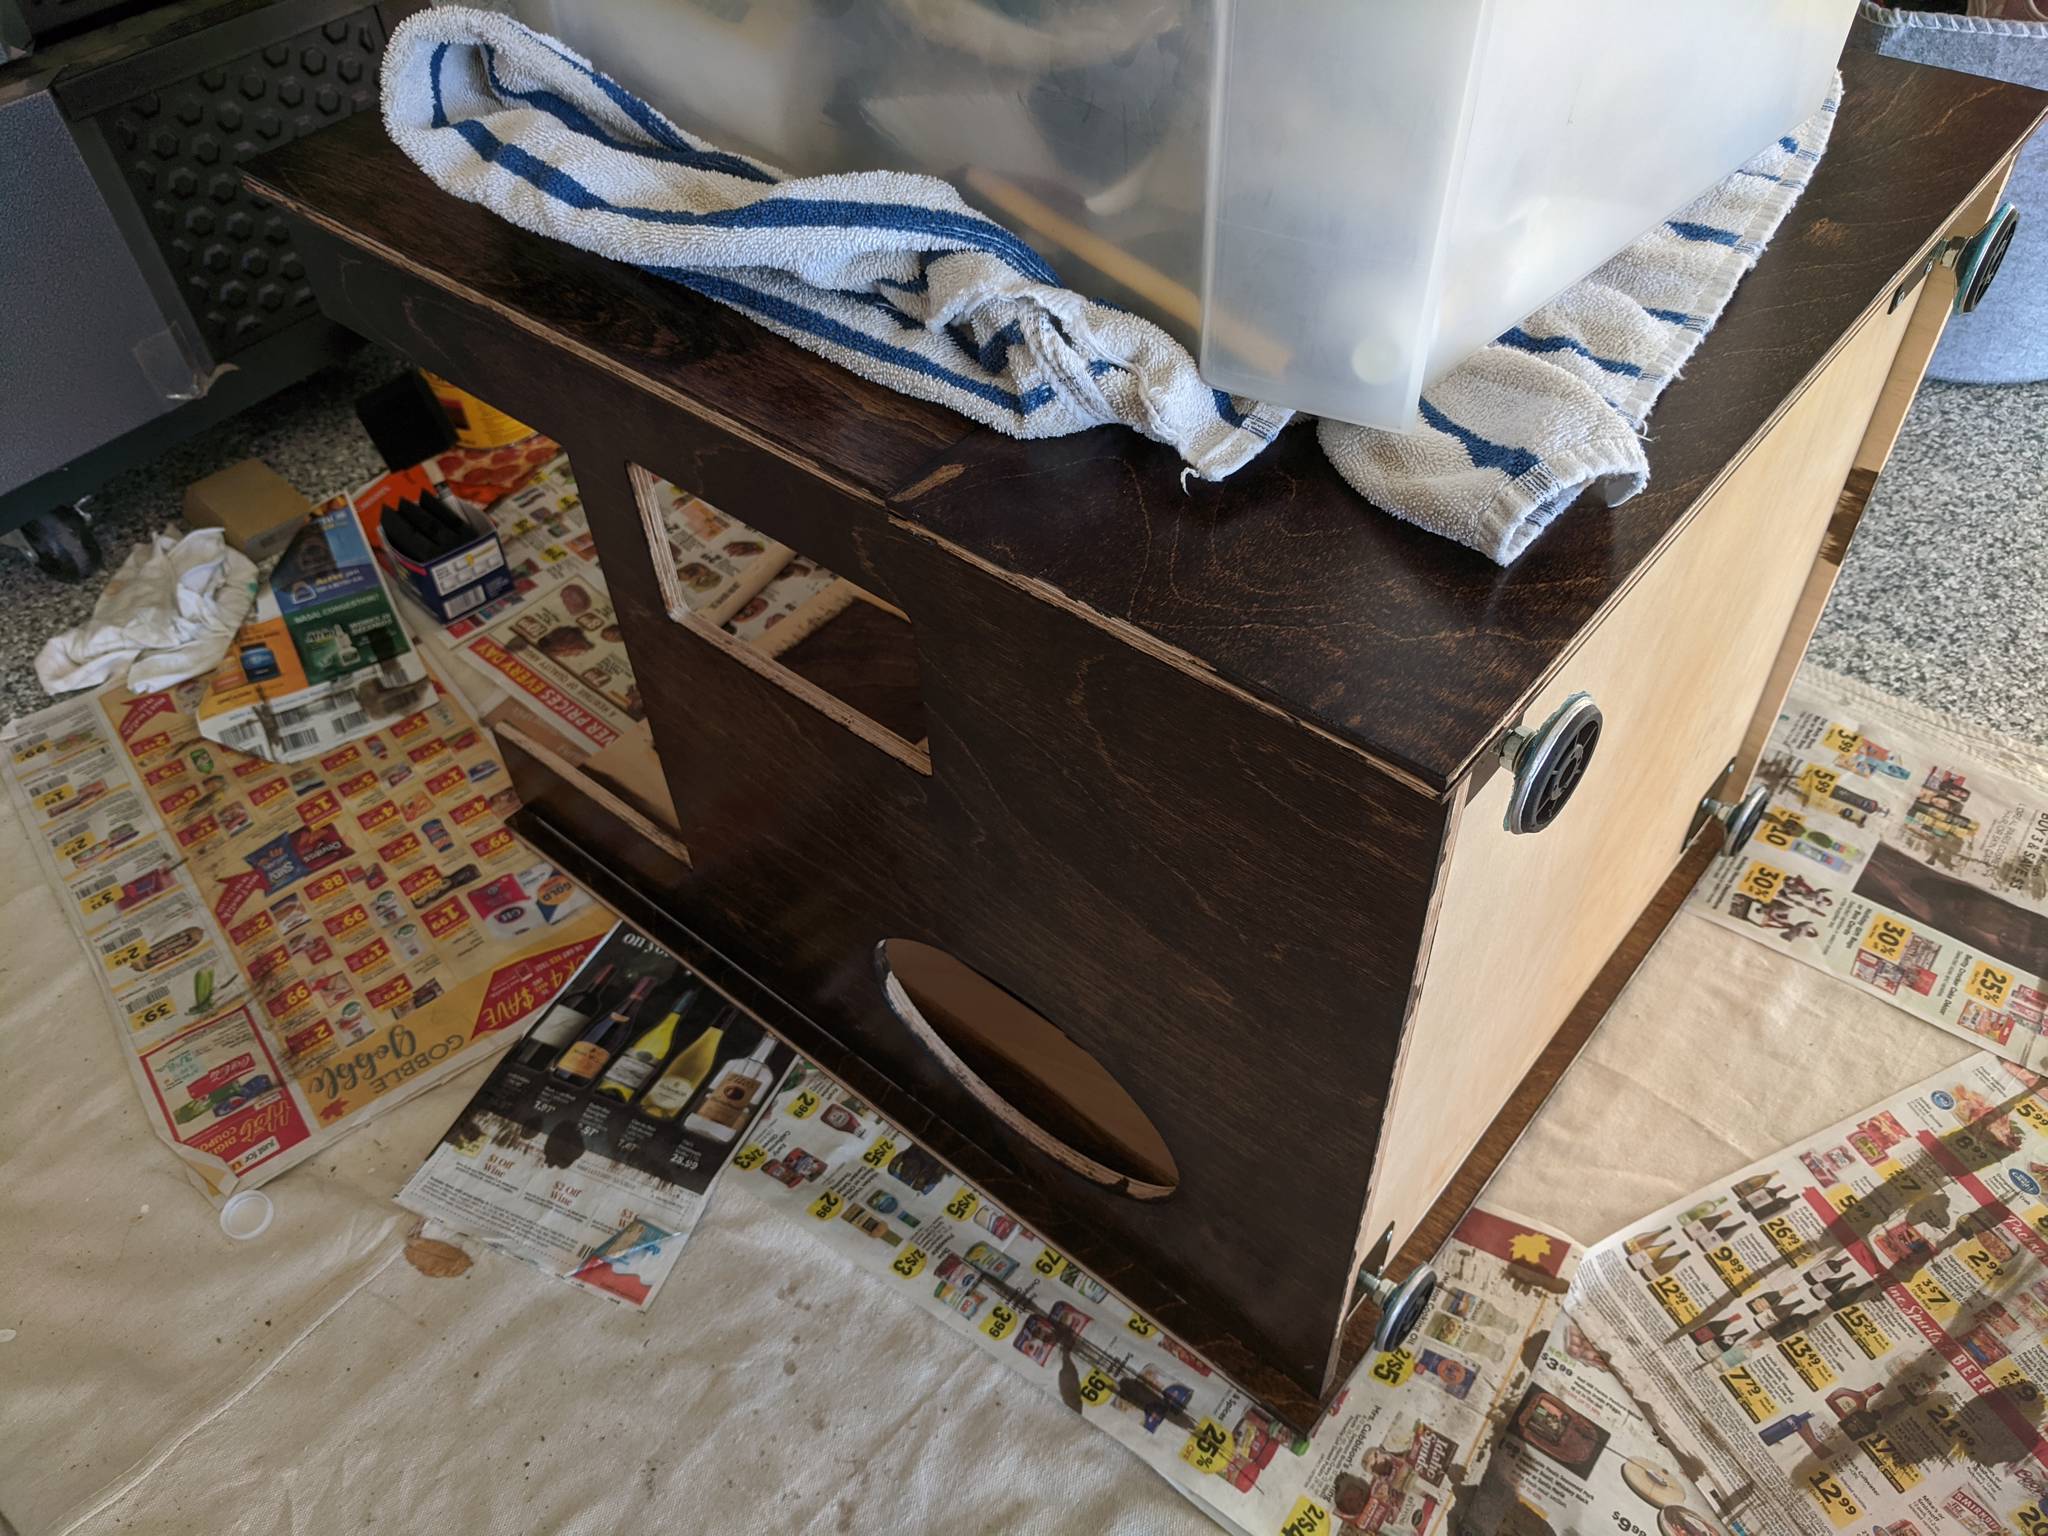
Haruman's kit comes in melamine, MDF, and baltic birch plywood. I went with the birch, which has a nice natural look, and stained it Dark Walnut with several finishing coats of polyurethane. This was my first time working with an oil-based stain, and although it involved a lot of work and clean-up, I couldn't be more pleased with the results.
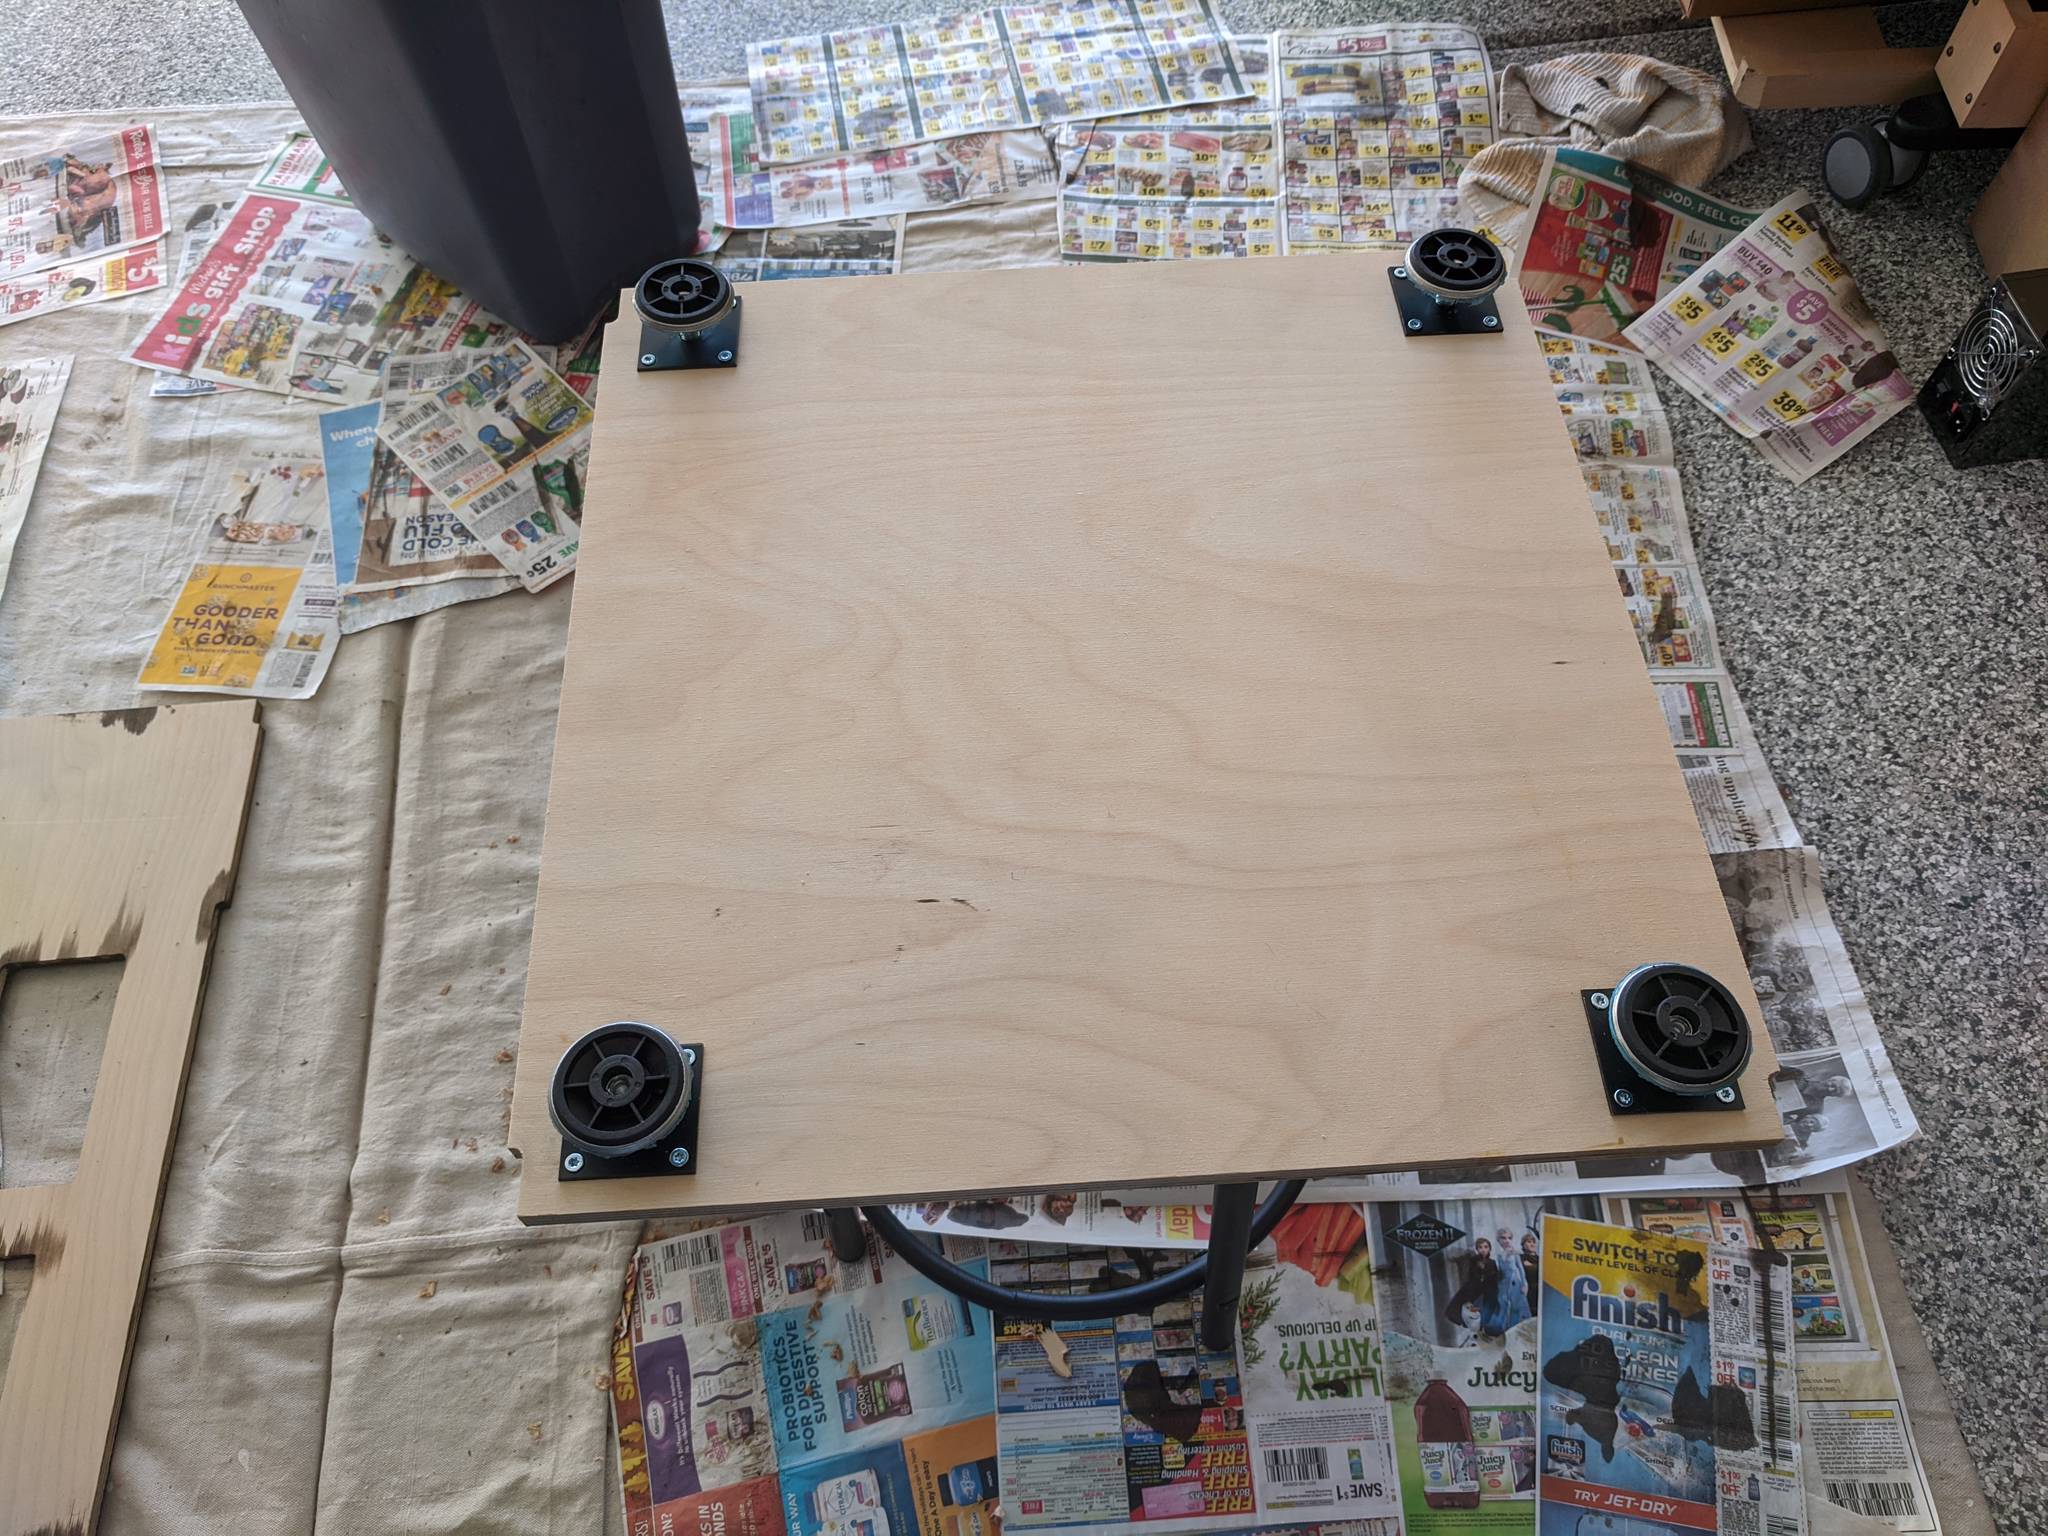
I also added leg levelers from RetroArcade.us.

Monitor
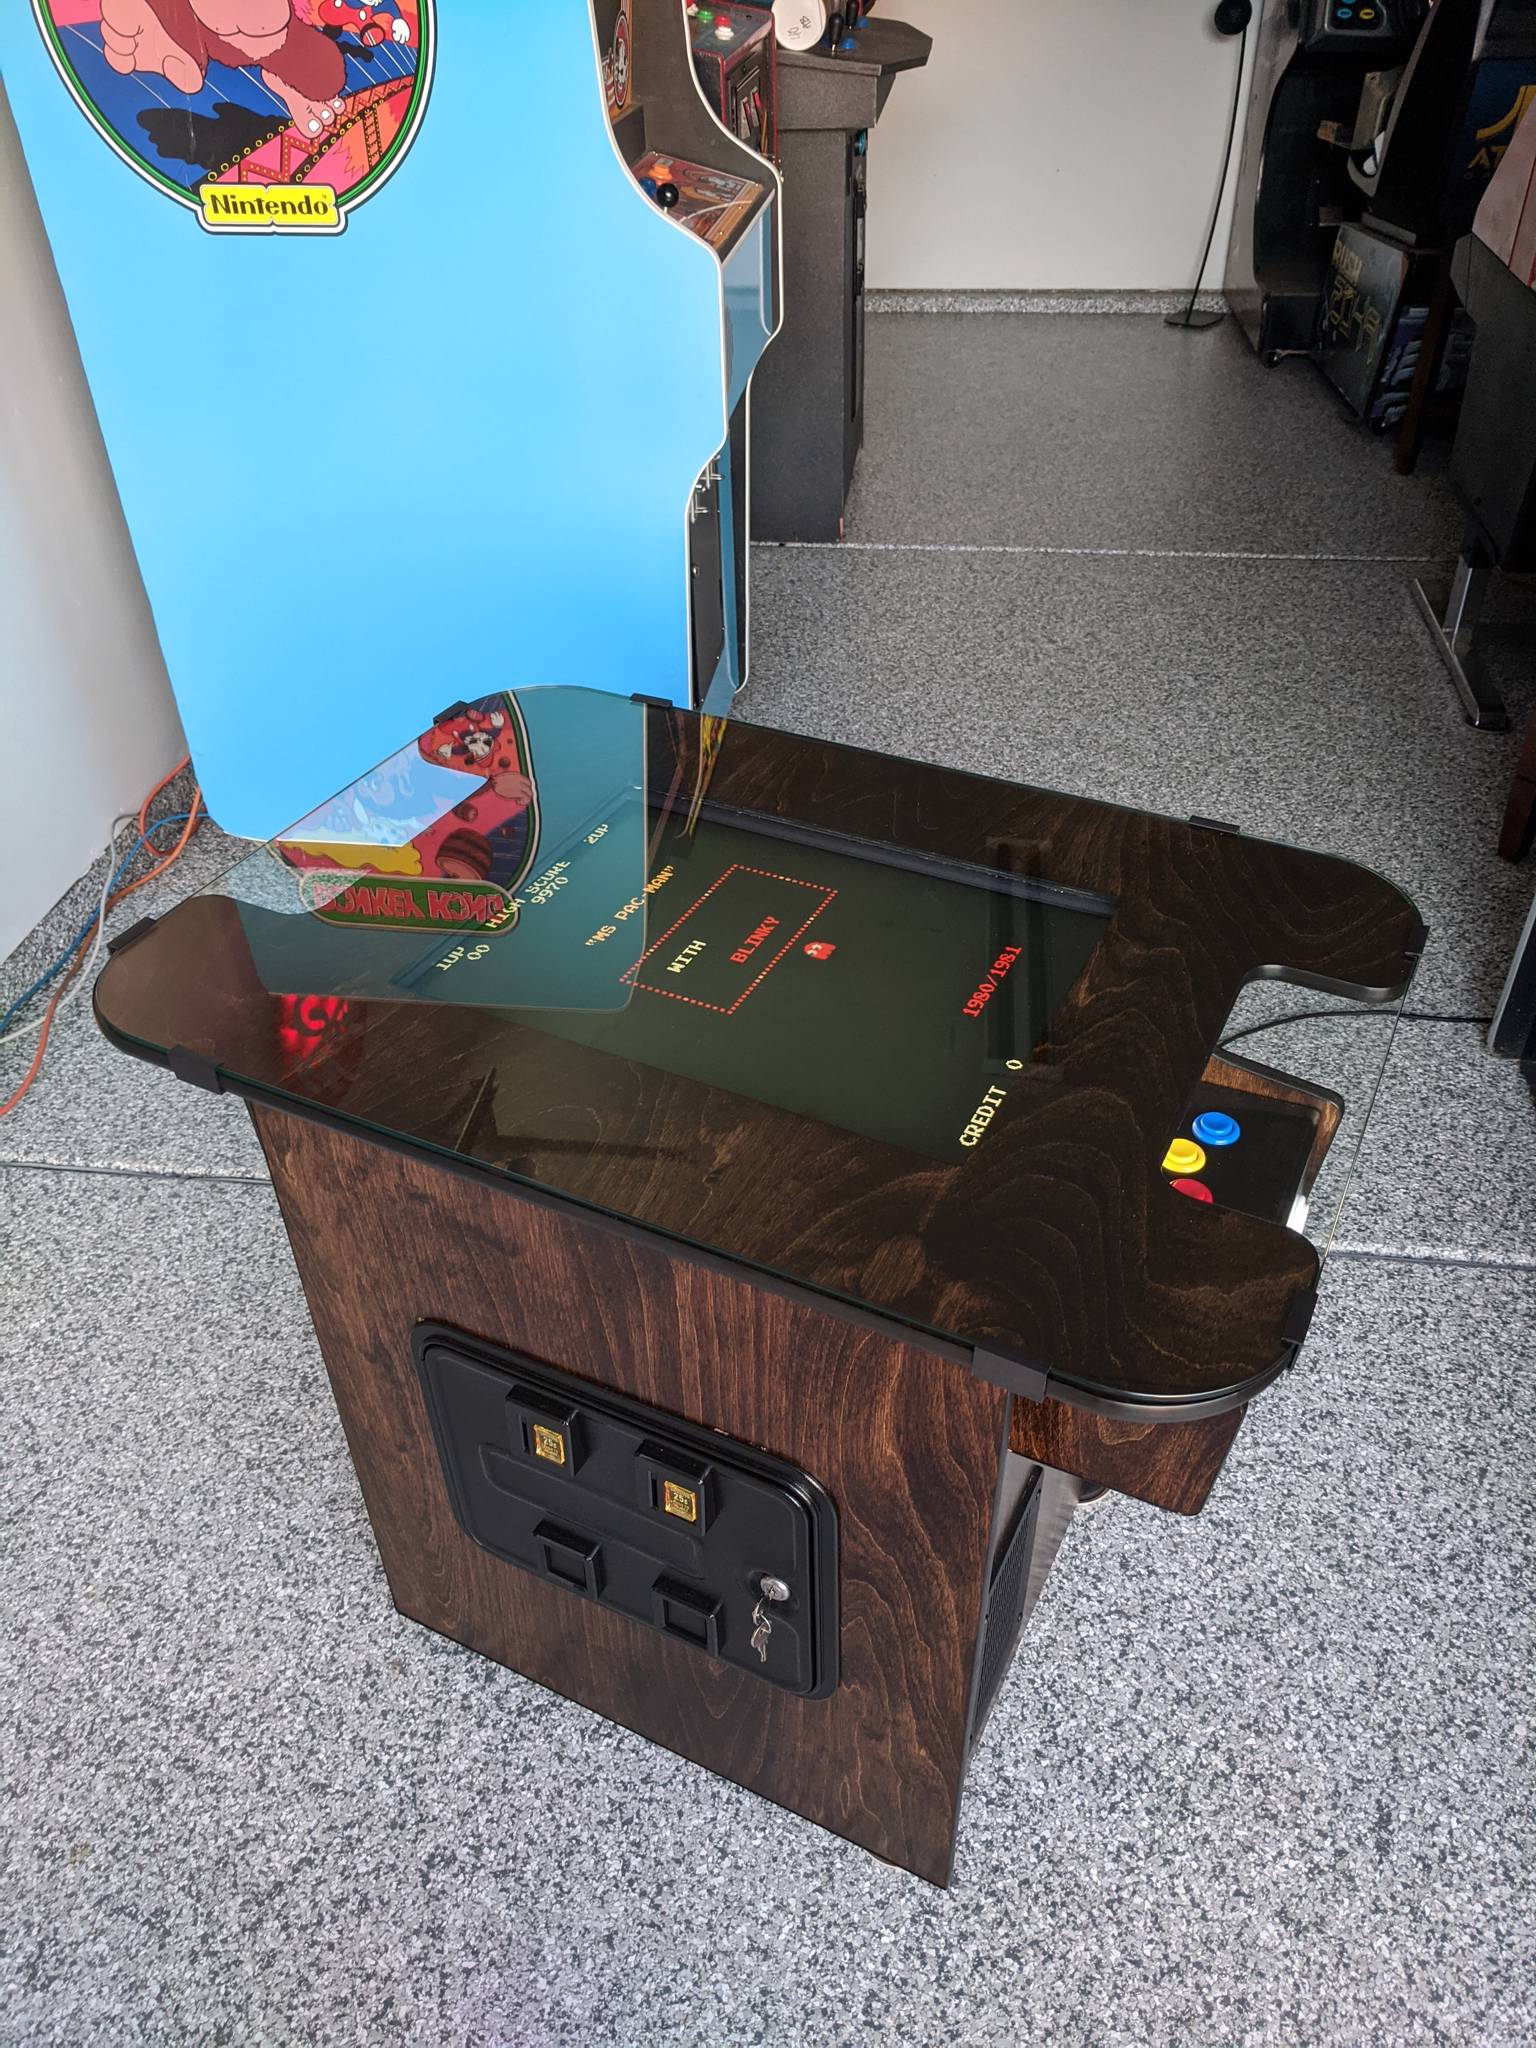
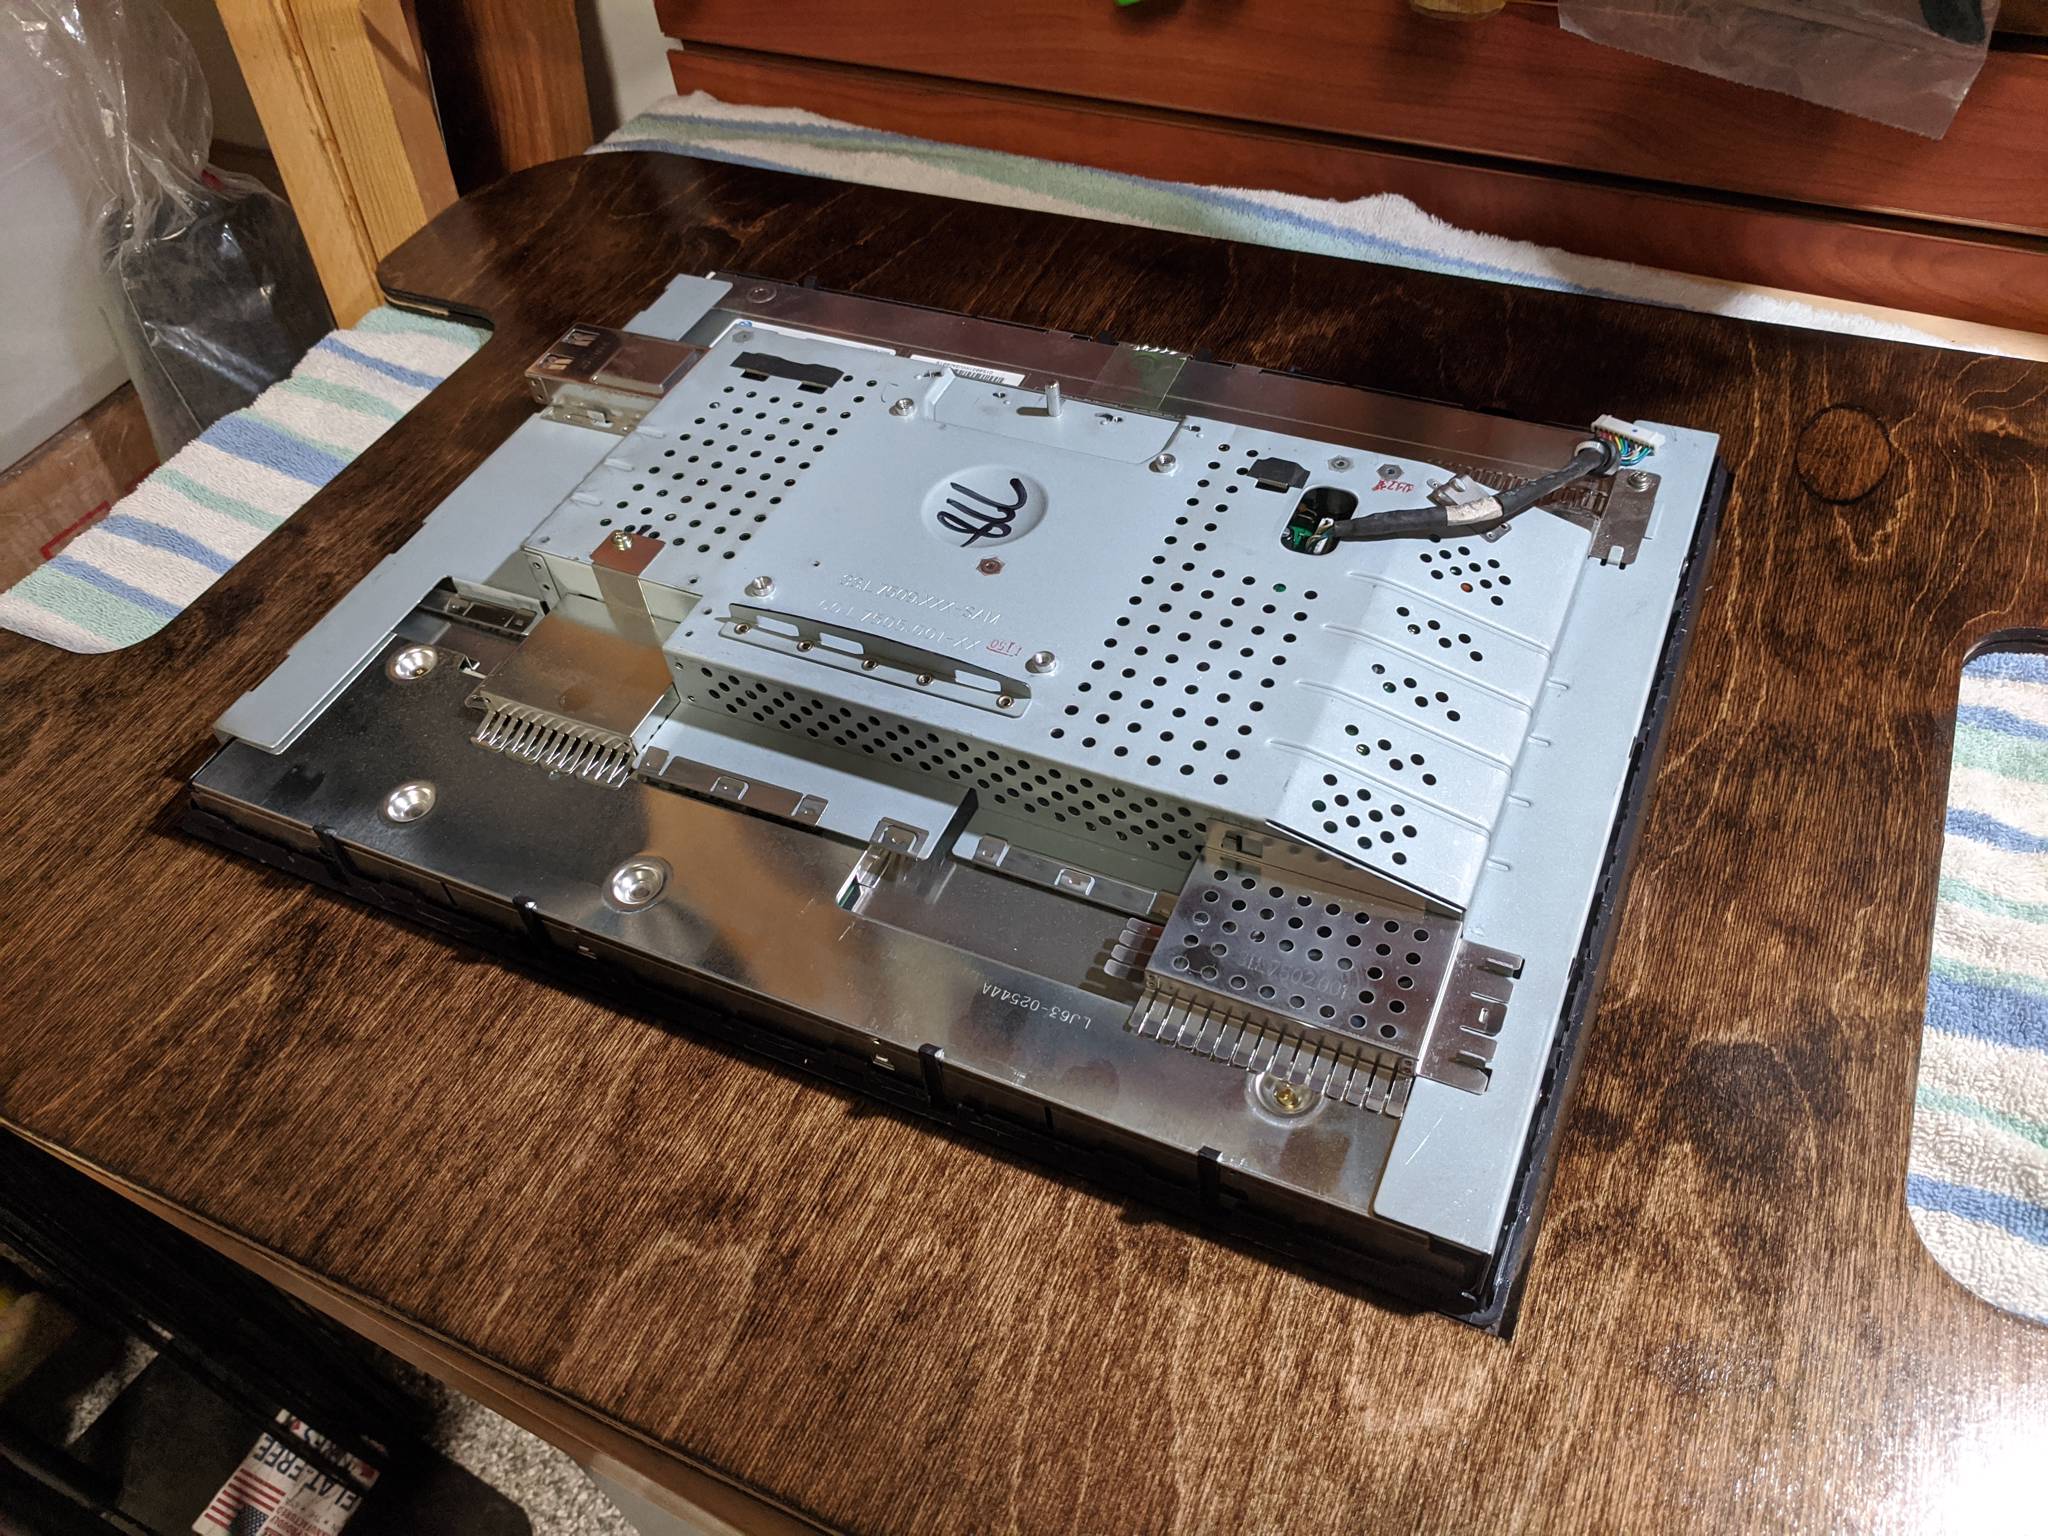
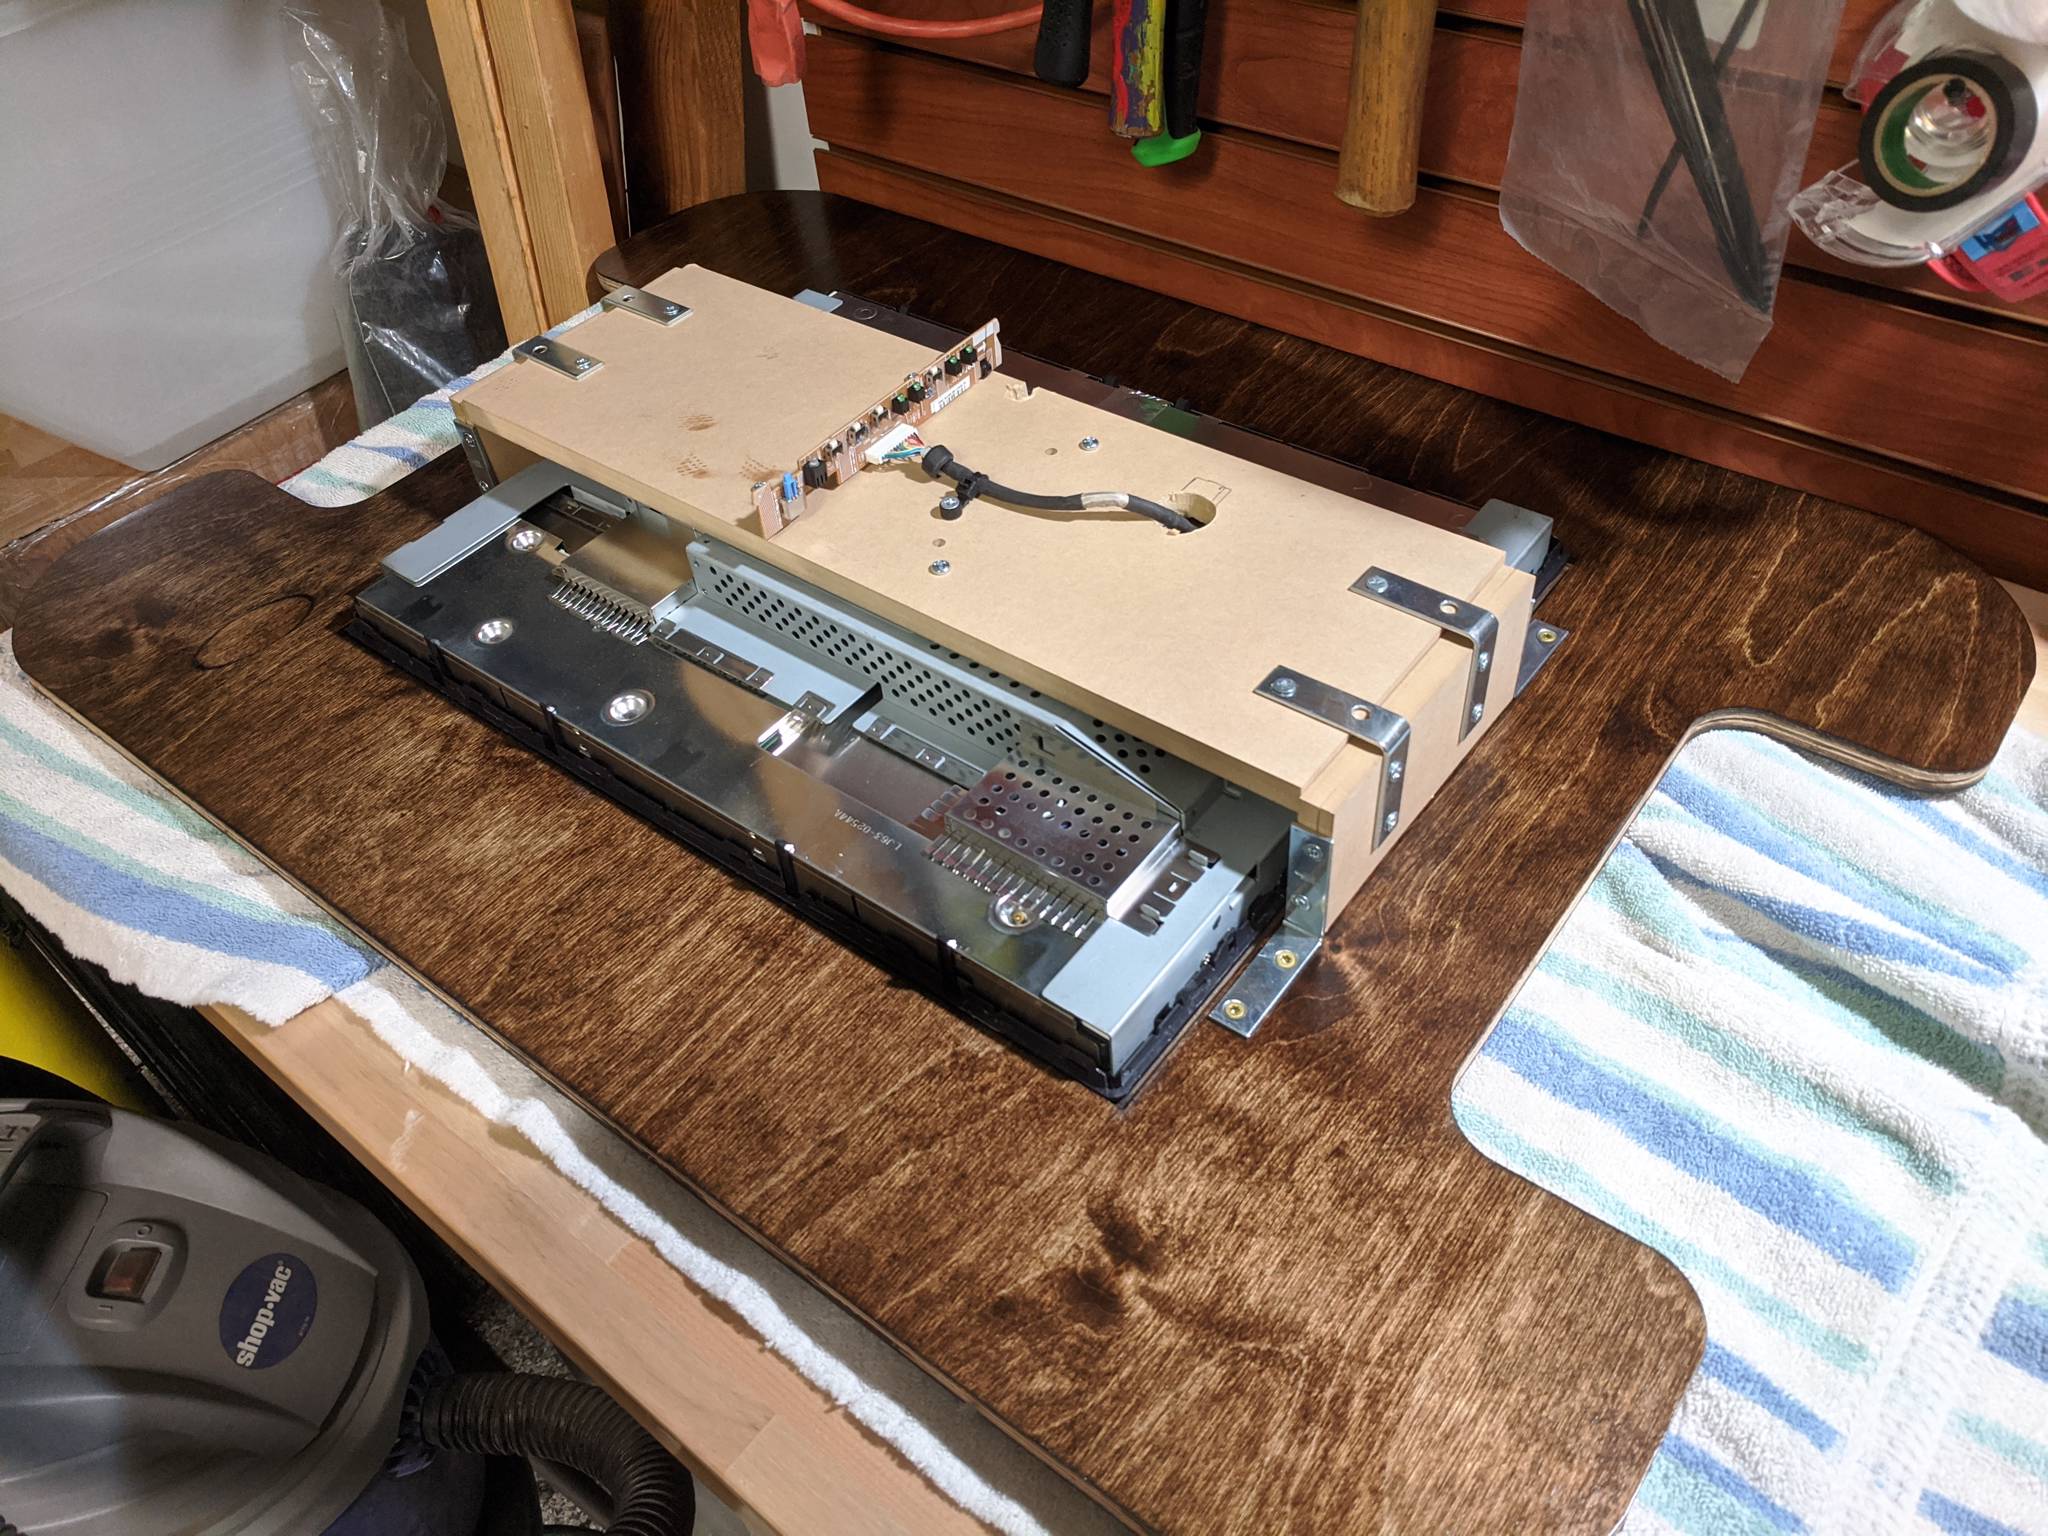
The kit is built specifically for the Dell 2001/2007FP LCD. This is one of the largest 4:3 LCDs available and it has very good left/right viewing angles, which is important on a cocktail cabinet (you'll be viewing the LCD from the sides when it's mounted in portrait orientation). I went with the 2001FP version because that's what I was able to find on eBay for a decent price.
Unfortunately, the kit's mounts weren't big enough for my monitor, even after removing the plastic housing from the screen. I had to improvise a bit with some metal brackets. I also removed the LCD's front panel PCB and mounted it on the bottom to prevent the kit's stop wood panel from depressing the buttons.
Once I had mounted the LCD, I realized I had forgotten to paint the exposed plywood border (oops), so I masked off the LCD panel and did a quick coat of black paint.


Cabinet Hardware
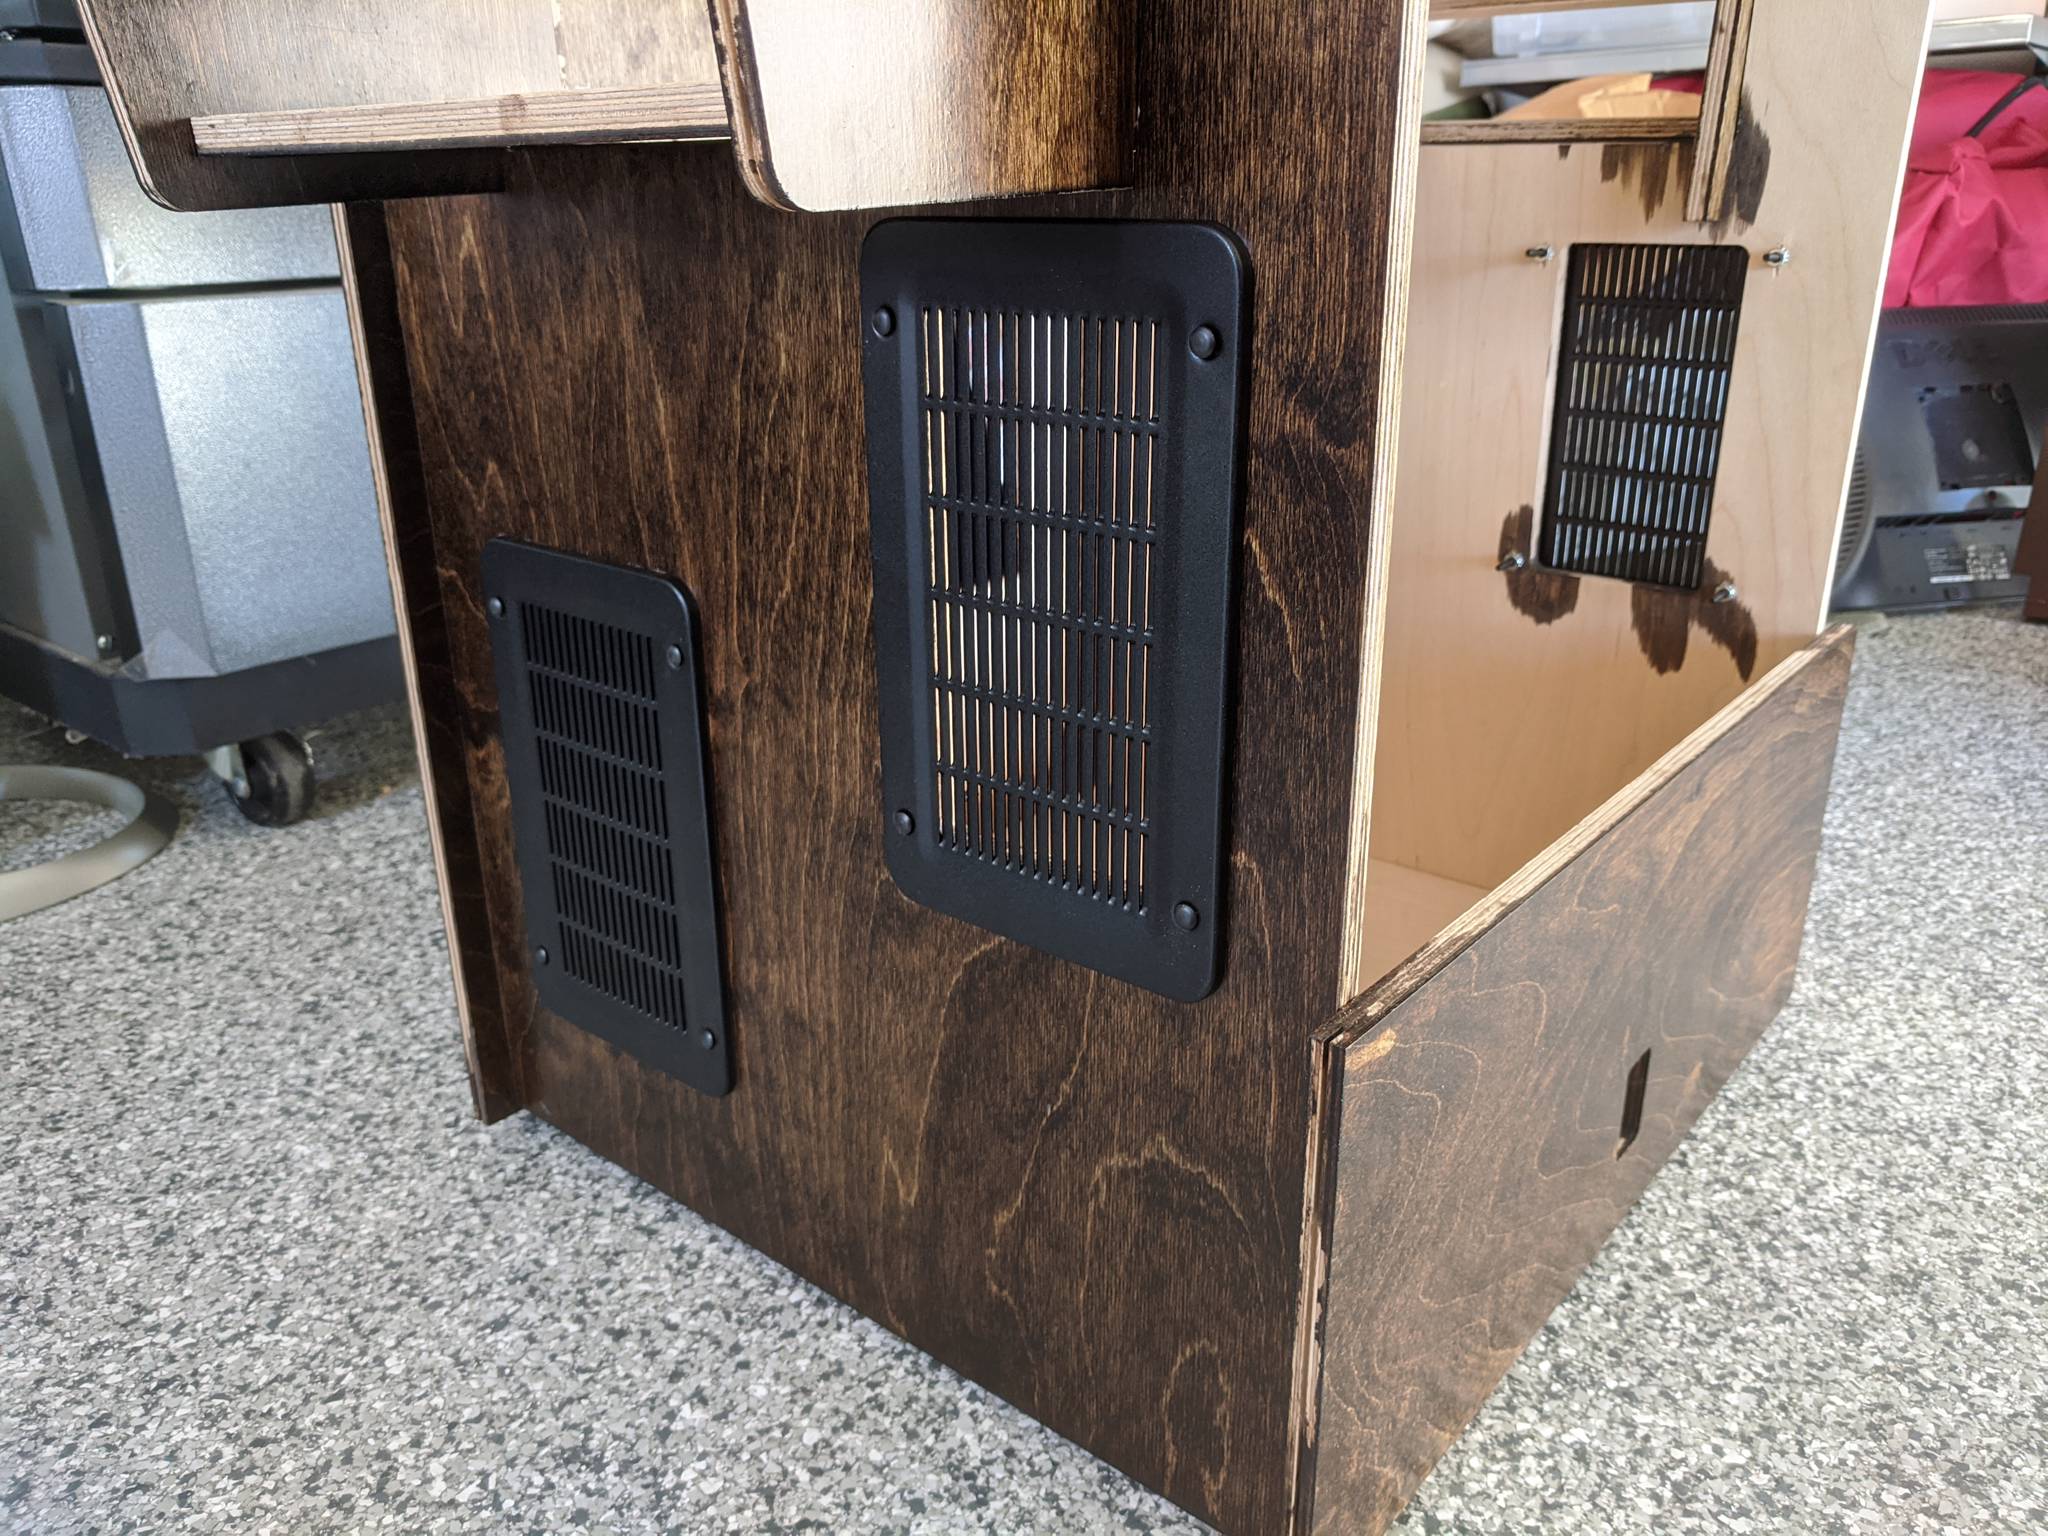
The cabinet kit is also pre-cut for several other commonly sized pieces of hardware, such as the speaker, ventilation, coin doors, and glass top.
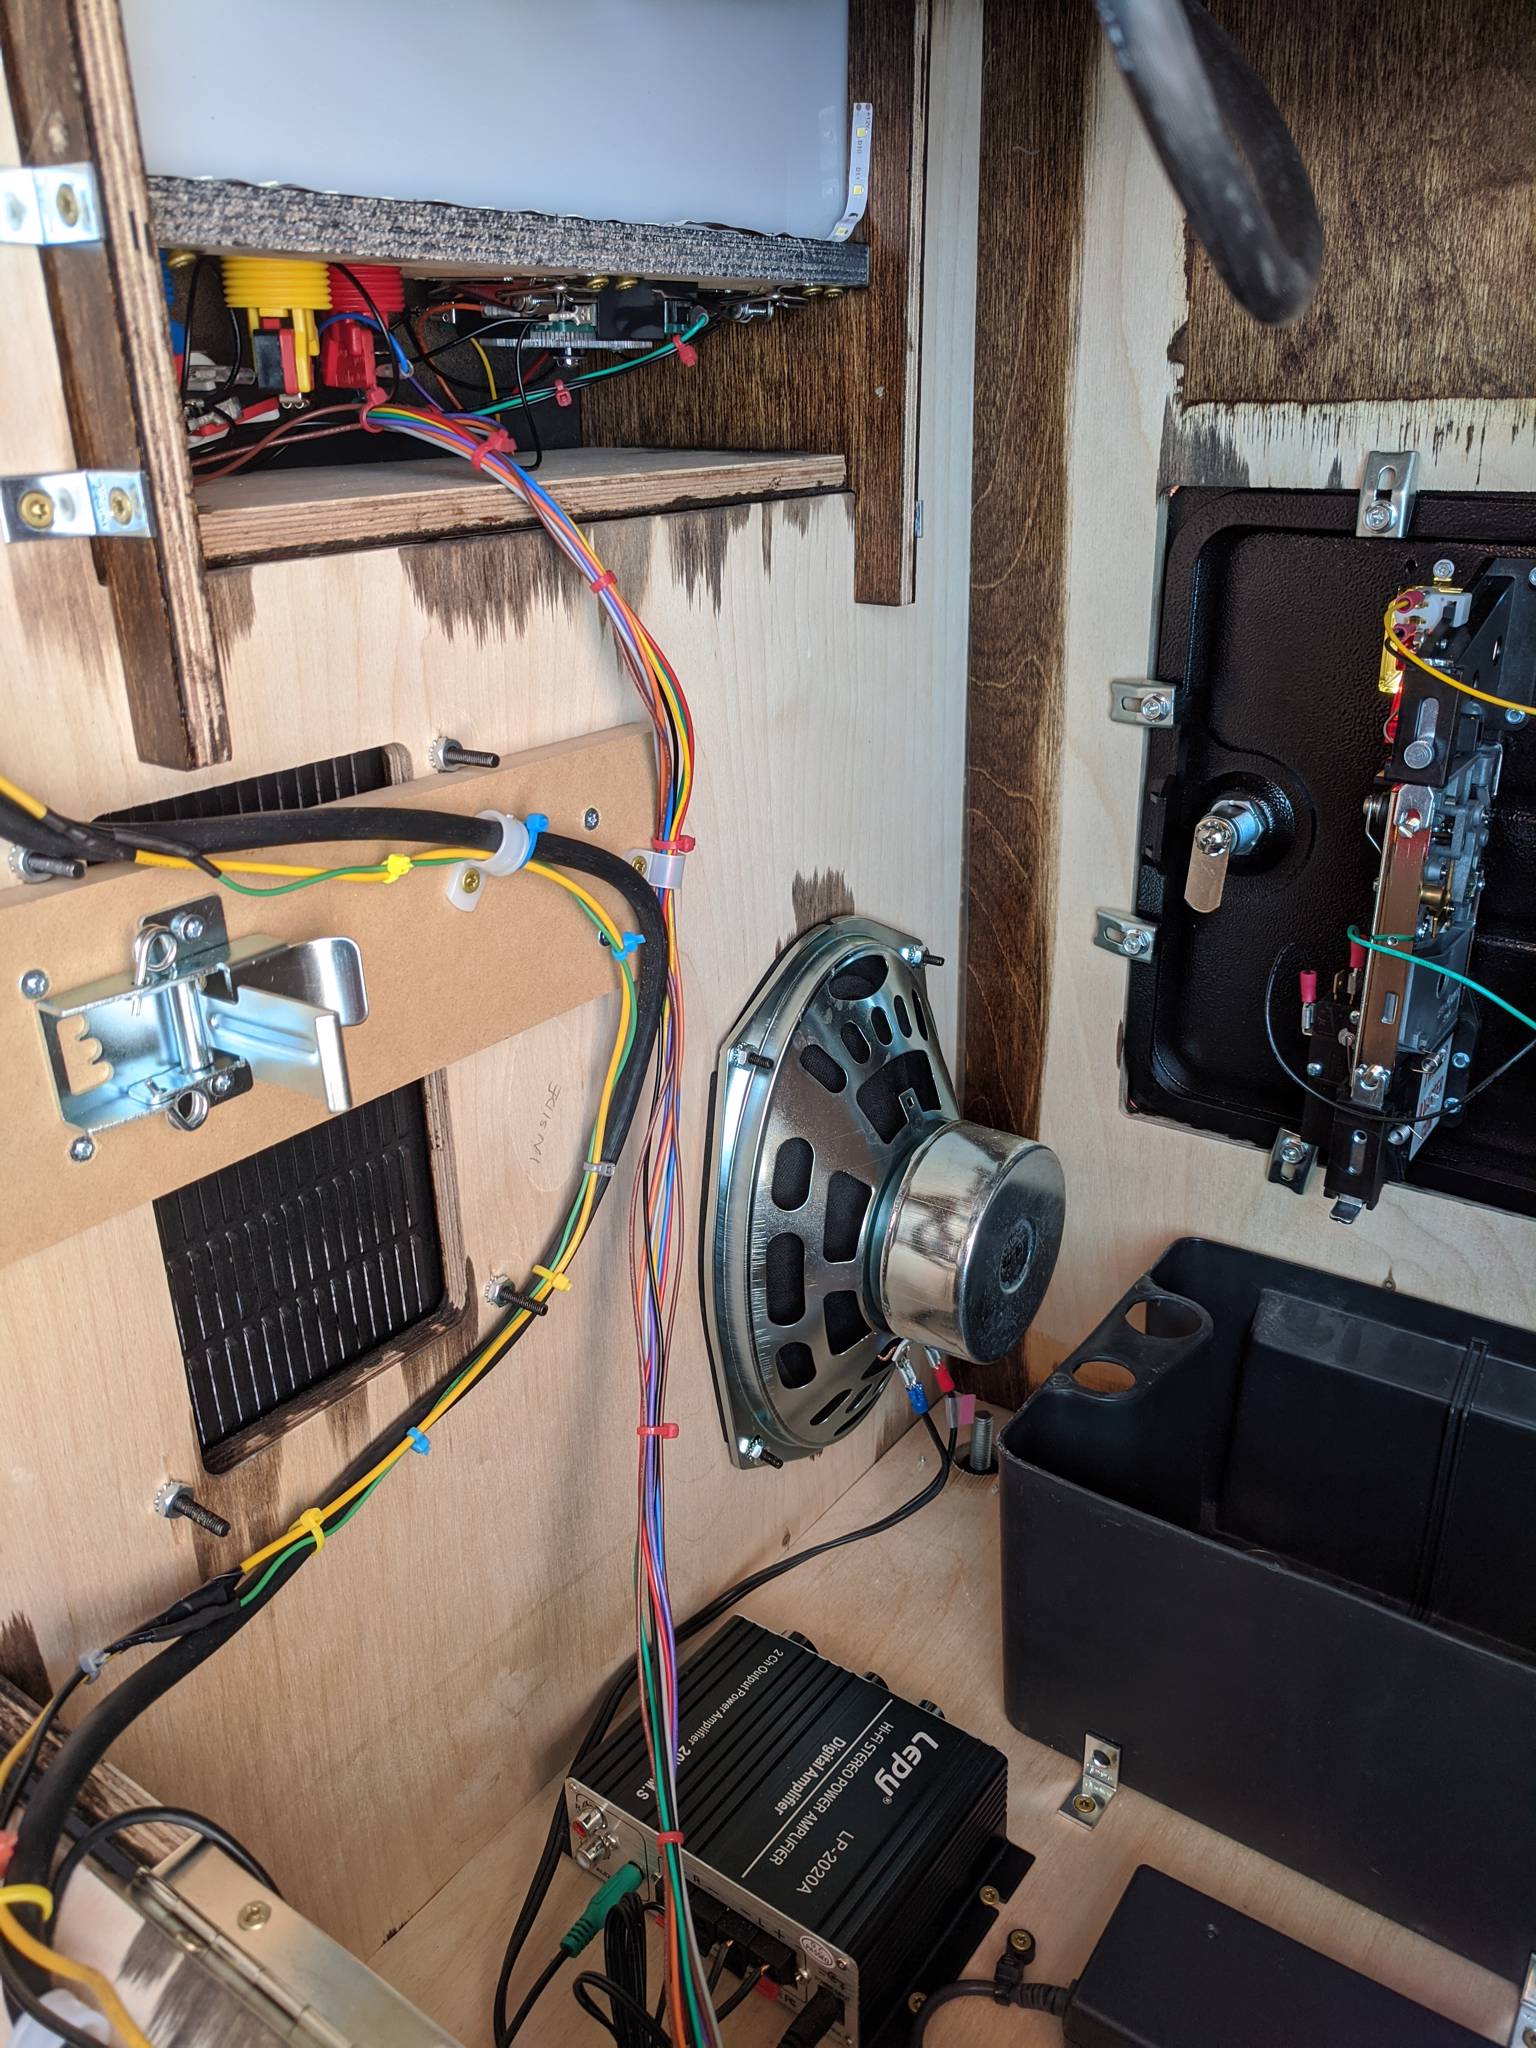
I got the speaker and speaker/ventilation grills from Arcadeshop.
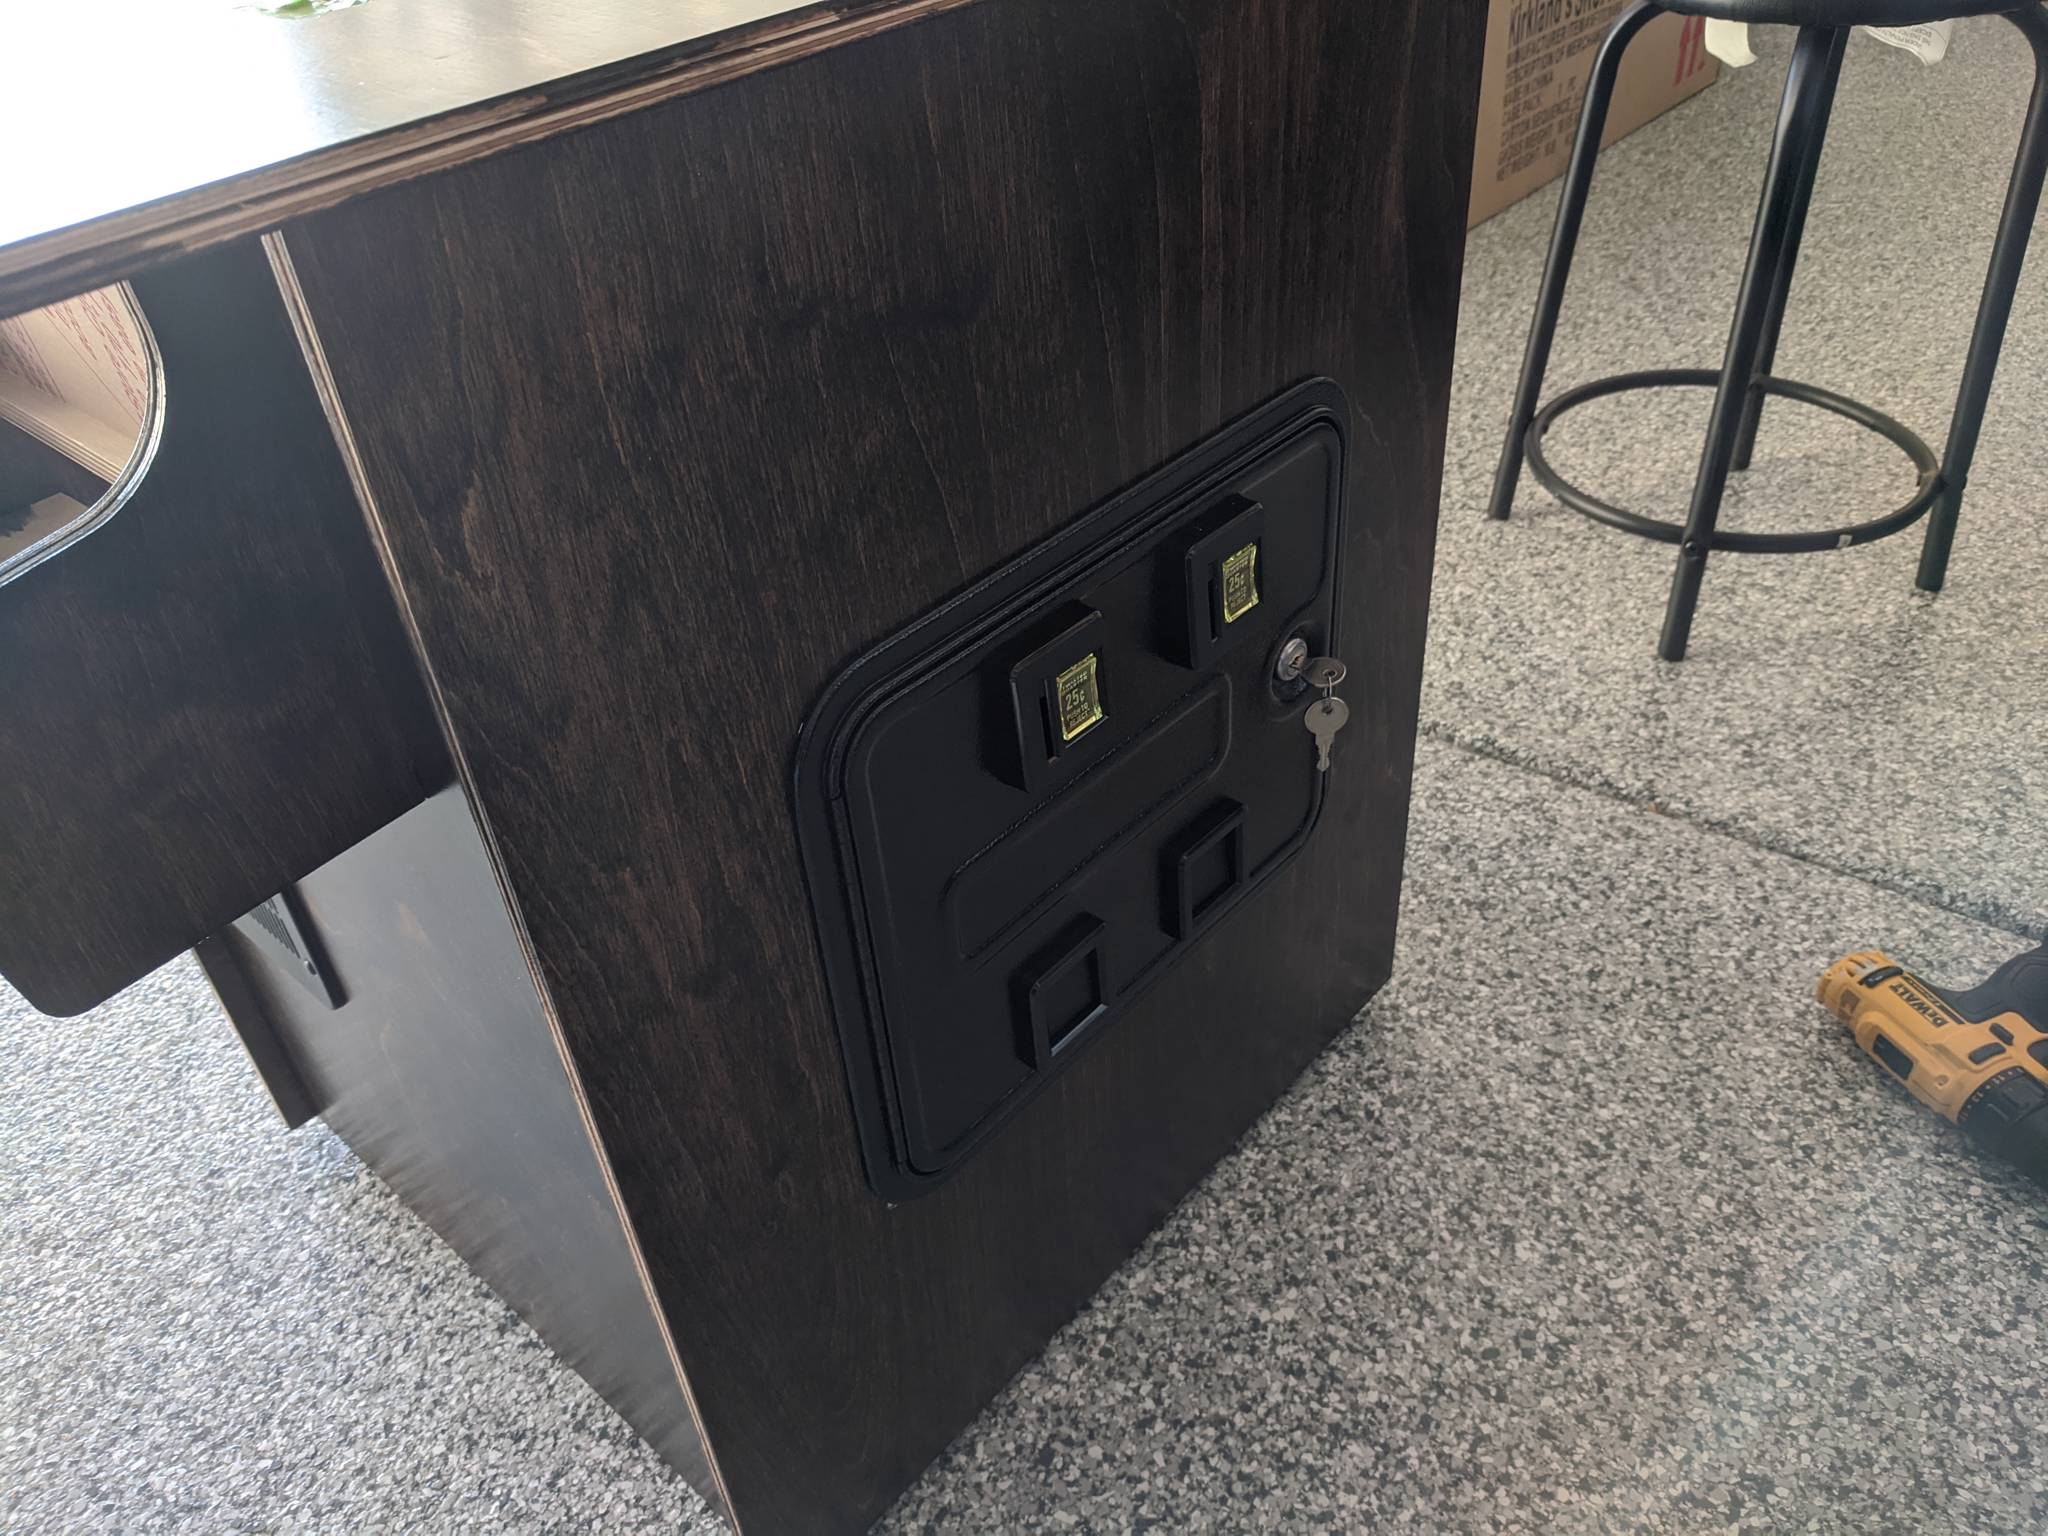
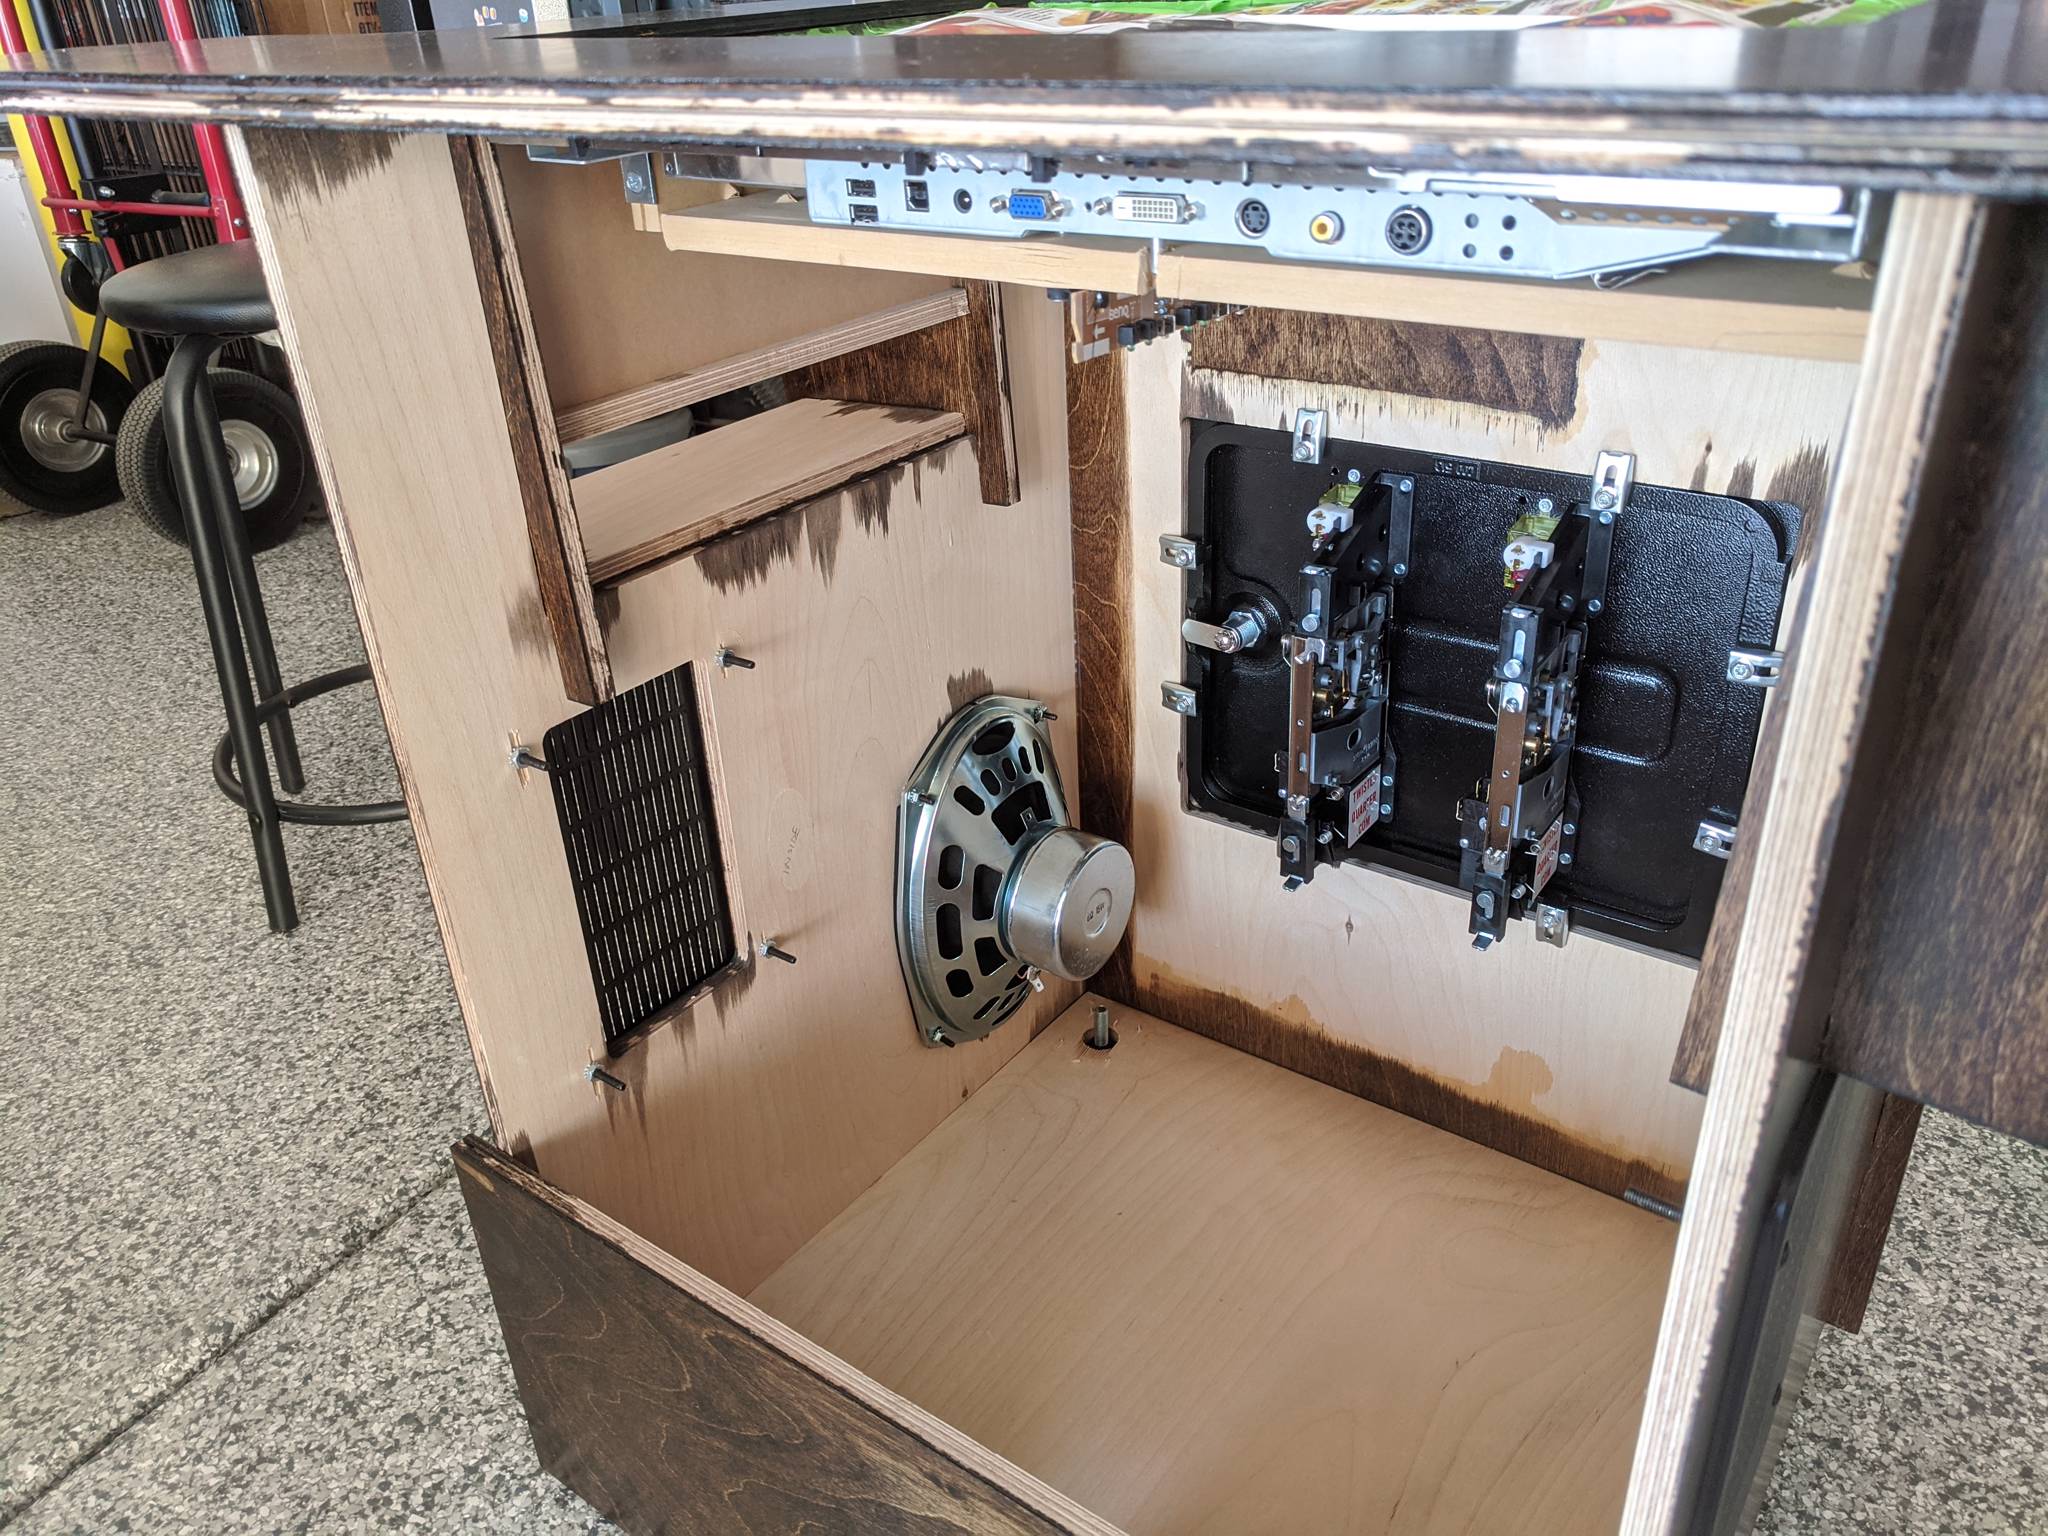
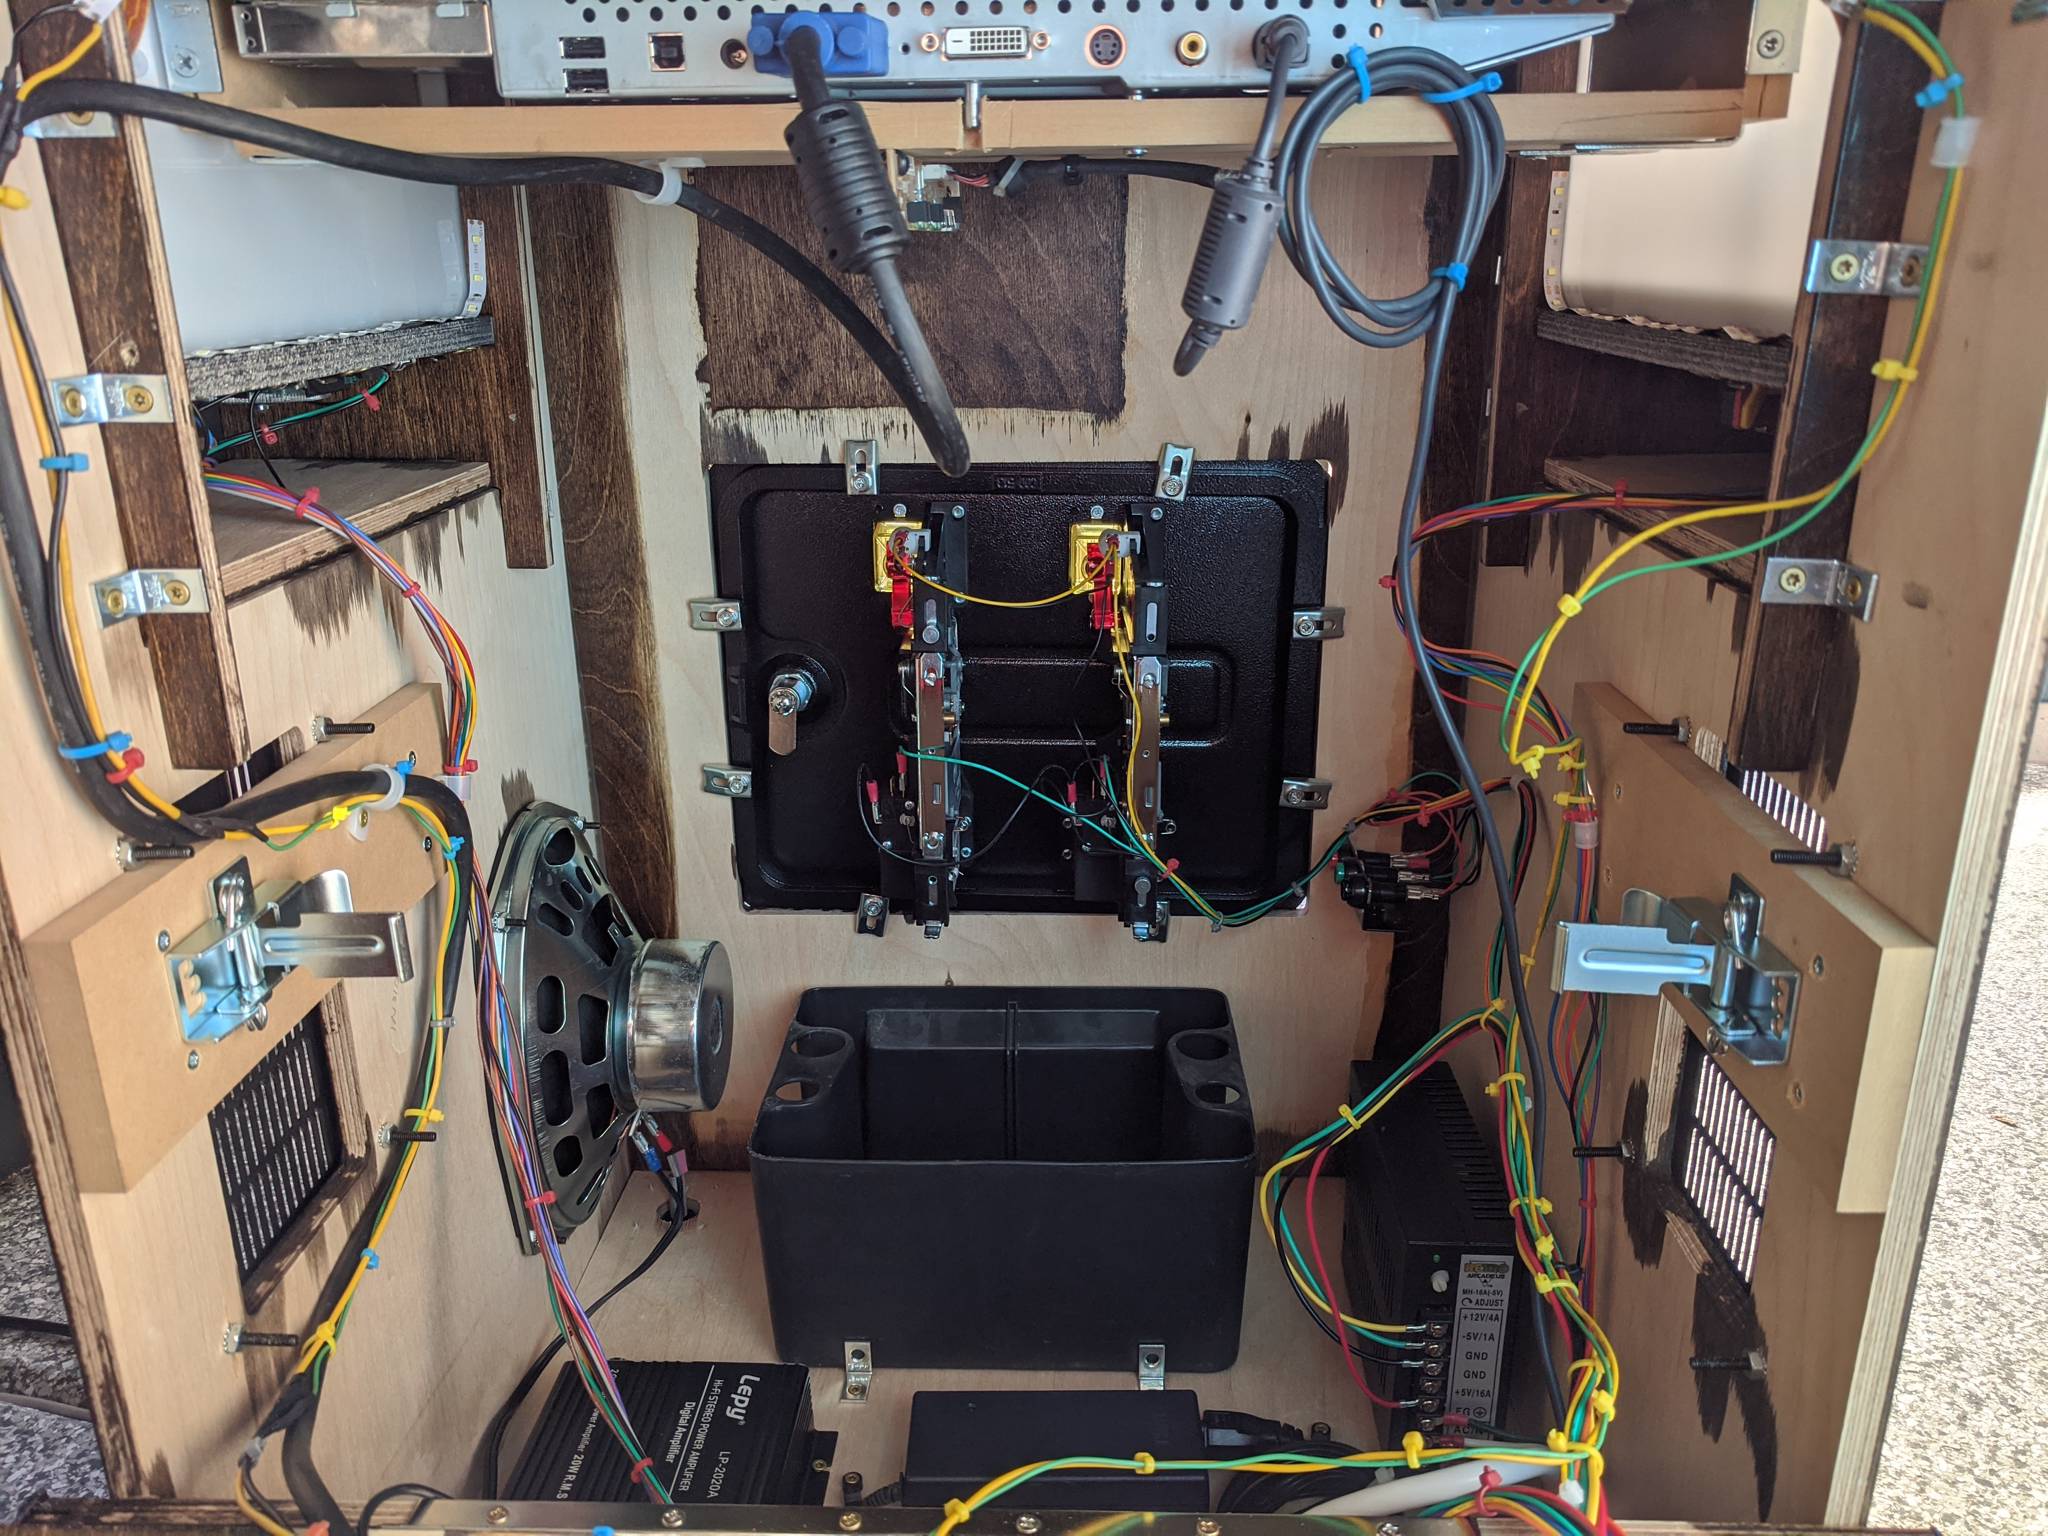
I went with this coin door from Twisted Quarter. Although the dimensions match, the corners of the door were more rounded than those of the pre-cut hole in the kit, which left small gaps at the corners. I was able to position the coin door such that the gaps aren't visible on the top corners, but they are still slightly visible on the bottom.
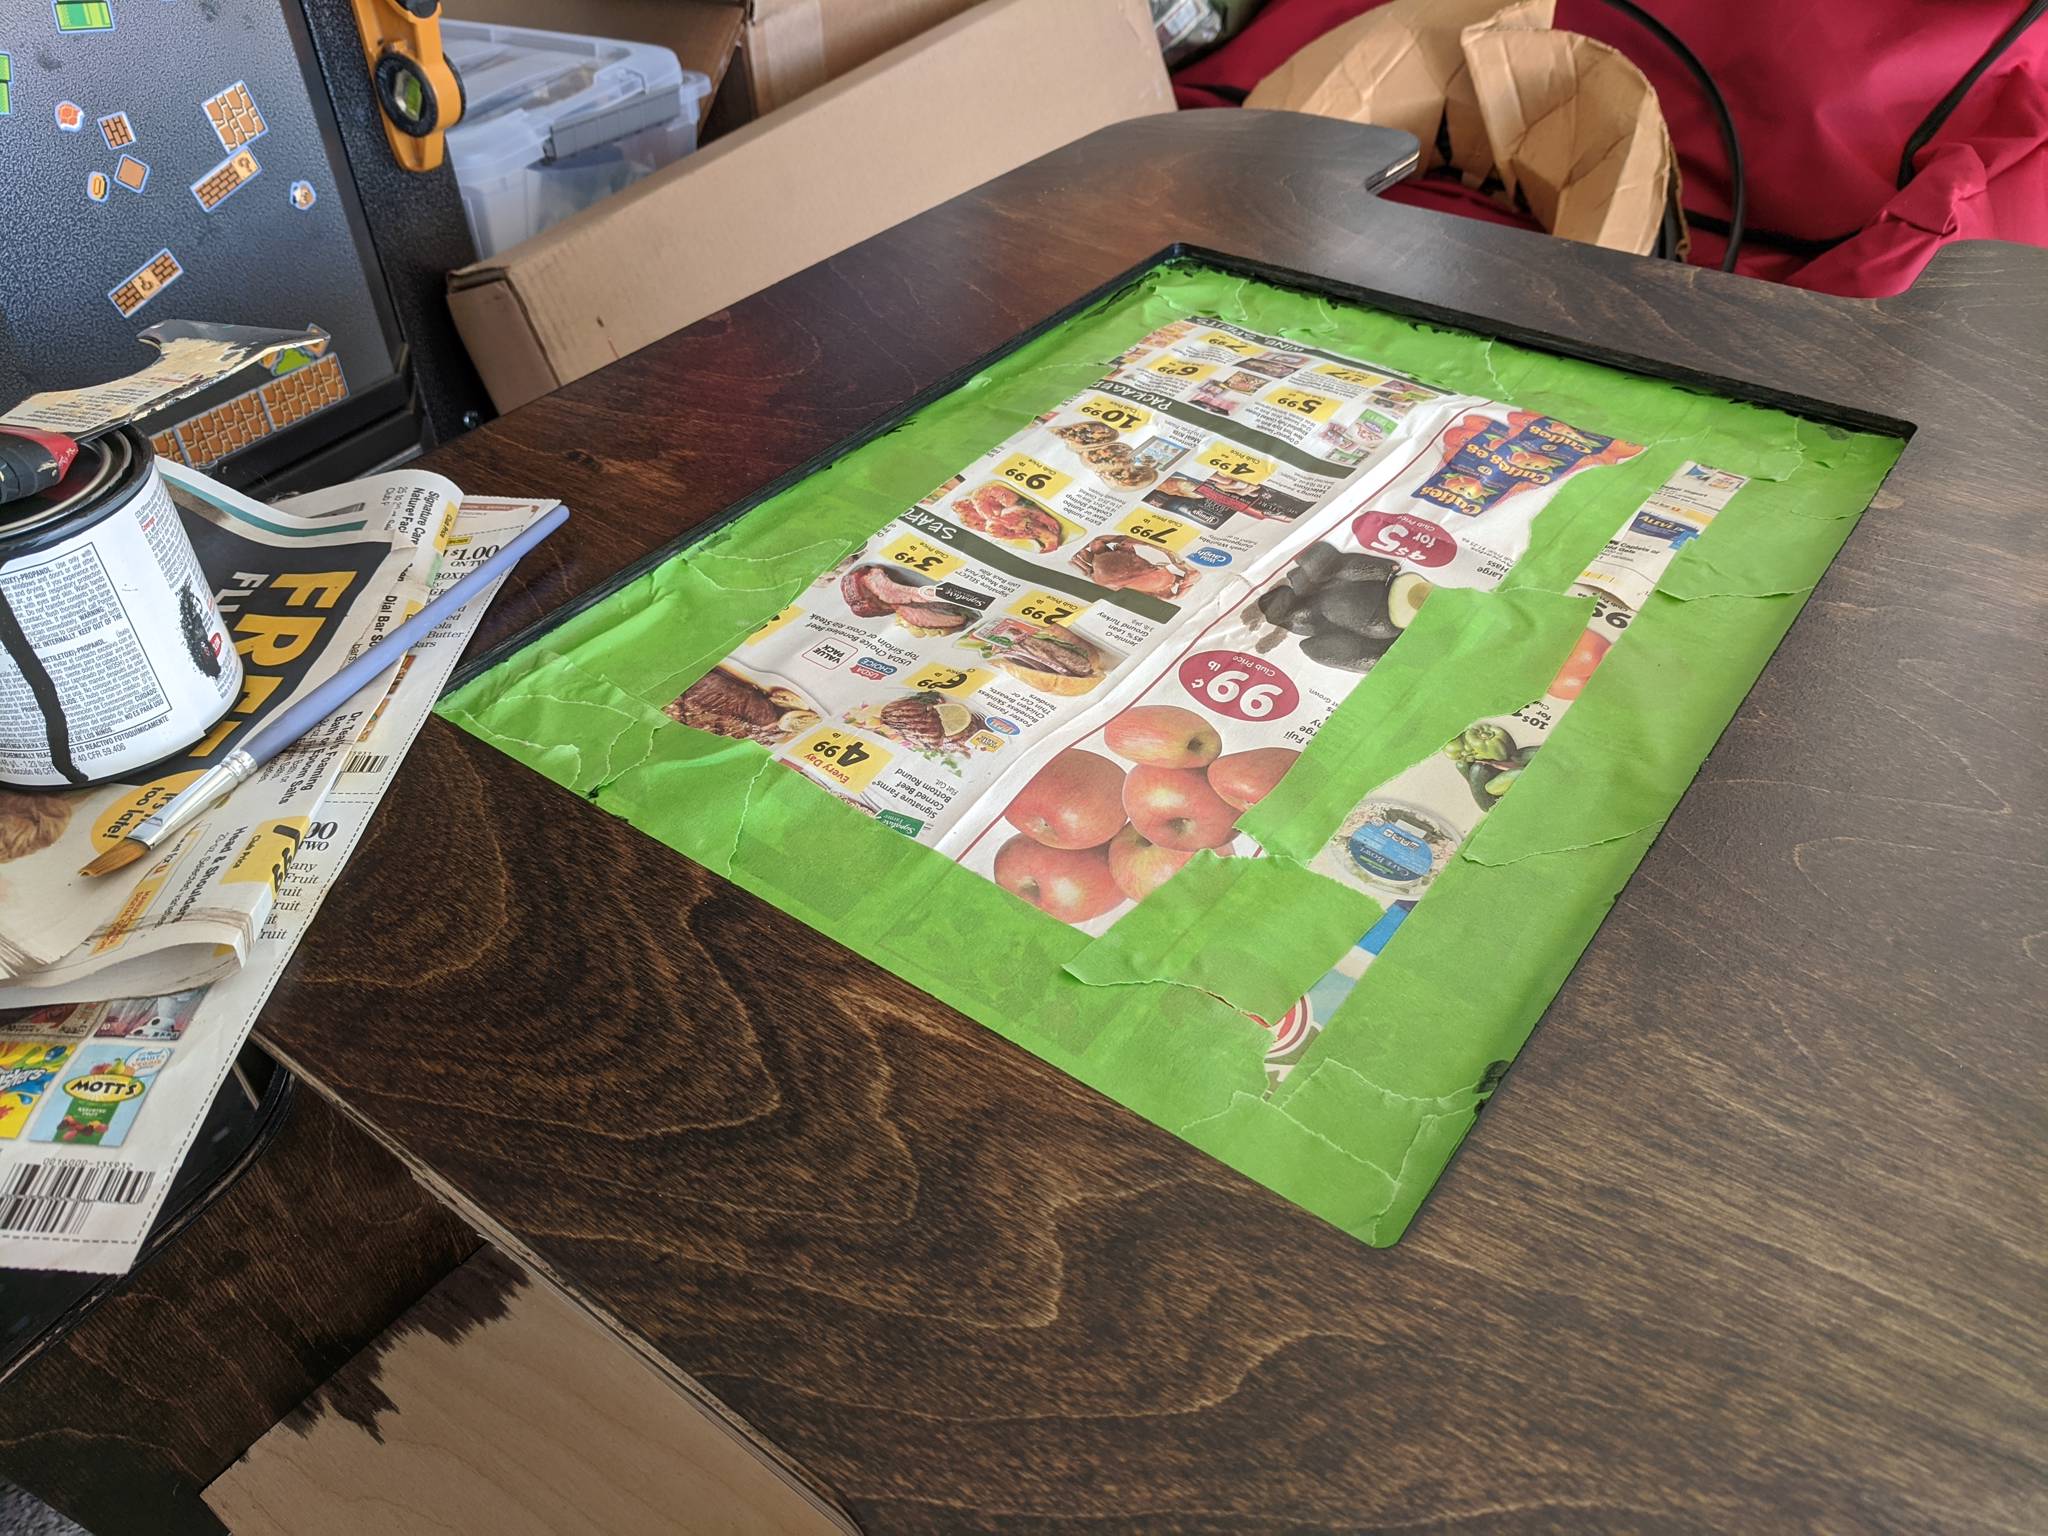
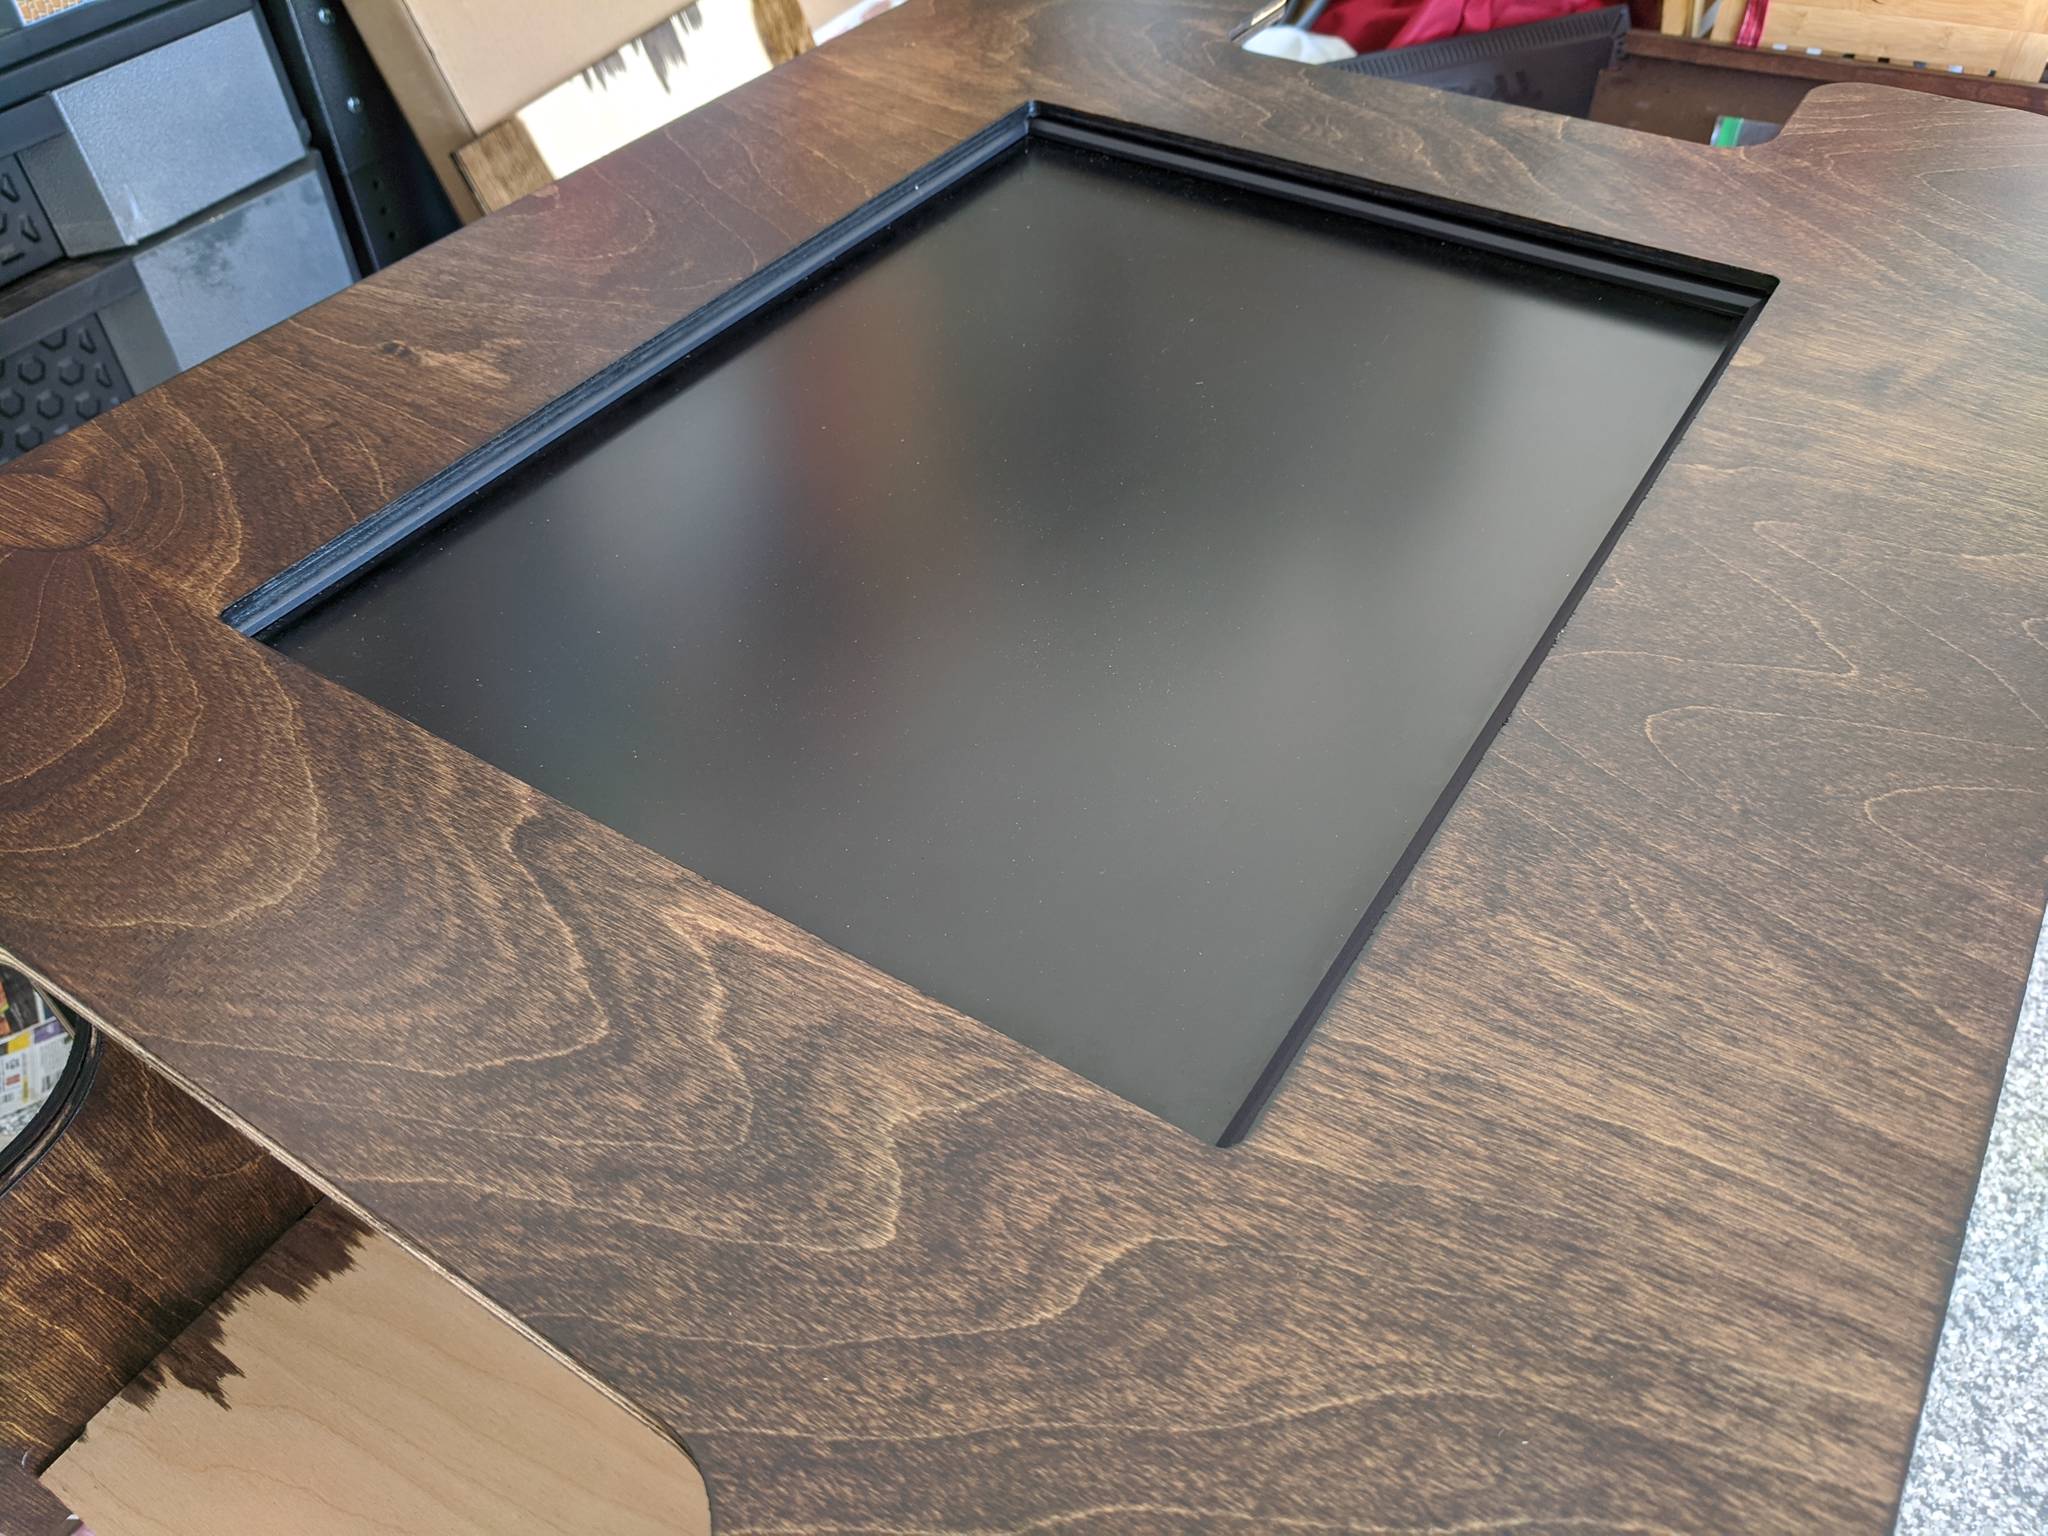
The kit's top is cut specifically for the standard Bally Midway glass, so I used this replacement by RetroArcade.us. Another hiccup here was the clips used to hold the glass in place. Haruman's kit comes with clips, which are listed on the website as "ABS black cocktail glass clips (pressure fit, no screws needed)." Unfortunately, they didn't stay on at all; they fell off easily when touched. I wanted to use a set of the metal cocktail glass clips that are used on authentic cocktail cabinets, but those cabinets are built with 3/4" plywood, whereas Haruman's kit uses 1/2" plywood, so that wouldn't work. Ultimately, I had to use screws on the underside of the cabinet to secure the kit's plastic clips in place, which causes them to bow a bit.


Control Panels
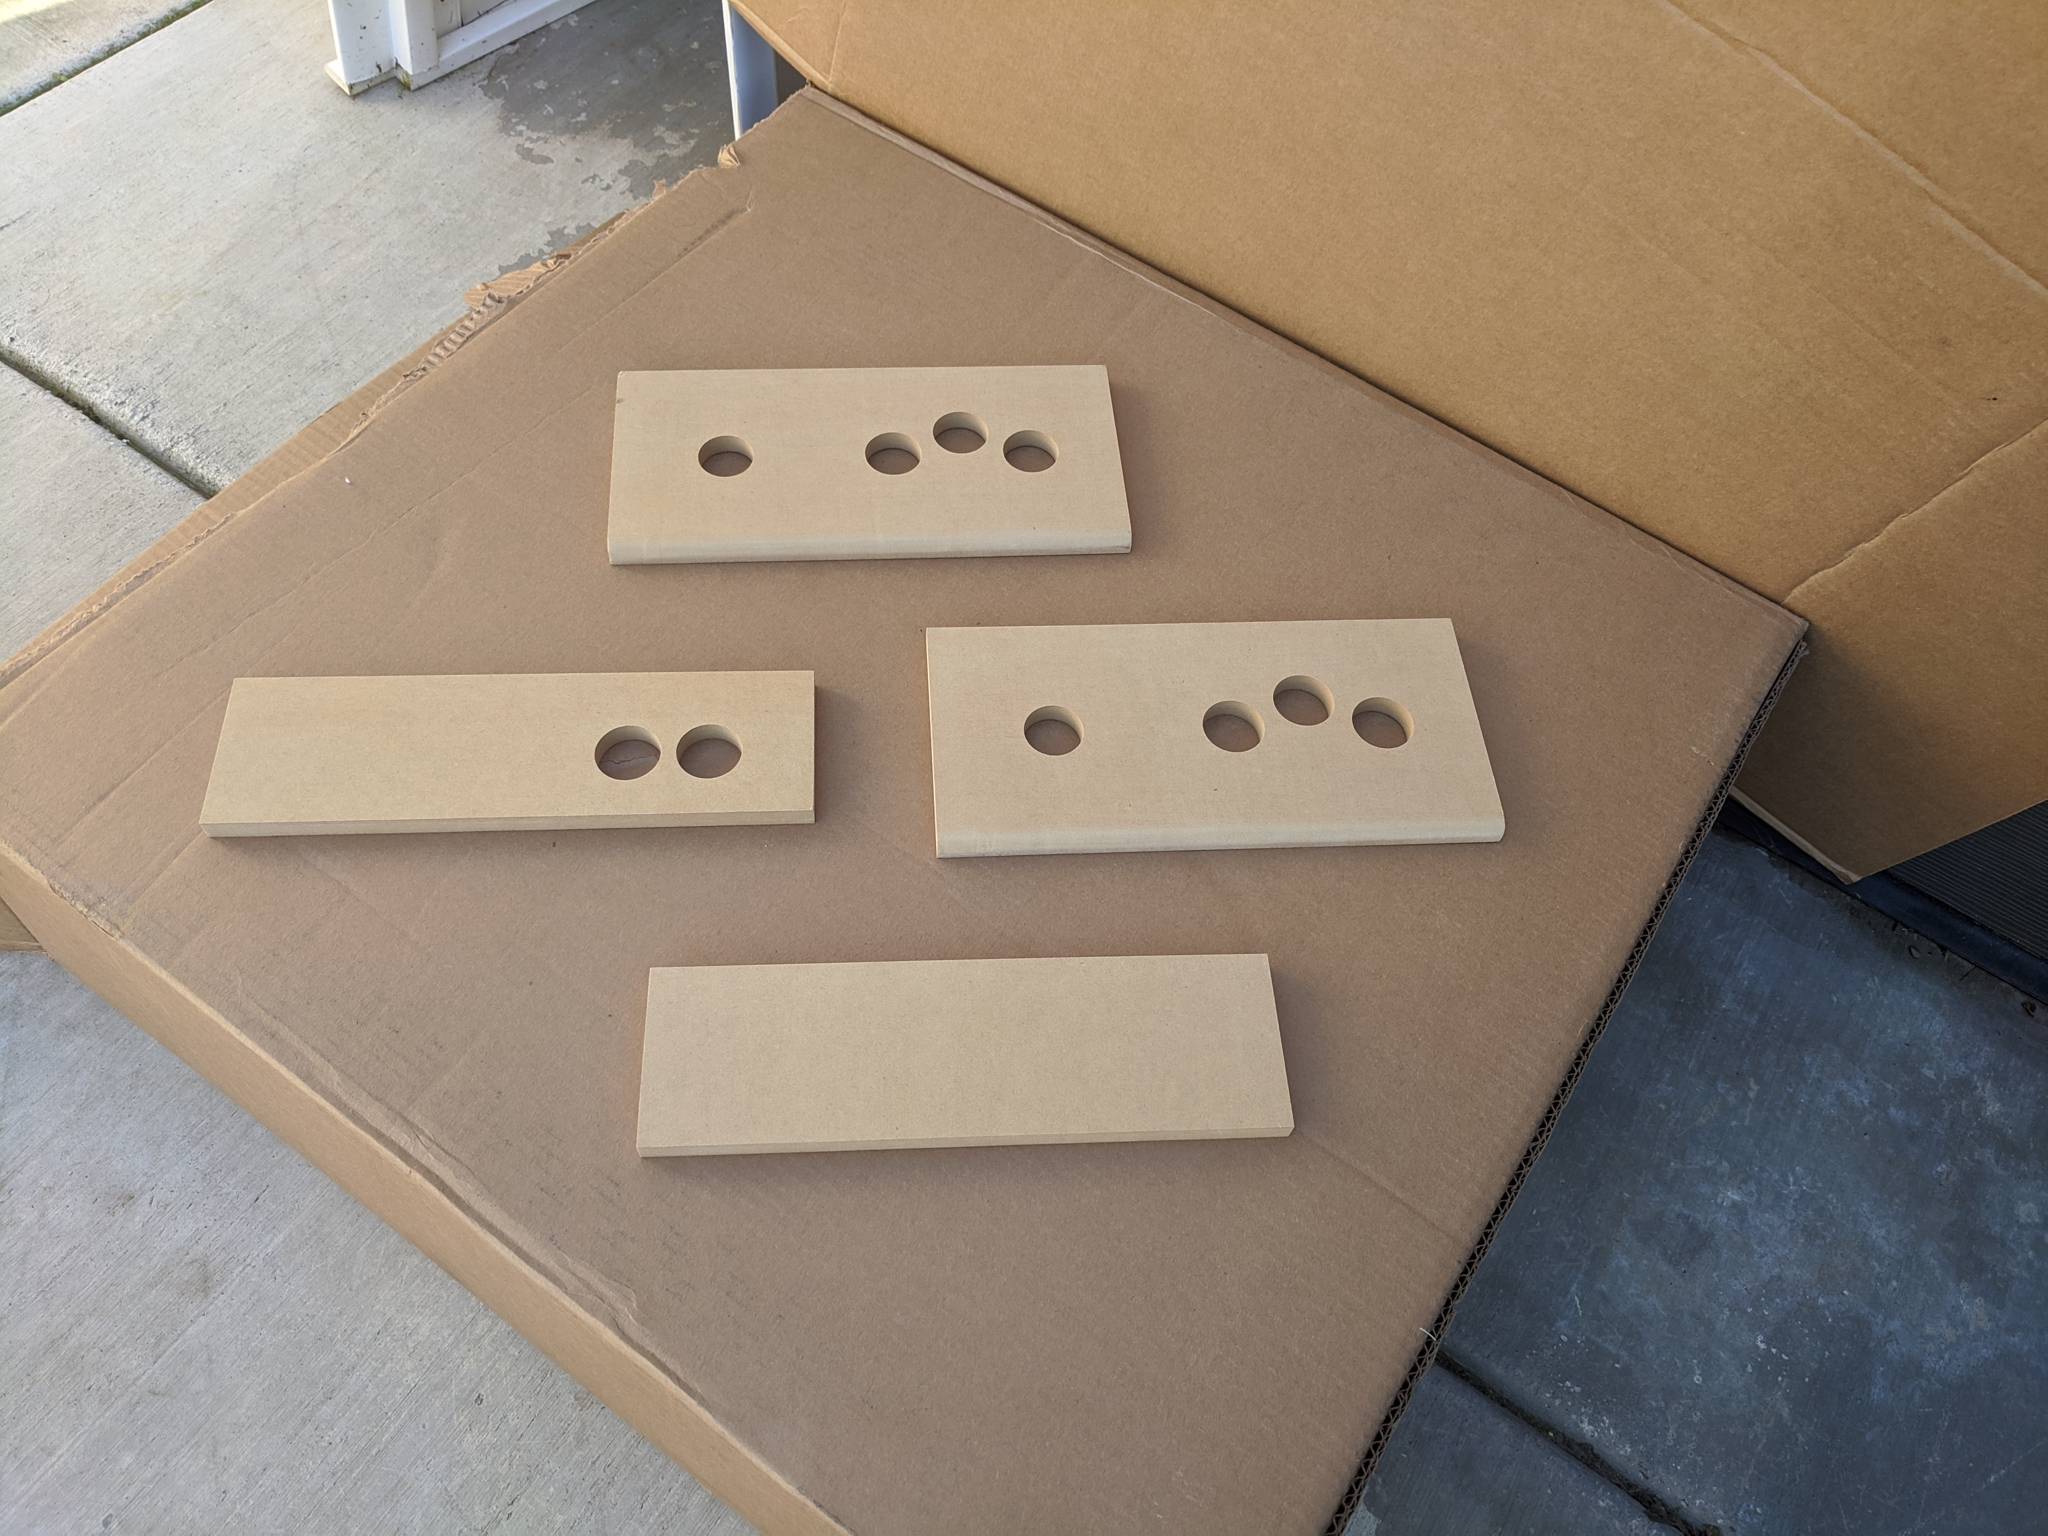
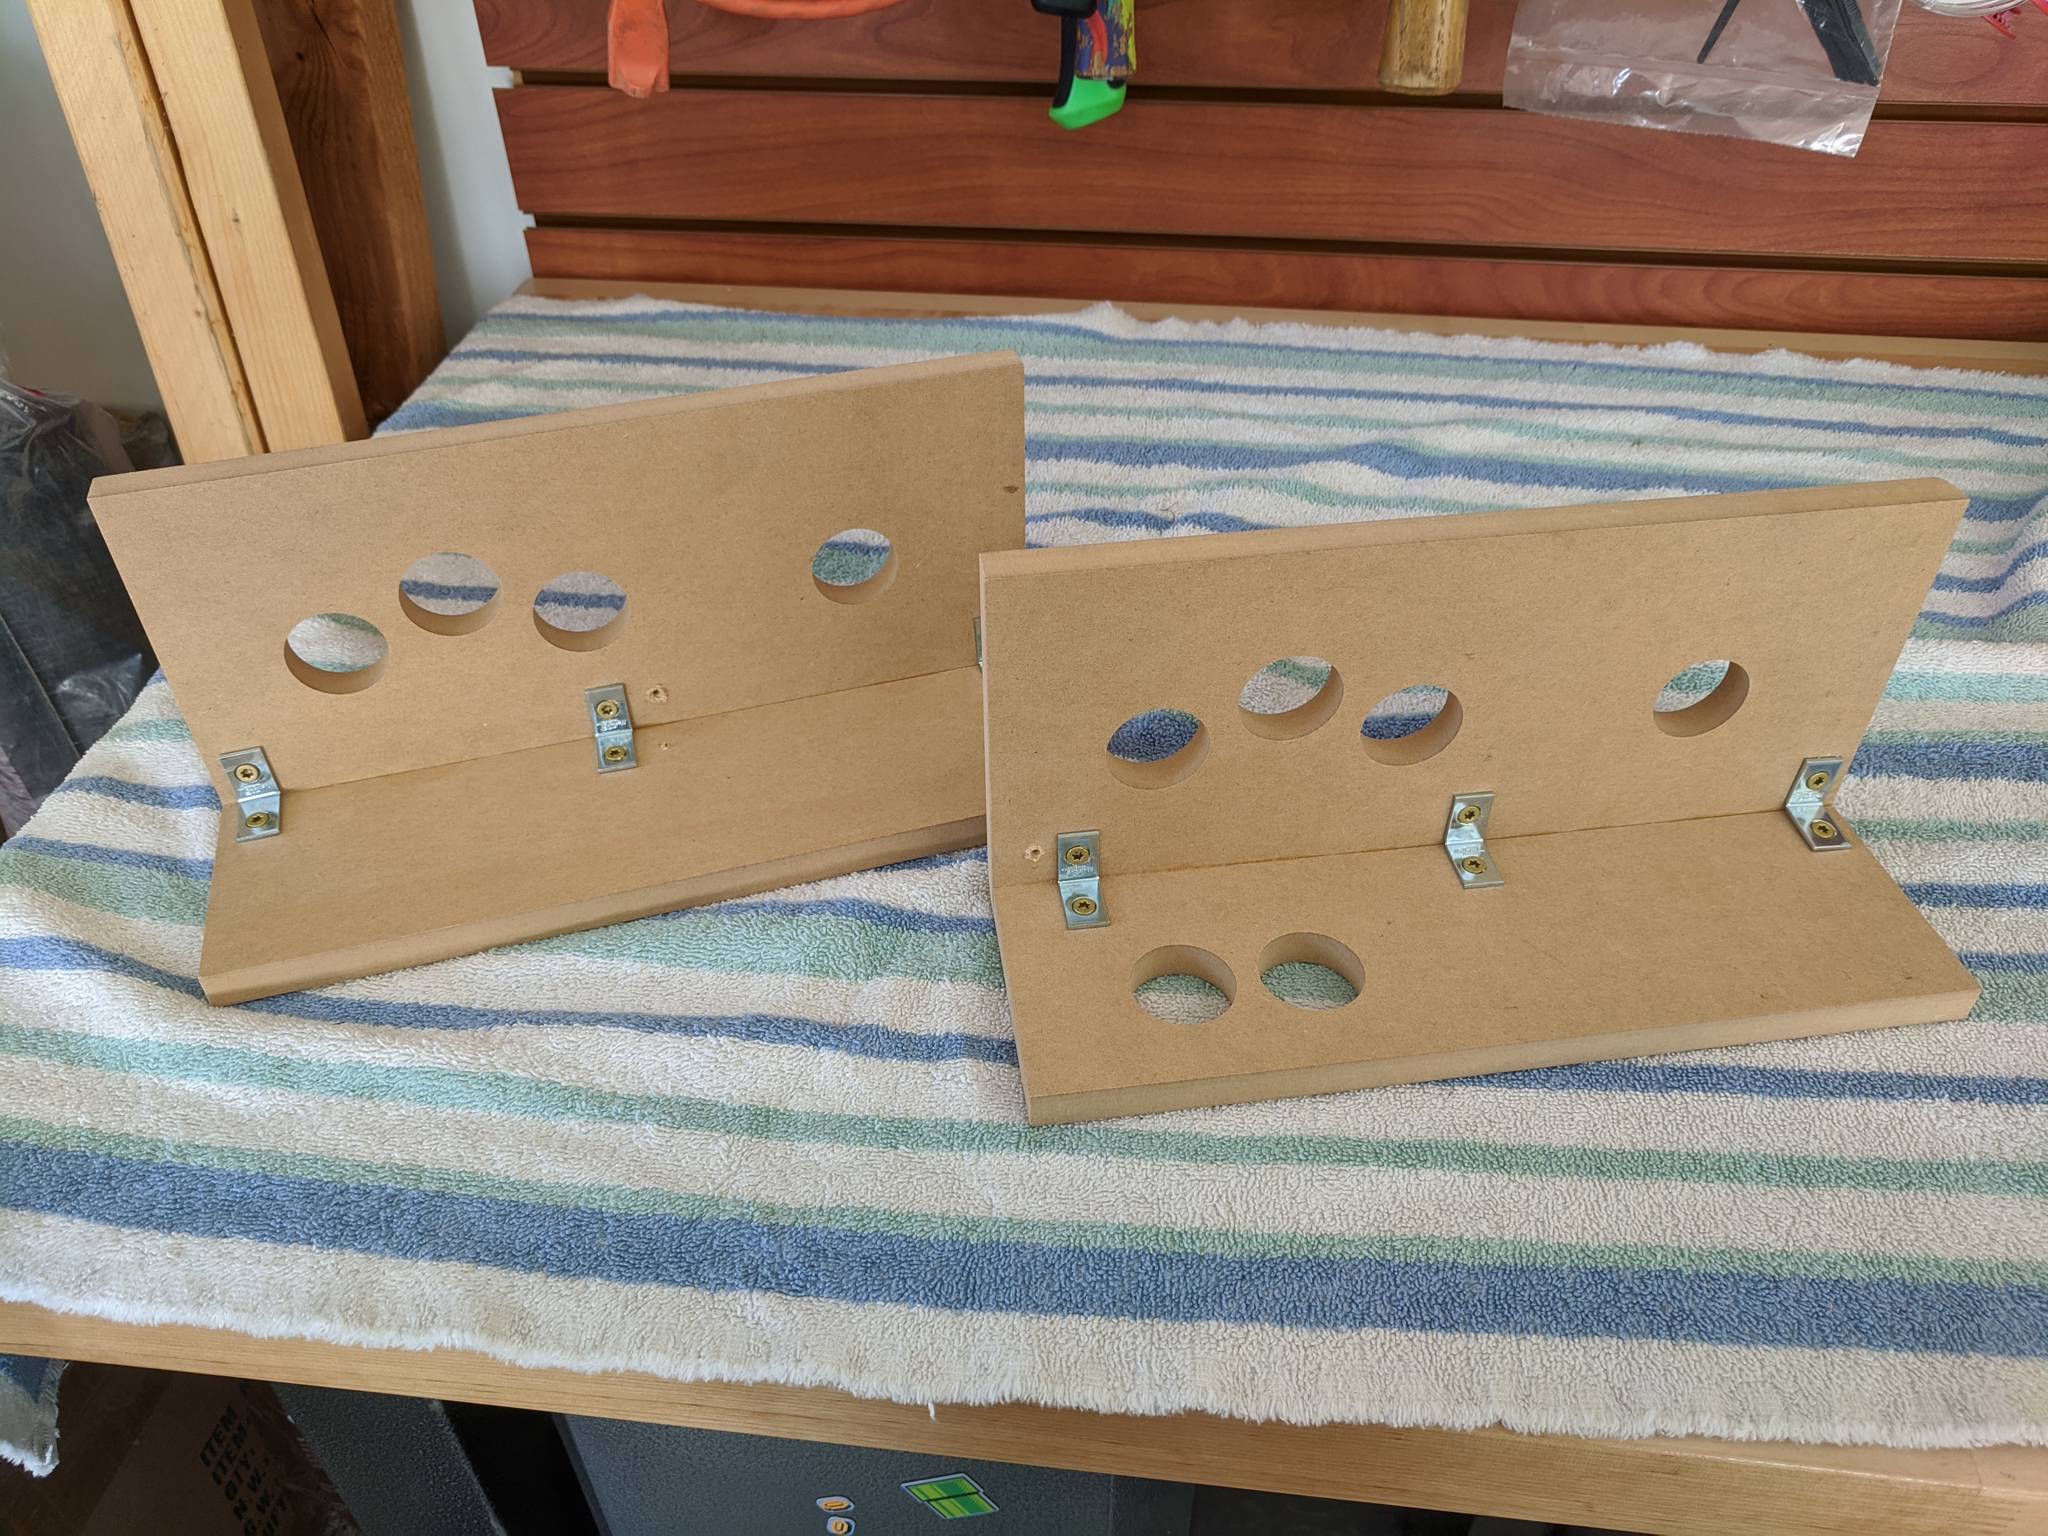
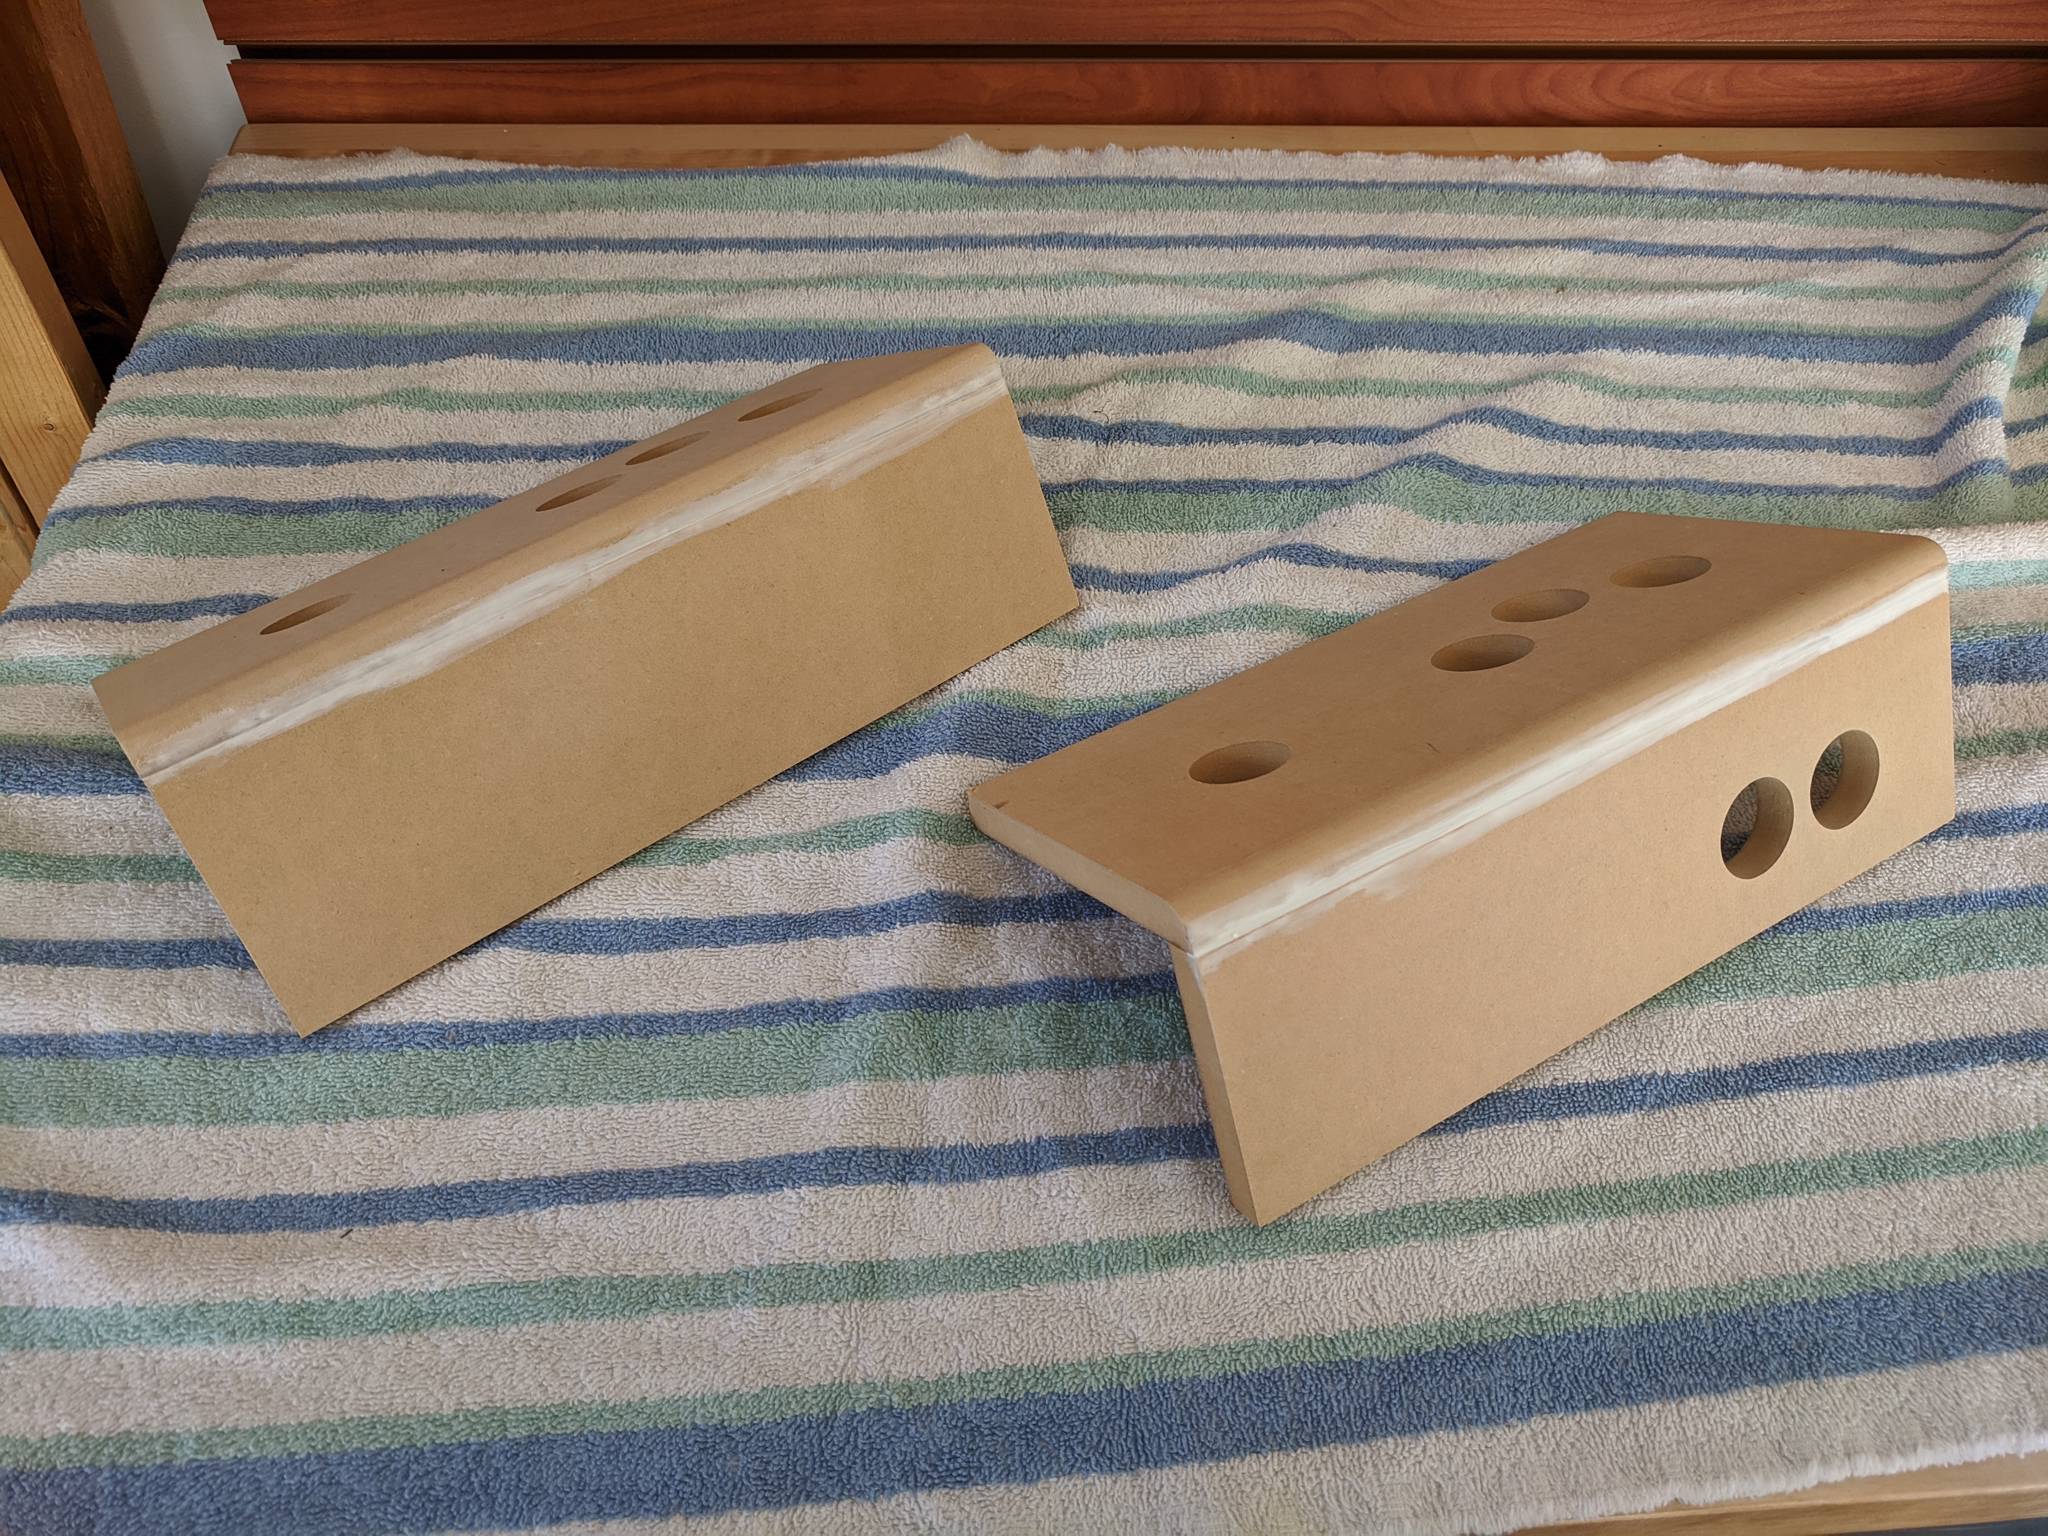
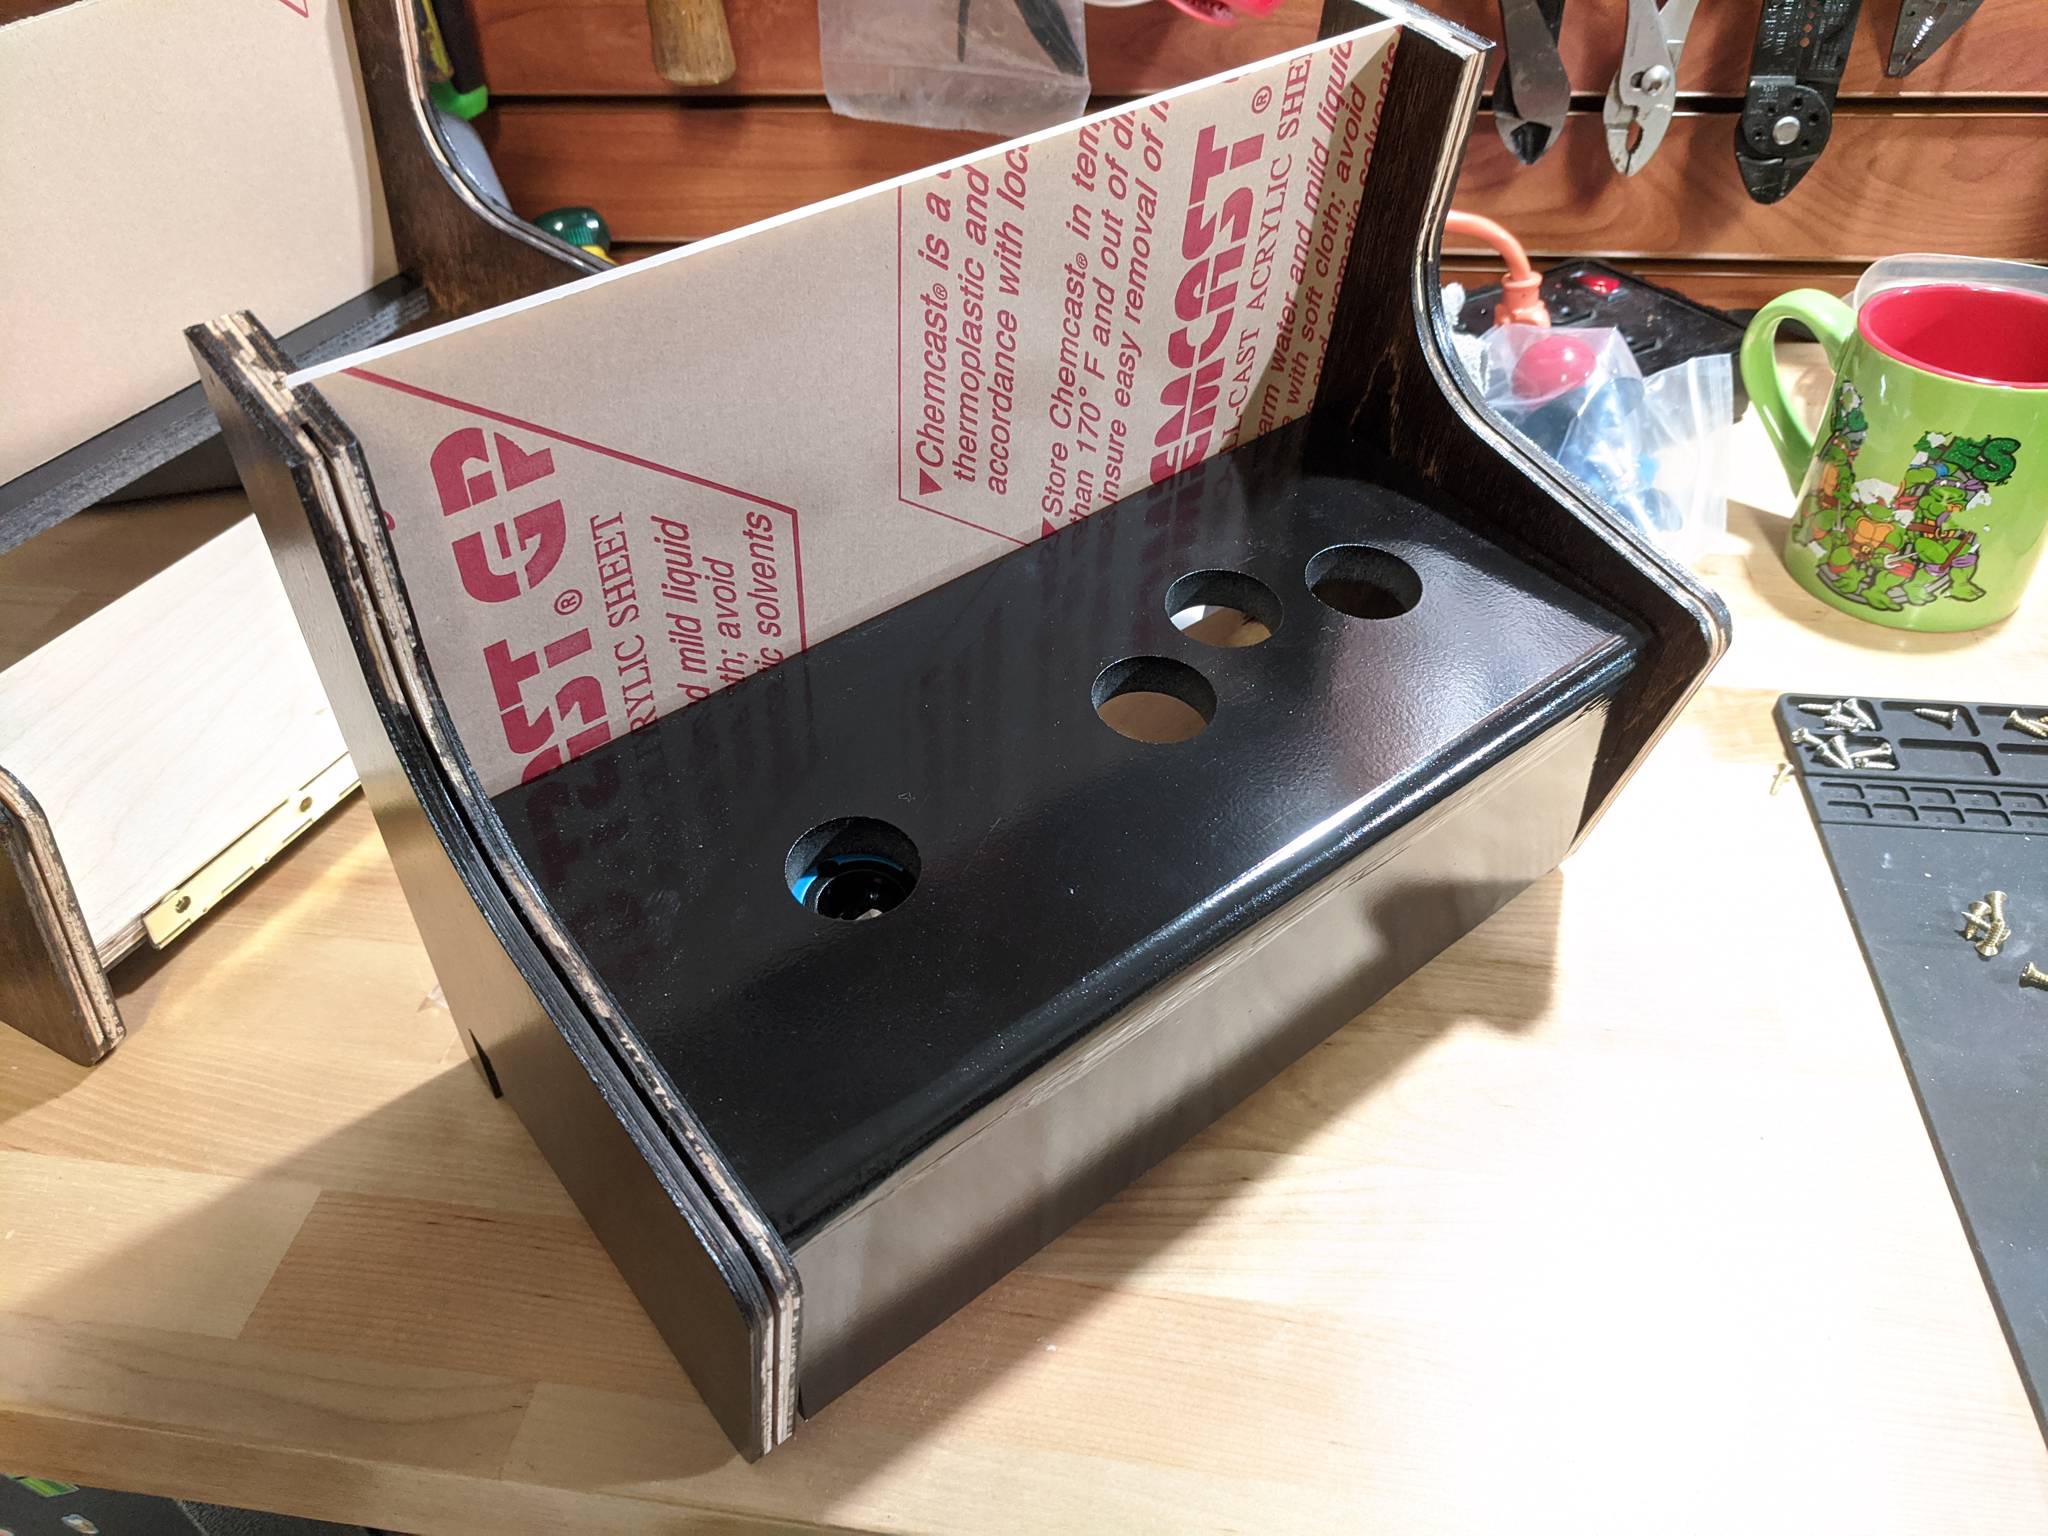
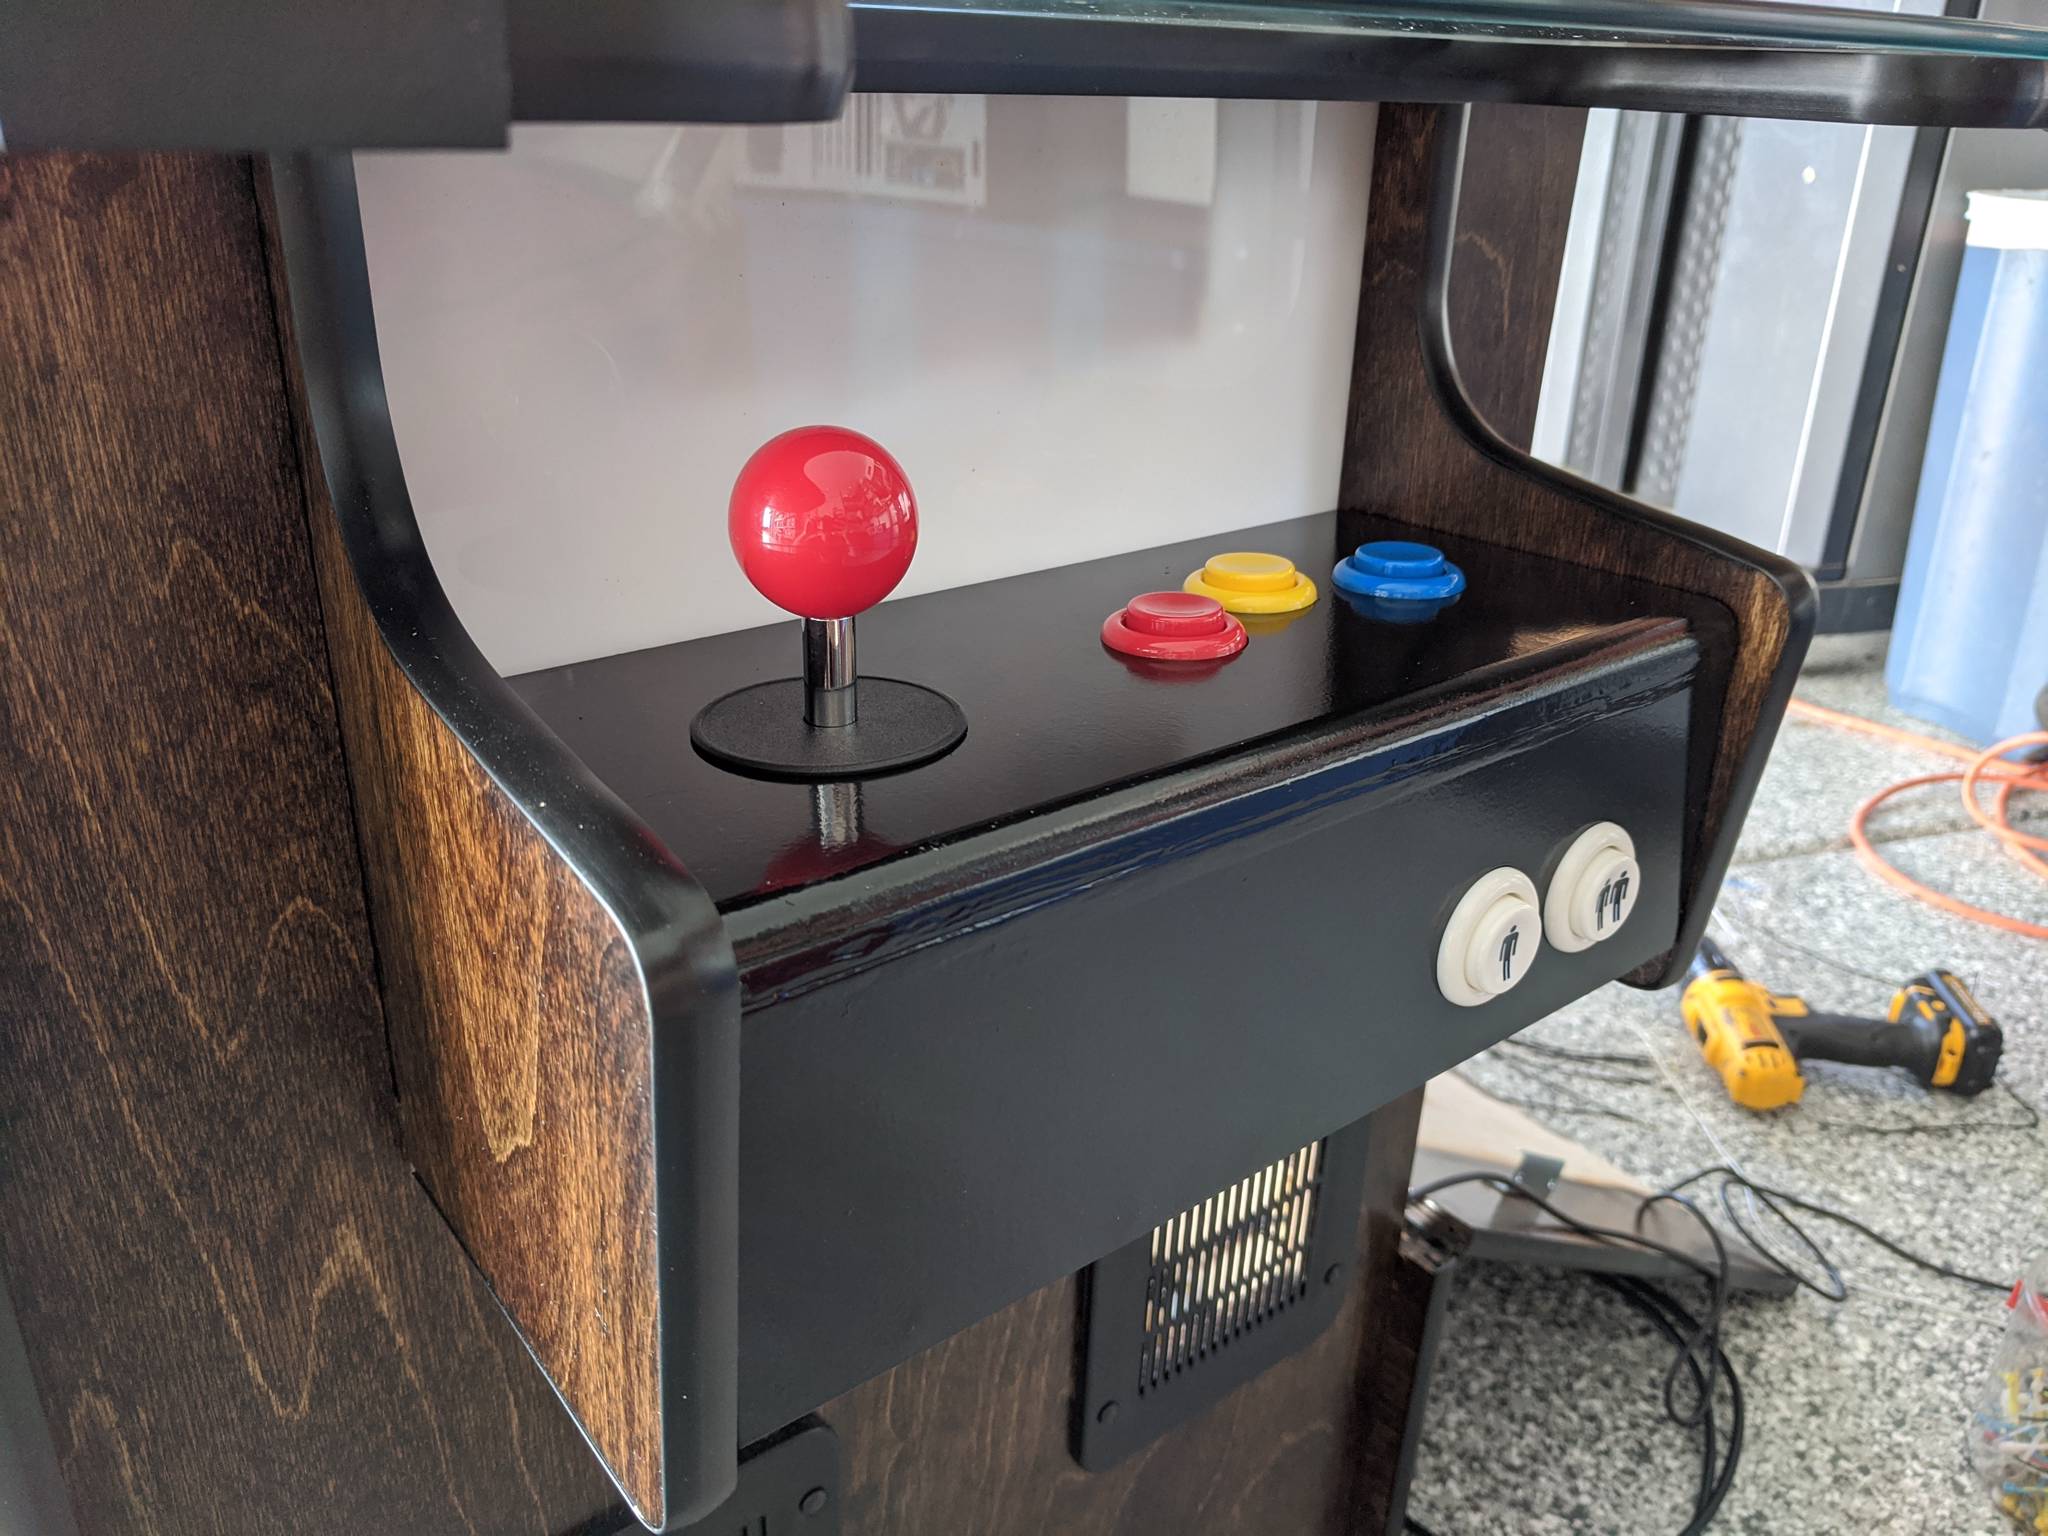
The kit's control panels come pre-cut for a joystick and three buttons, with an additional two buttons on one side for the start buttons. I attached the panels with metal brackets and wood glue to add stability.
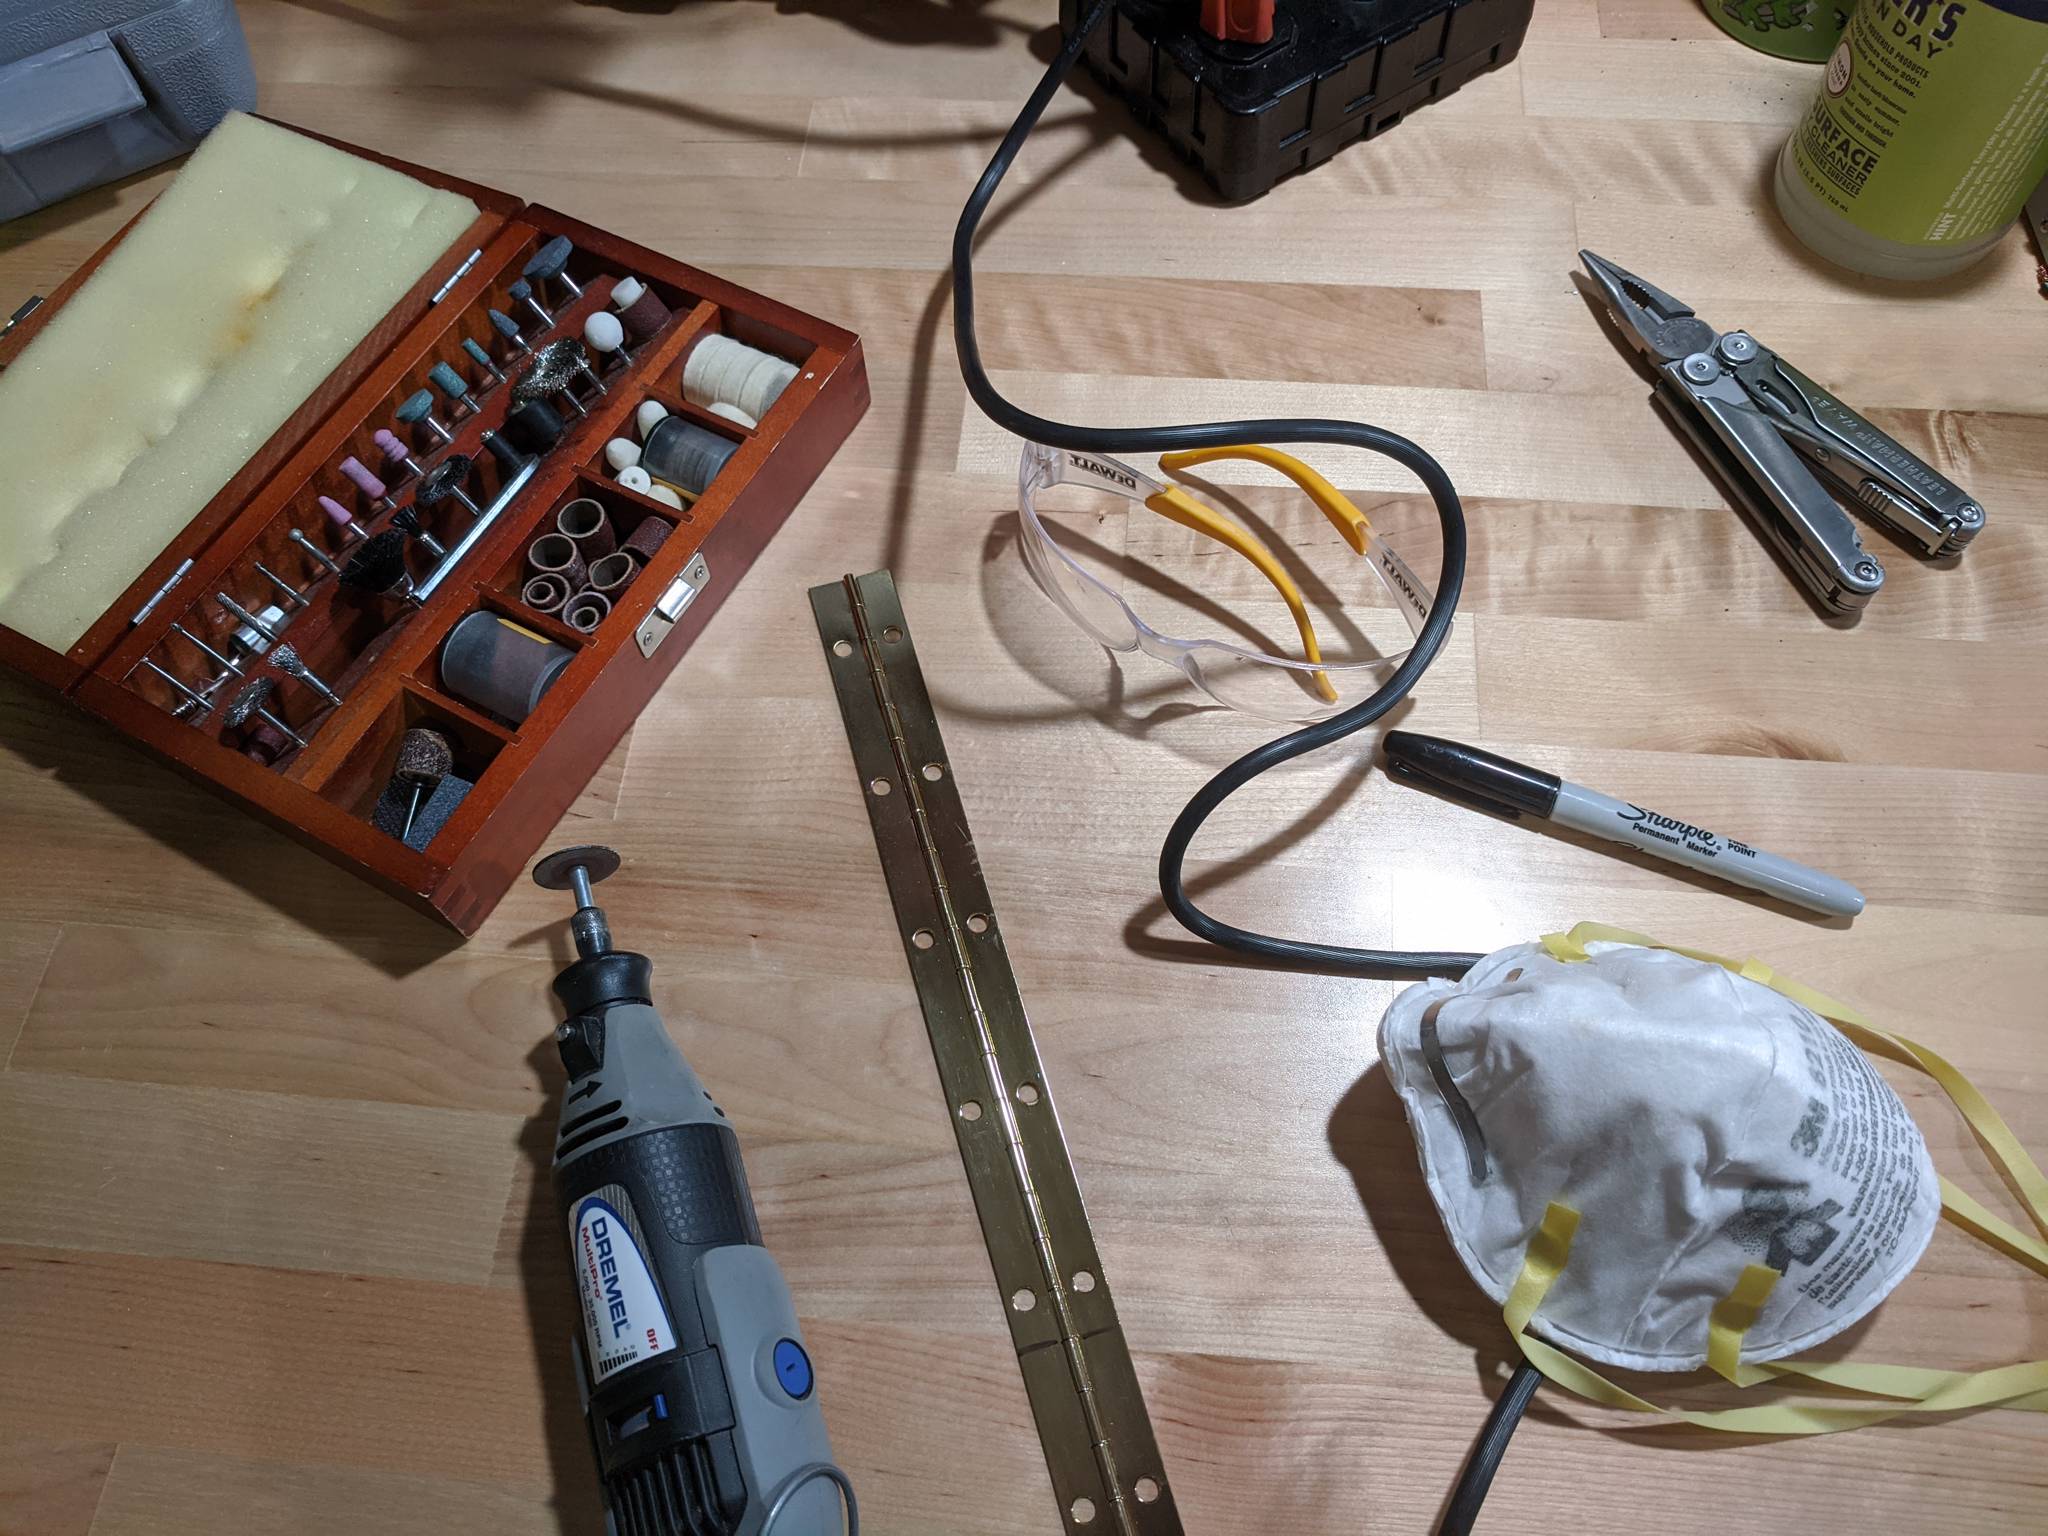
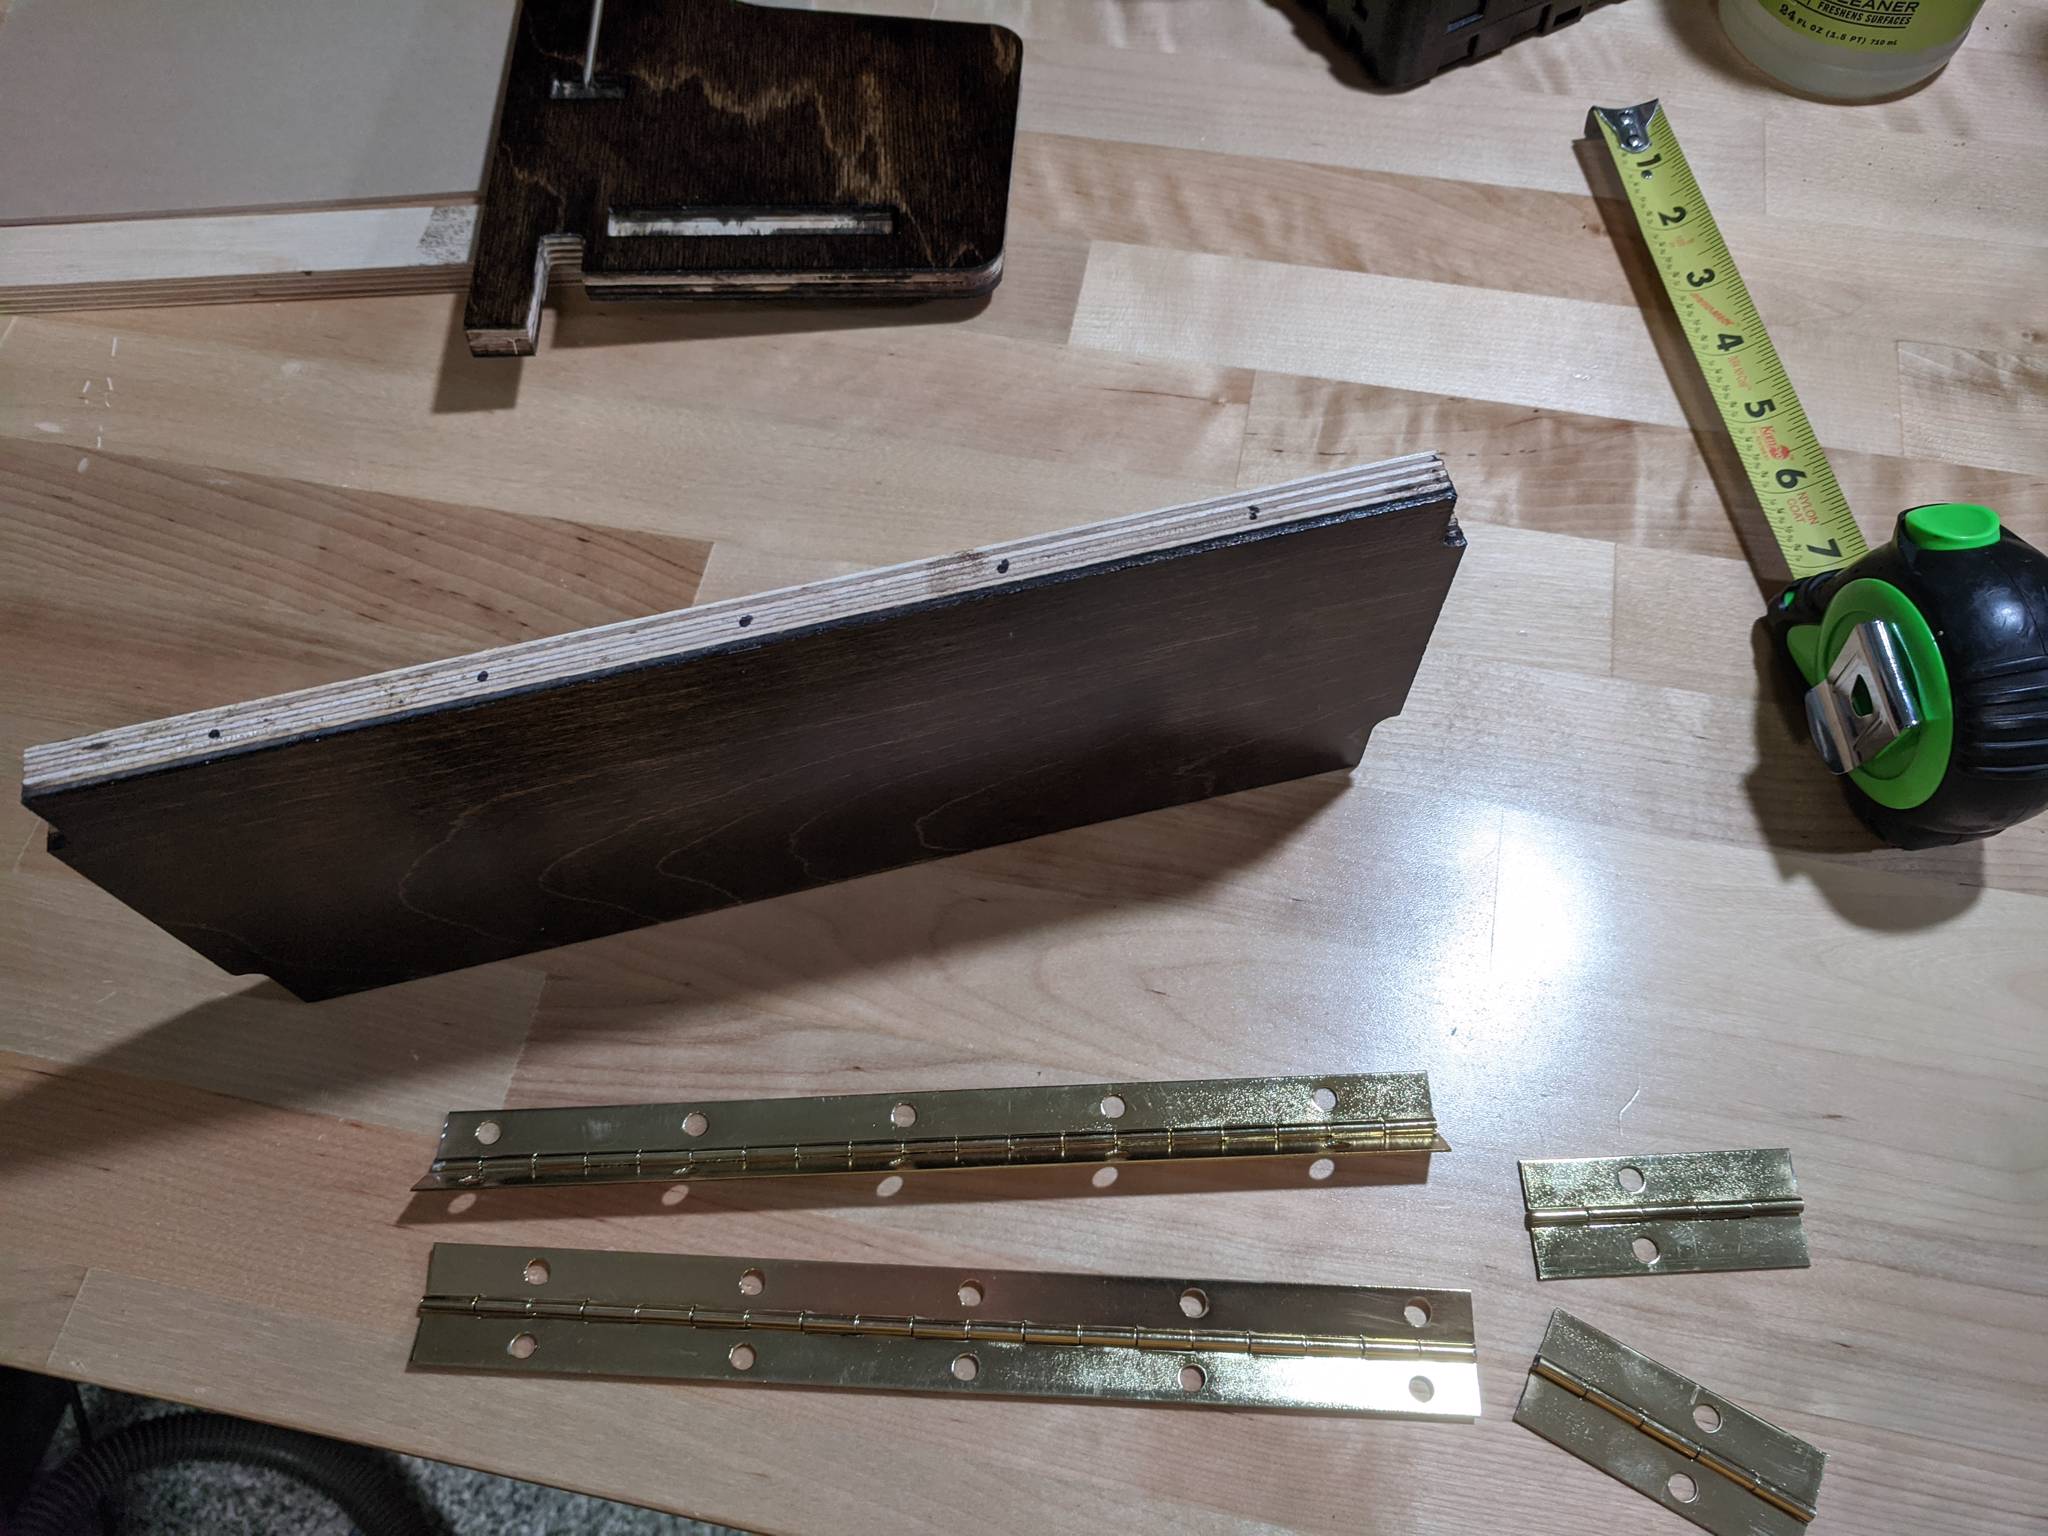
I used piano hinges to attach the control panel tops to the body, to allow easy access underneath. I couldn't find any piano hinges that were close in size, so I bought a much longer one and cut it with a Dremel.
I used Rust-Oleum enamel spray to add several coats to the control panel tops. It came out looking very shiny, and seems pretty resistant to scratches and wear so far.


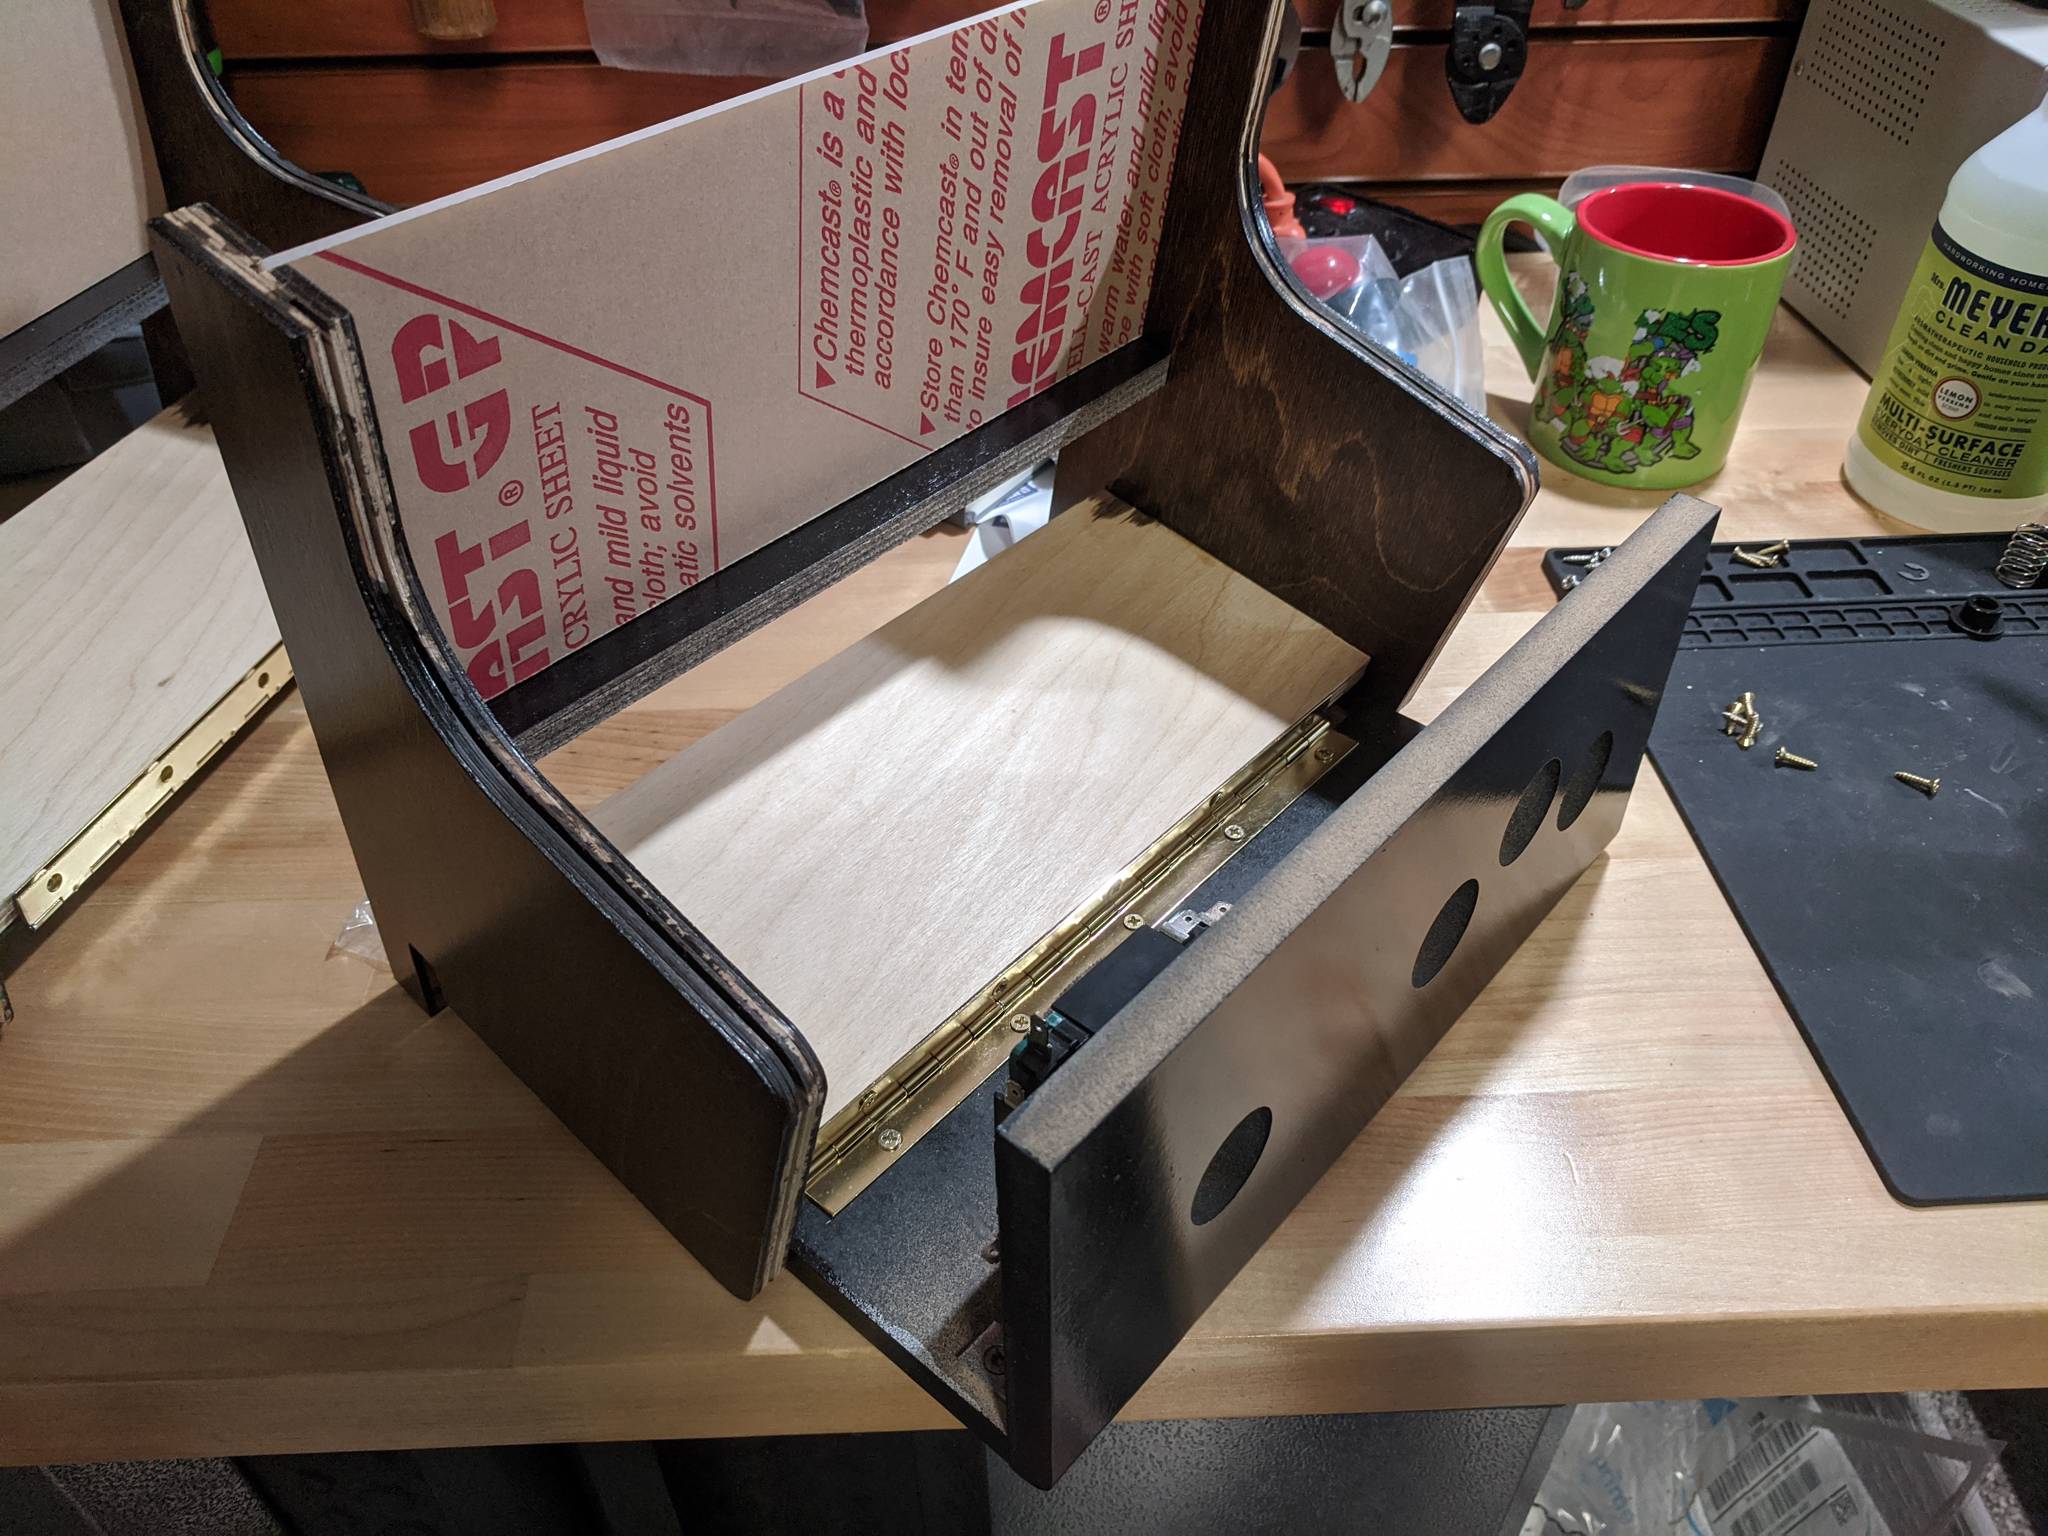

By far the most frustrating part of the build was attaching the control panel tops to the cabinet. The kit's instructions suggest using Velcro or magnets, but I was very doubtful that would work well. When playing games, people put a lot of weight on the panels pulling the joysticks (think trying to outrun ghosts in Pac-Man), and I just didn't think Velco or magnets would hold up to the force--or if they did, there would likely be lots of wobble on the panel. I decided to look for my own solution.
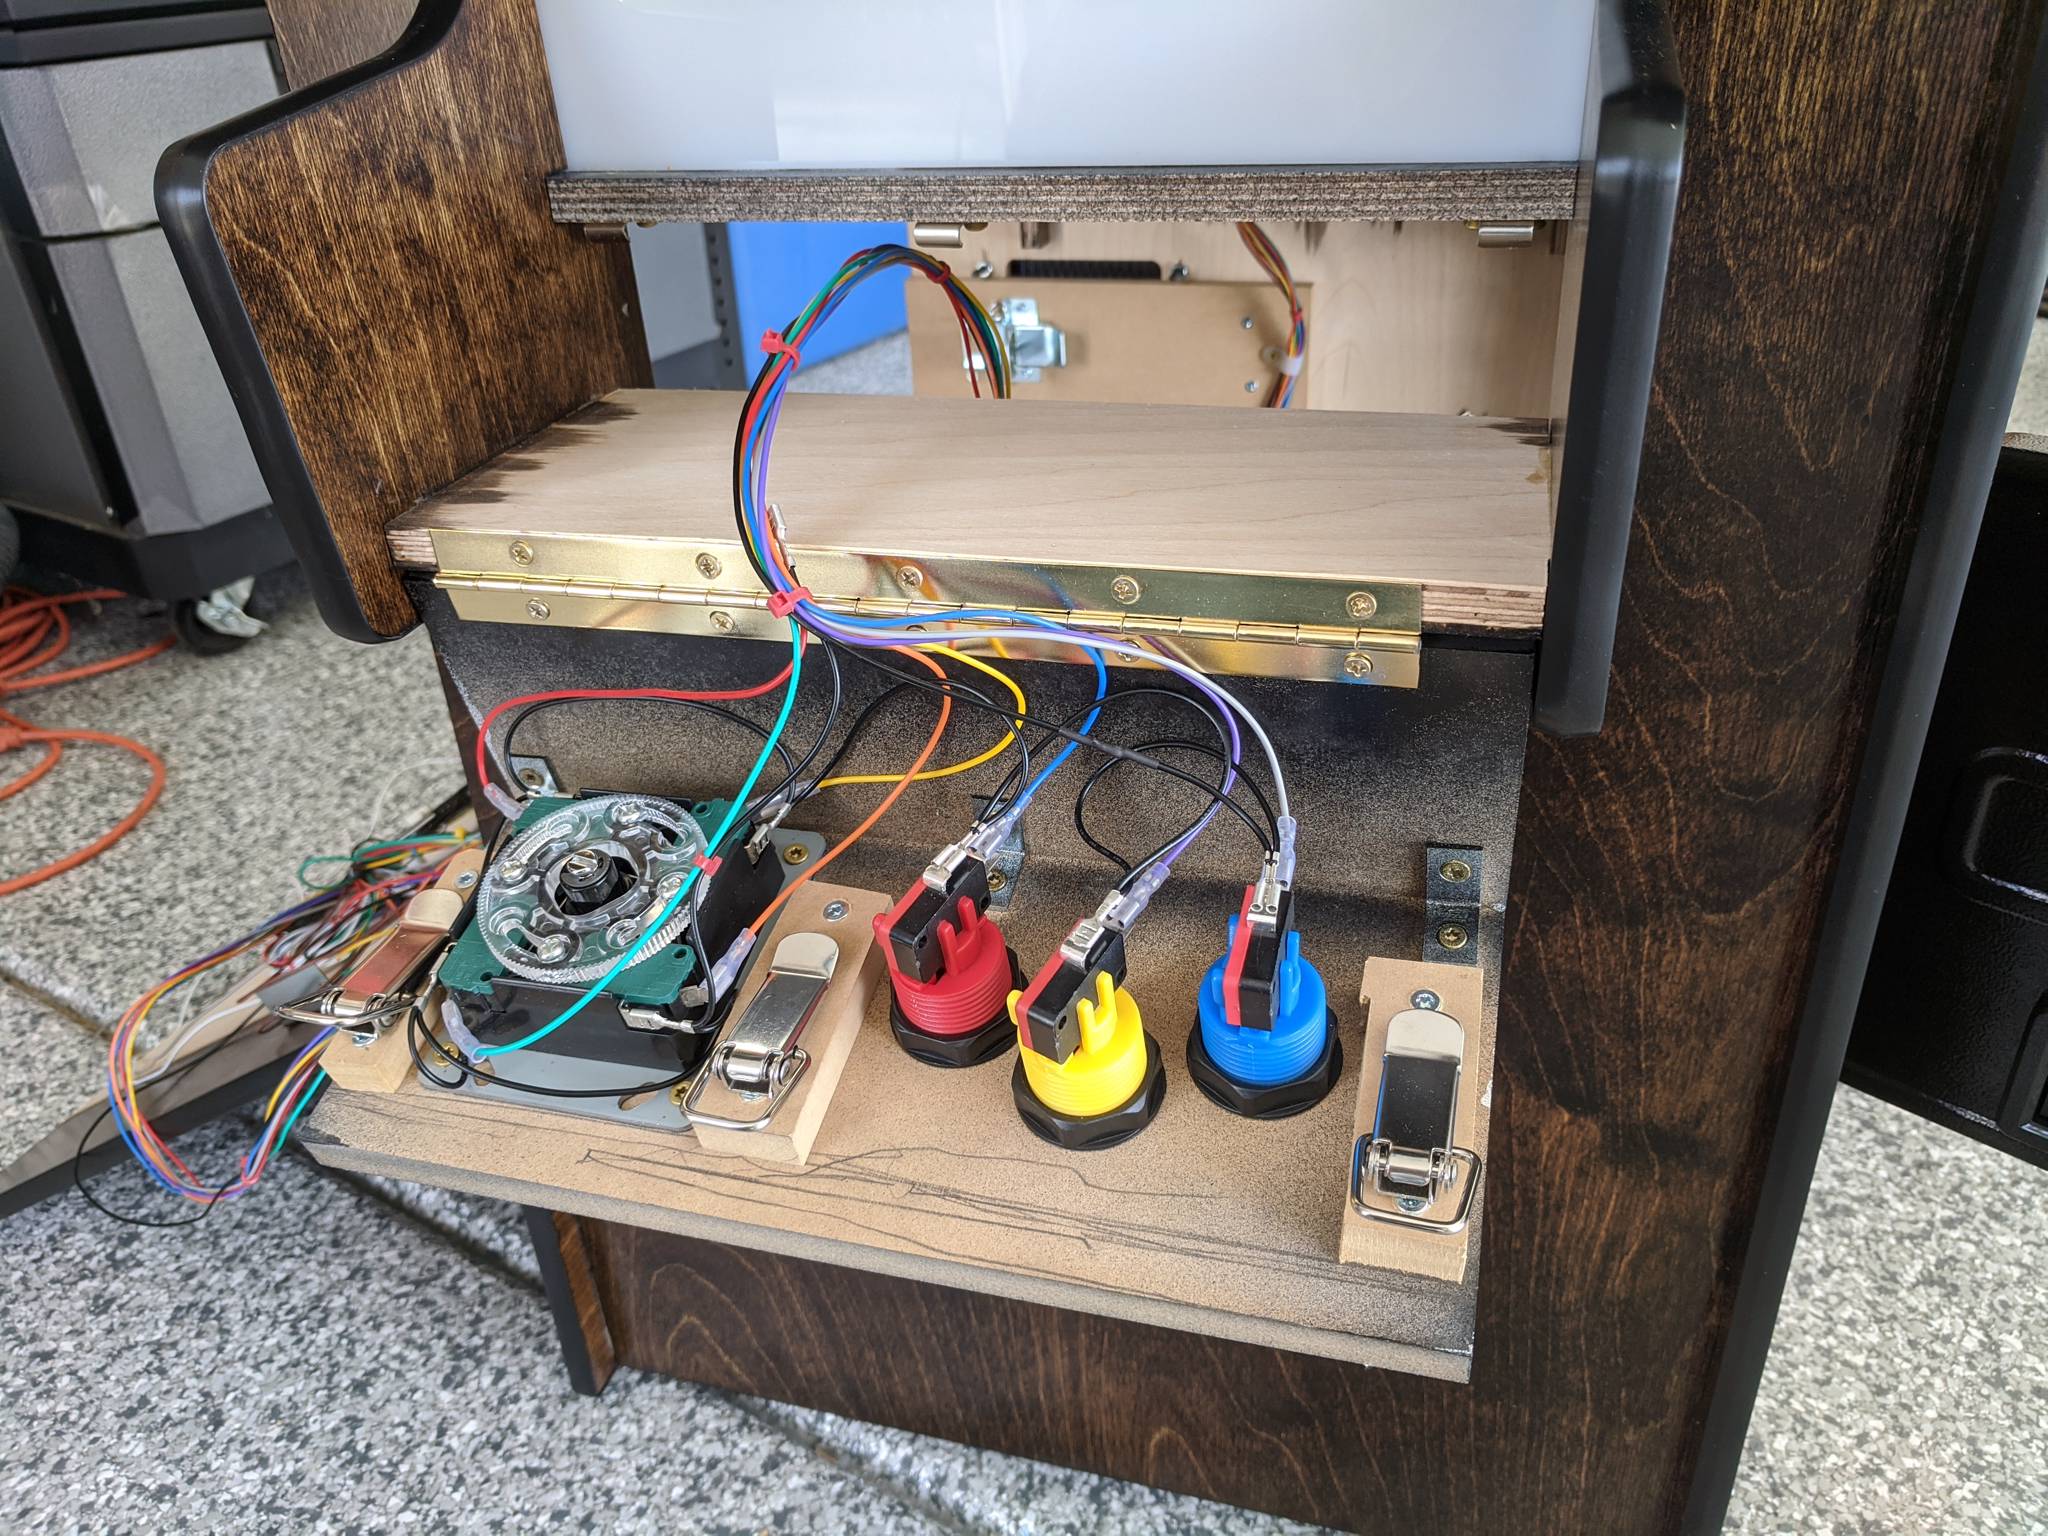
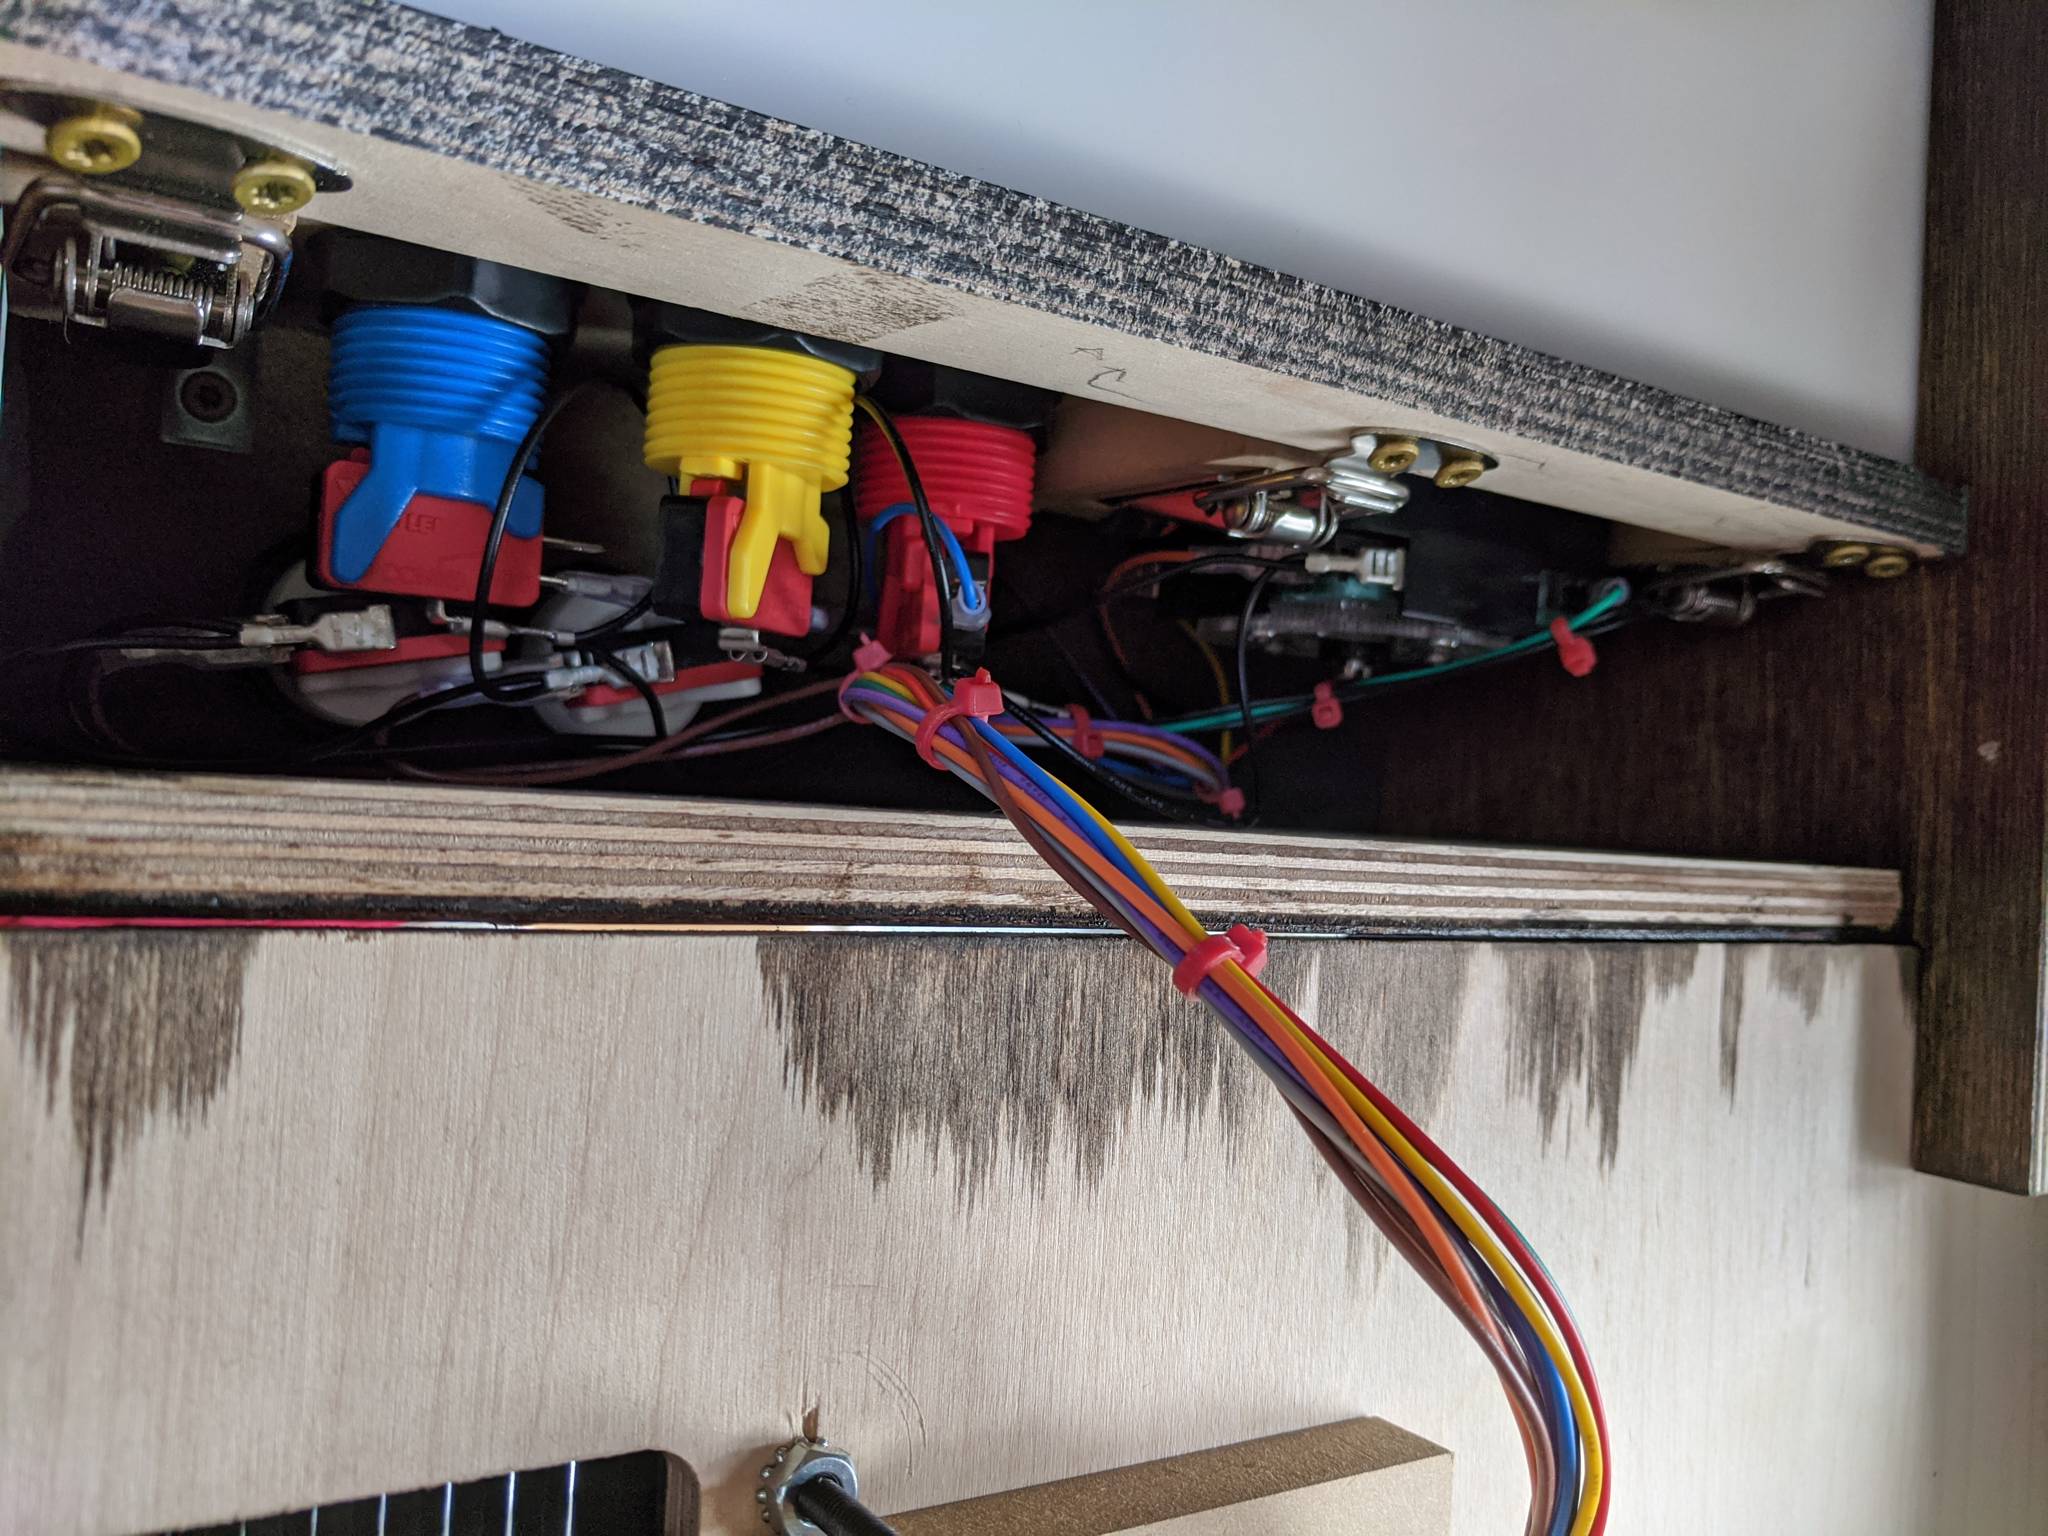
I wanted something like the system used by real cocktail cabinets, which have clamp clips accessible on the inside by reaching through the coin door. This keeps the control panels tops extremely tight (no wobbling), and prevents the control panels from being opened unless you have the key to the coin door.
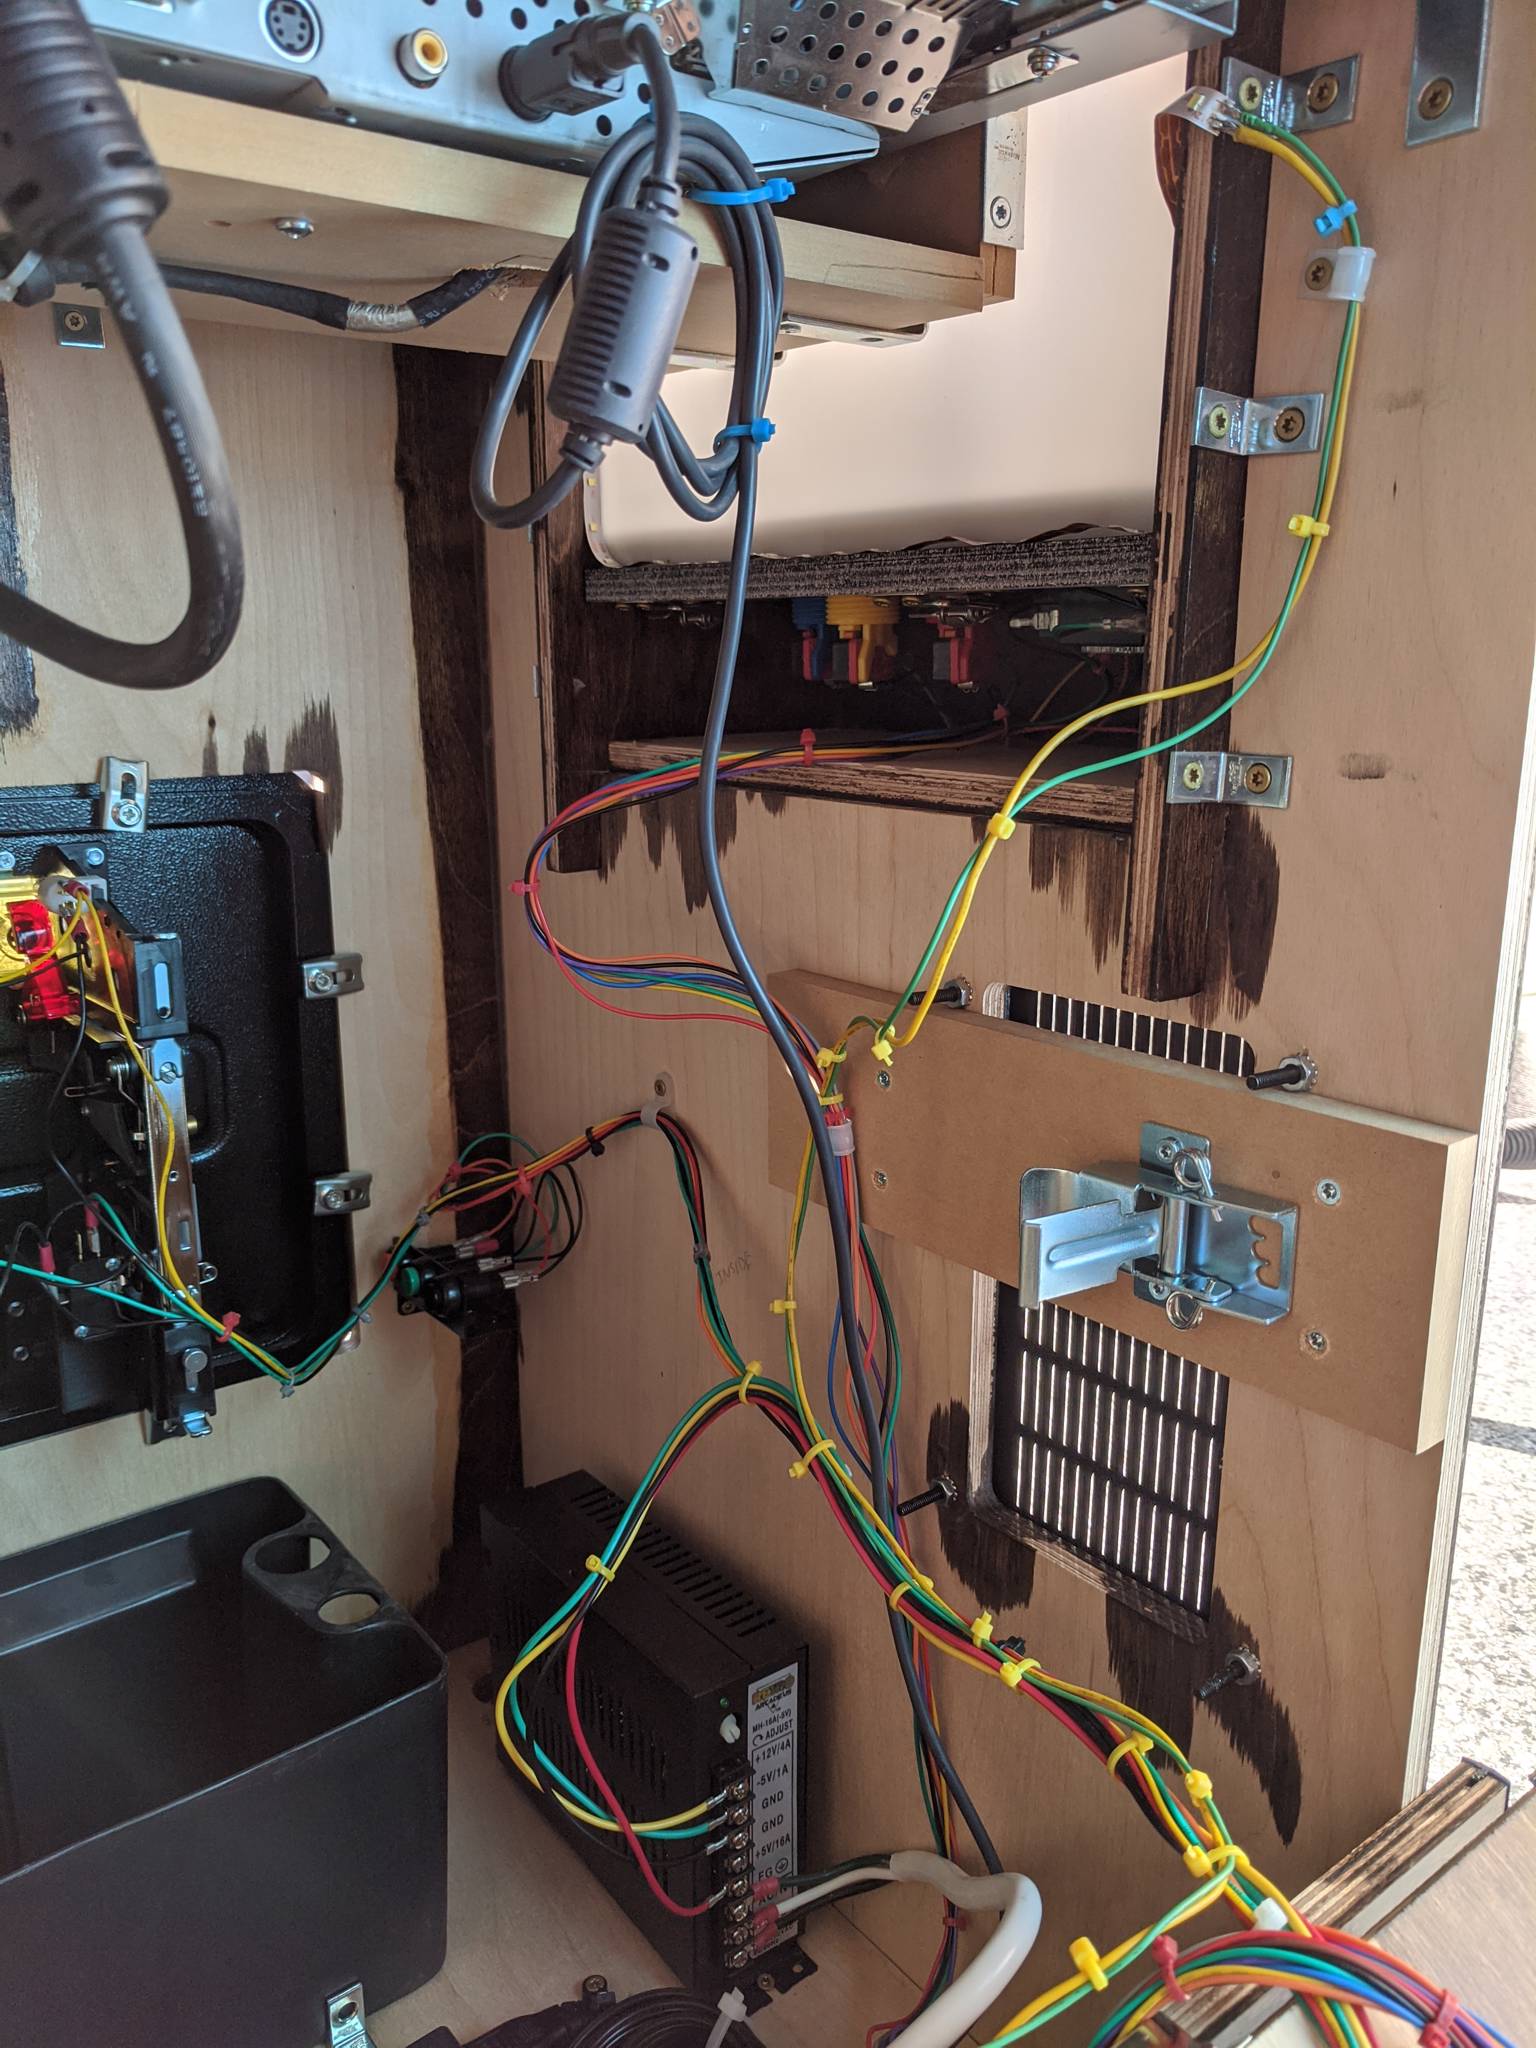
After several trials, eventually I ended up using chest catch latches. I had to cut some shims from the extra wood that came with the kit so that the latches were at the correct height. This ended up working really well; the panels don't wiggle at all and are easy to unlatch from the inside.
As for the joysticks and buttons, I used the set from this kit by RetroArcade.us.


Wiring and Game Board
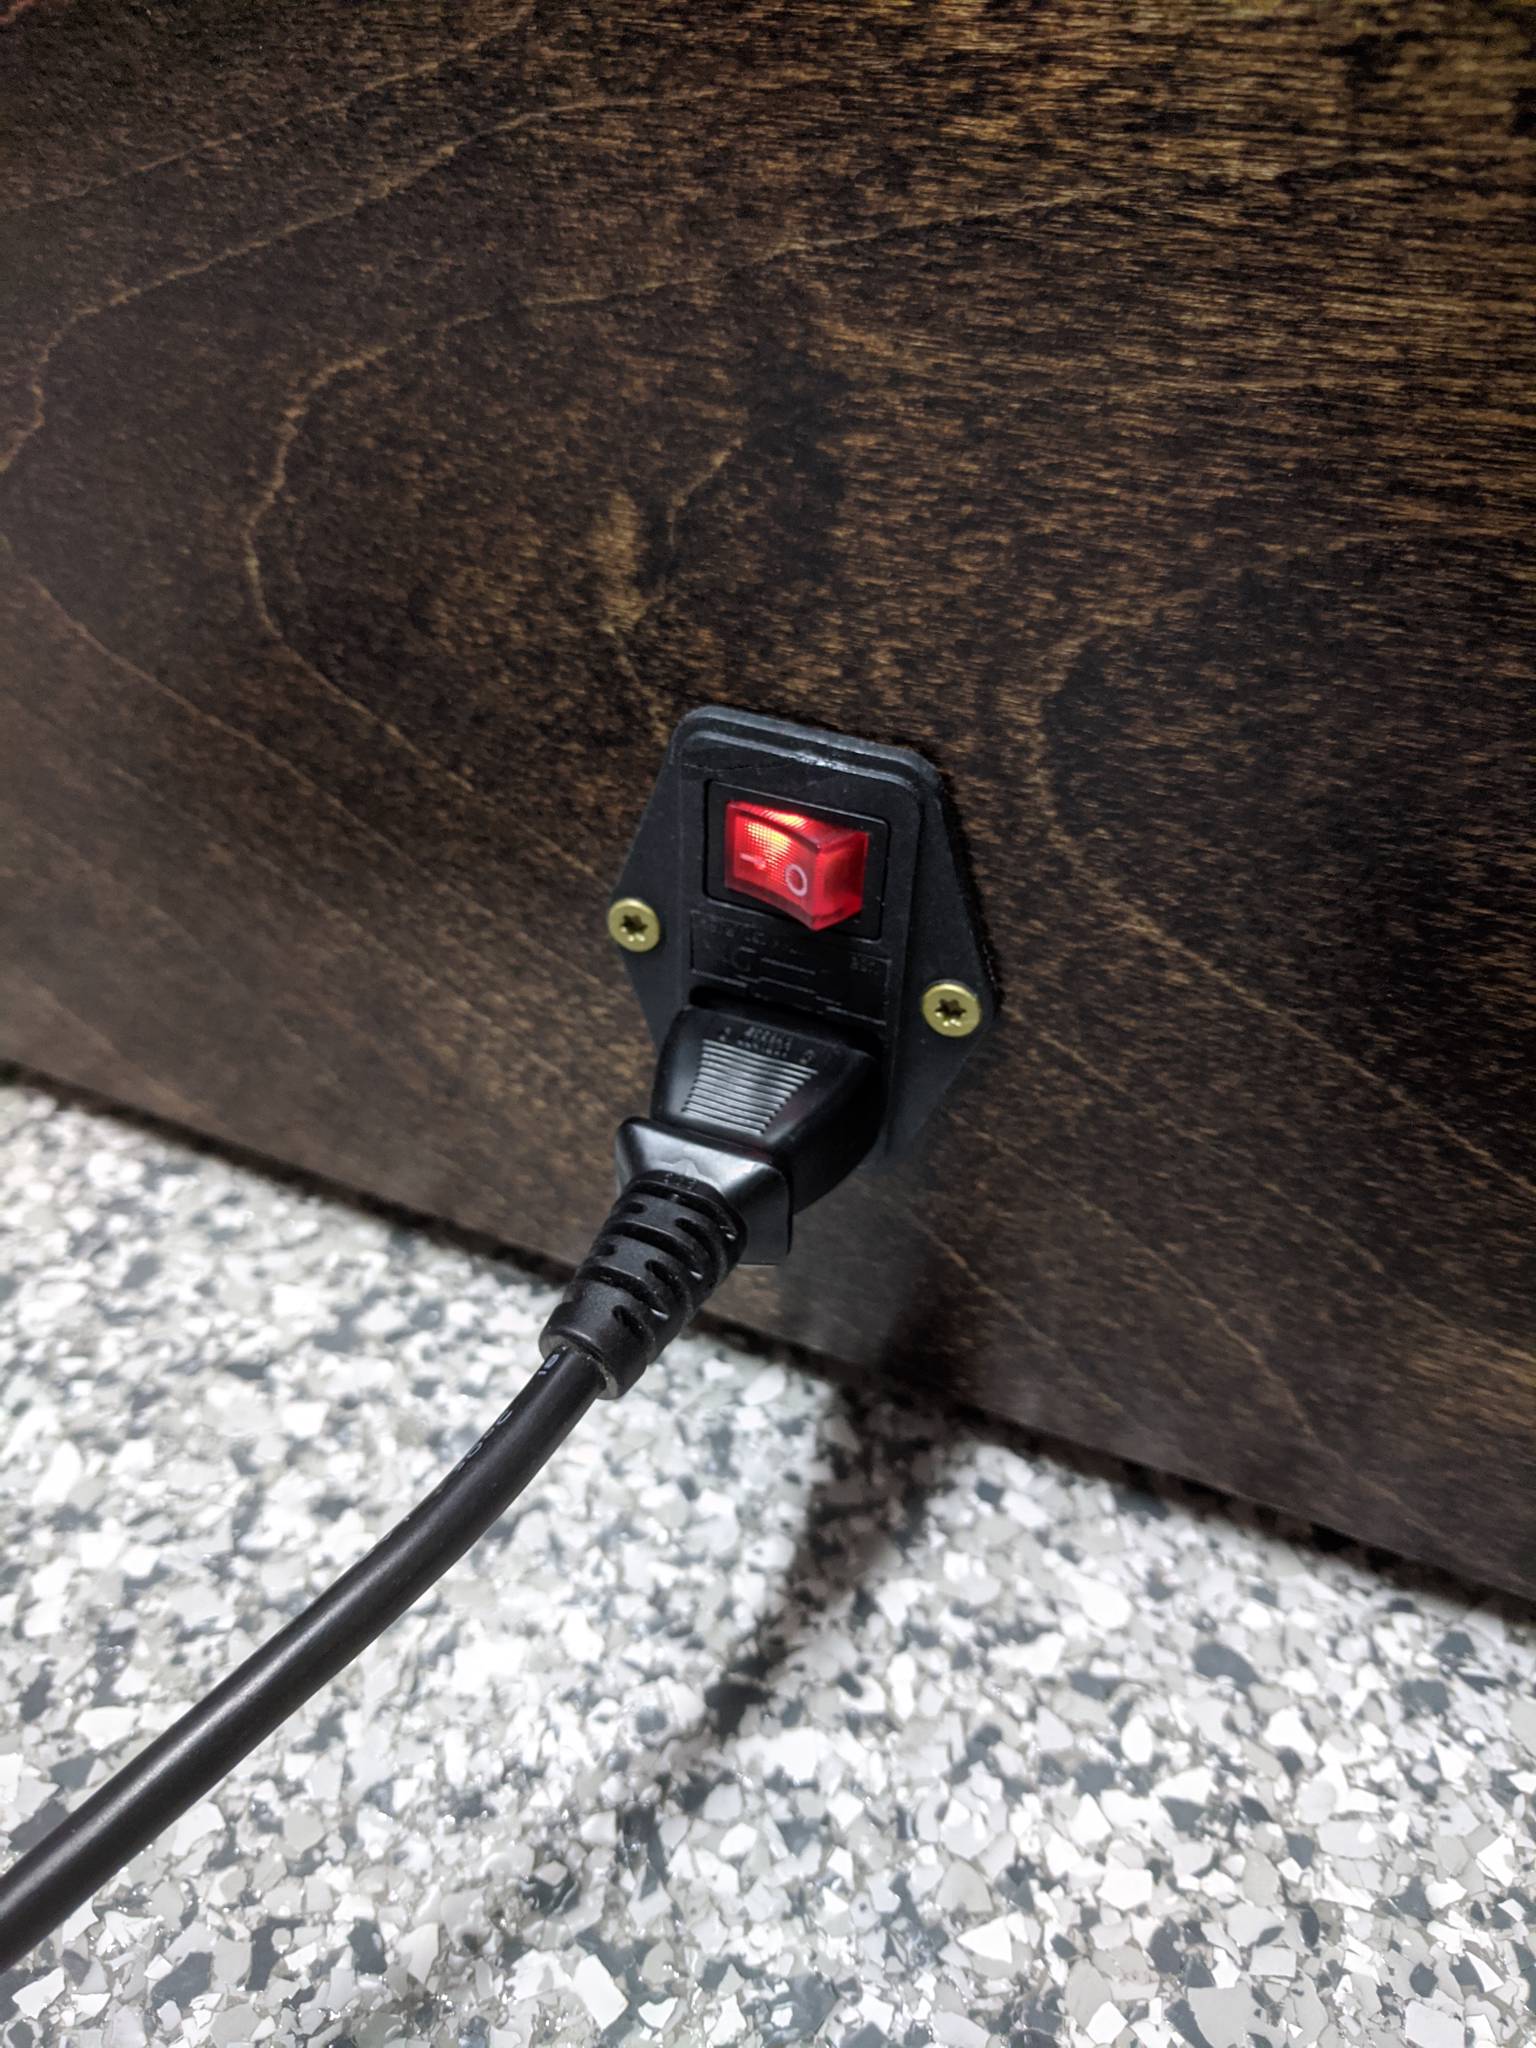
The kit came with a fused power switch that uses an IEC C16 connector (standard PC power cable). I connected the switch outlet to a power strip on the inside, which powers the game board, audio amplifier, and monitor.
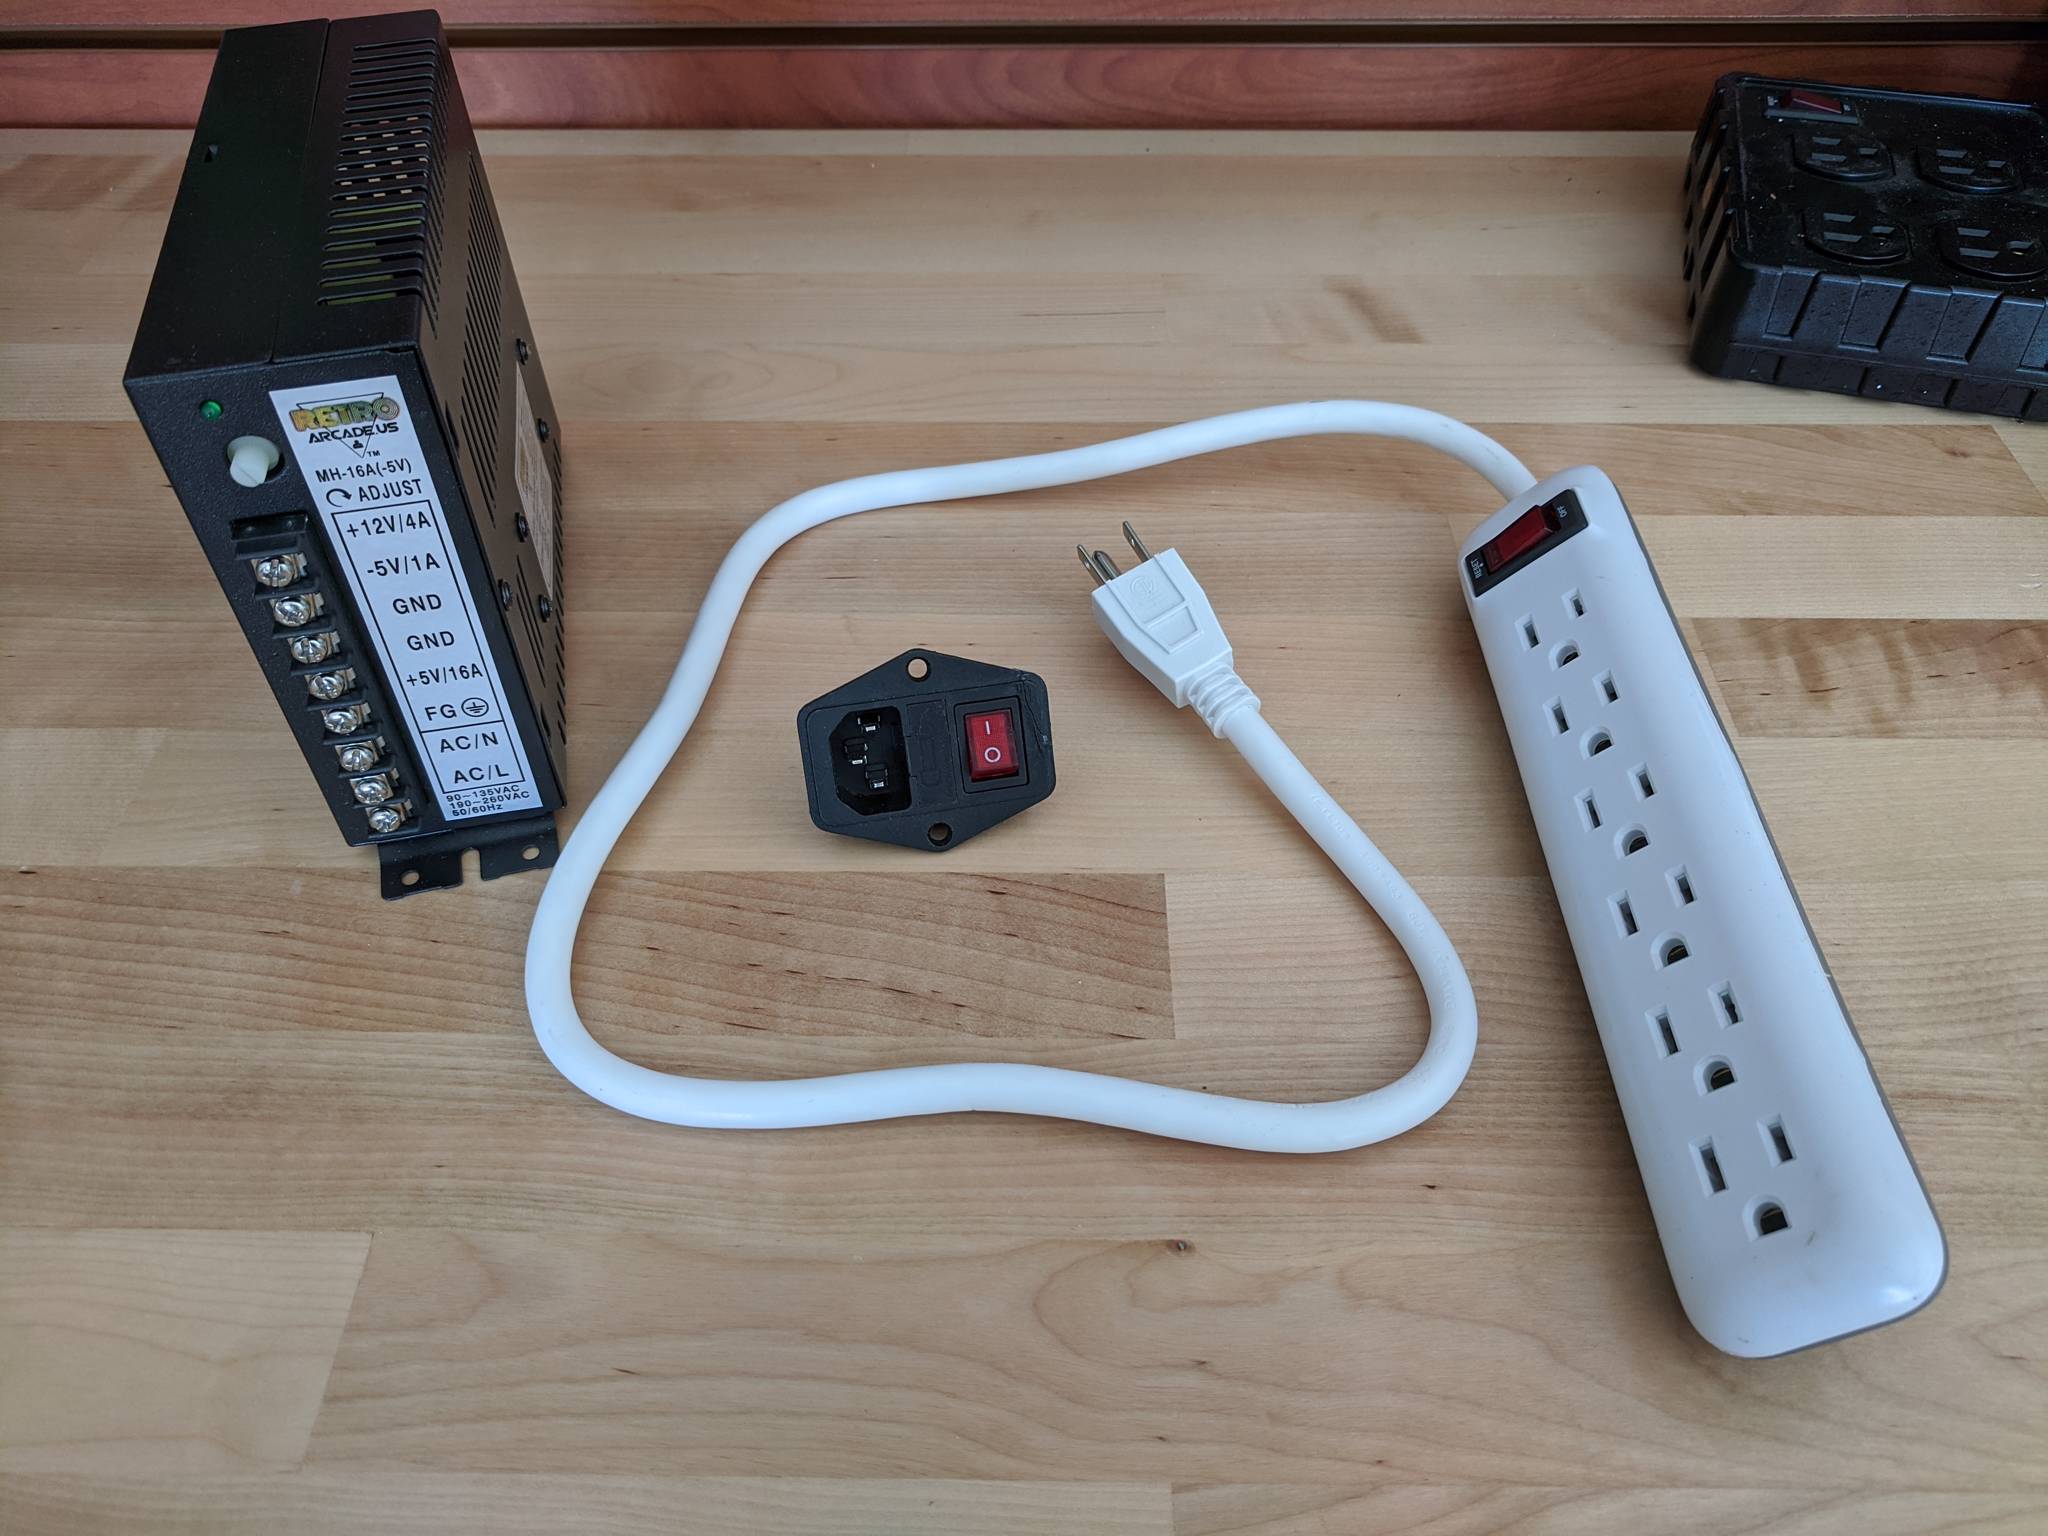
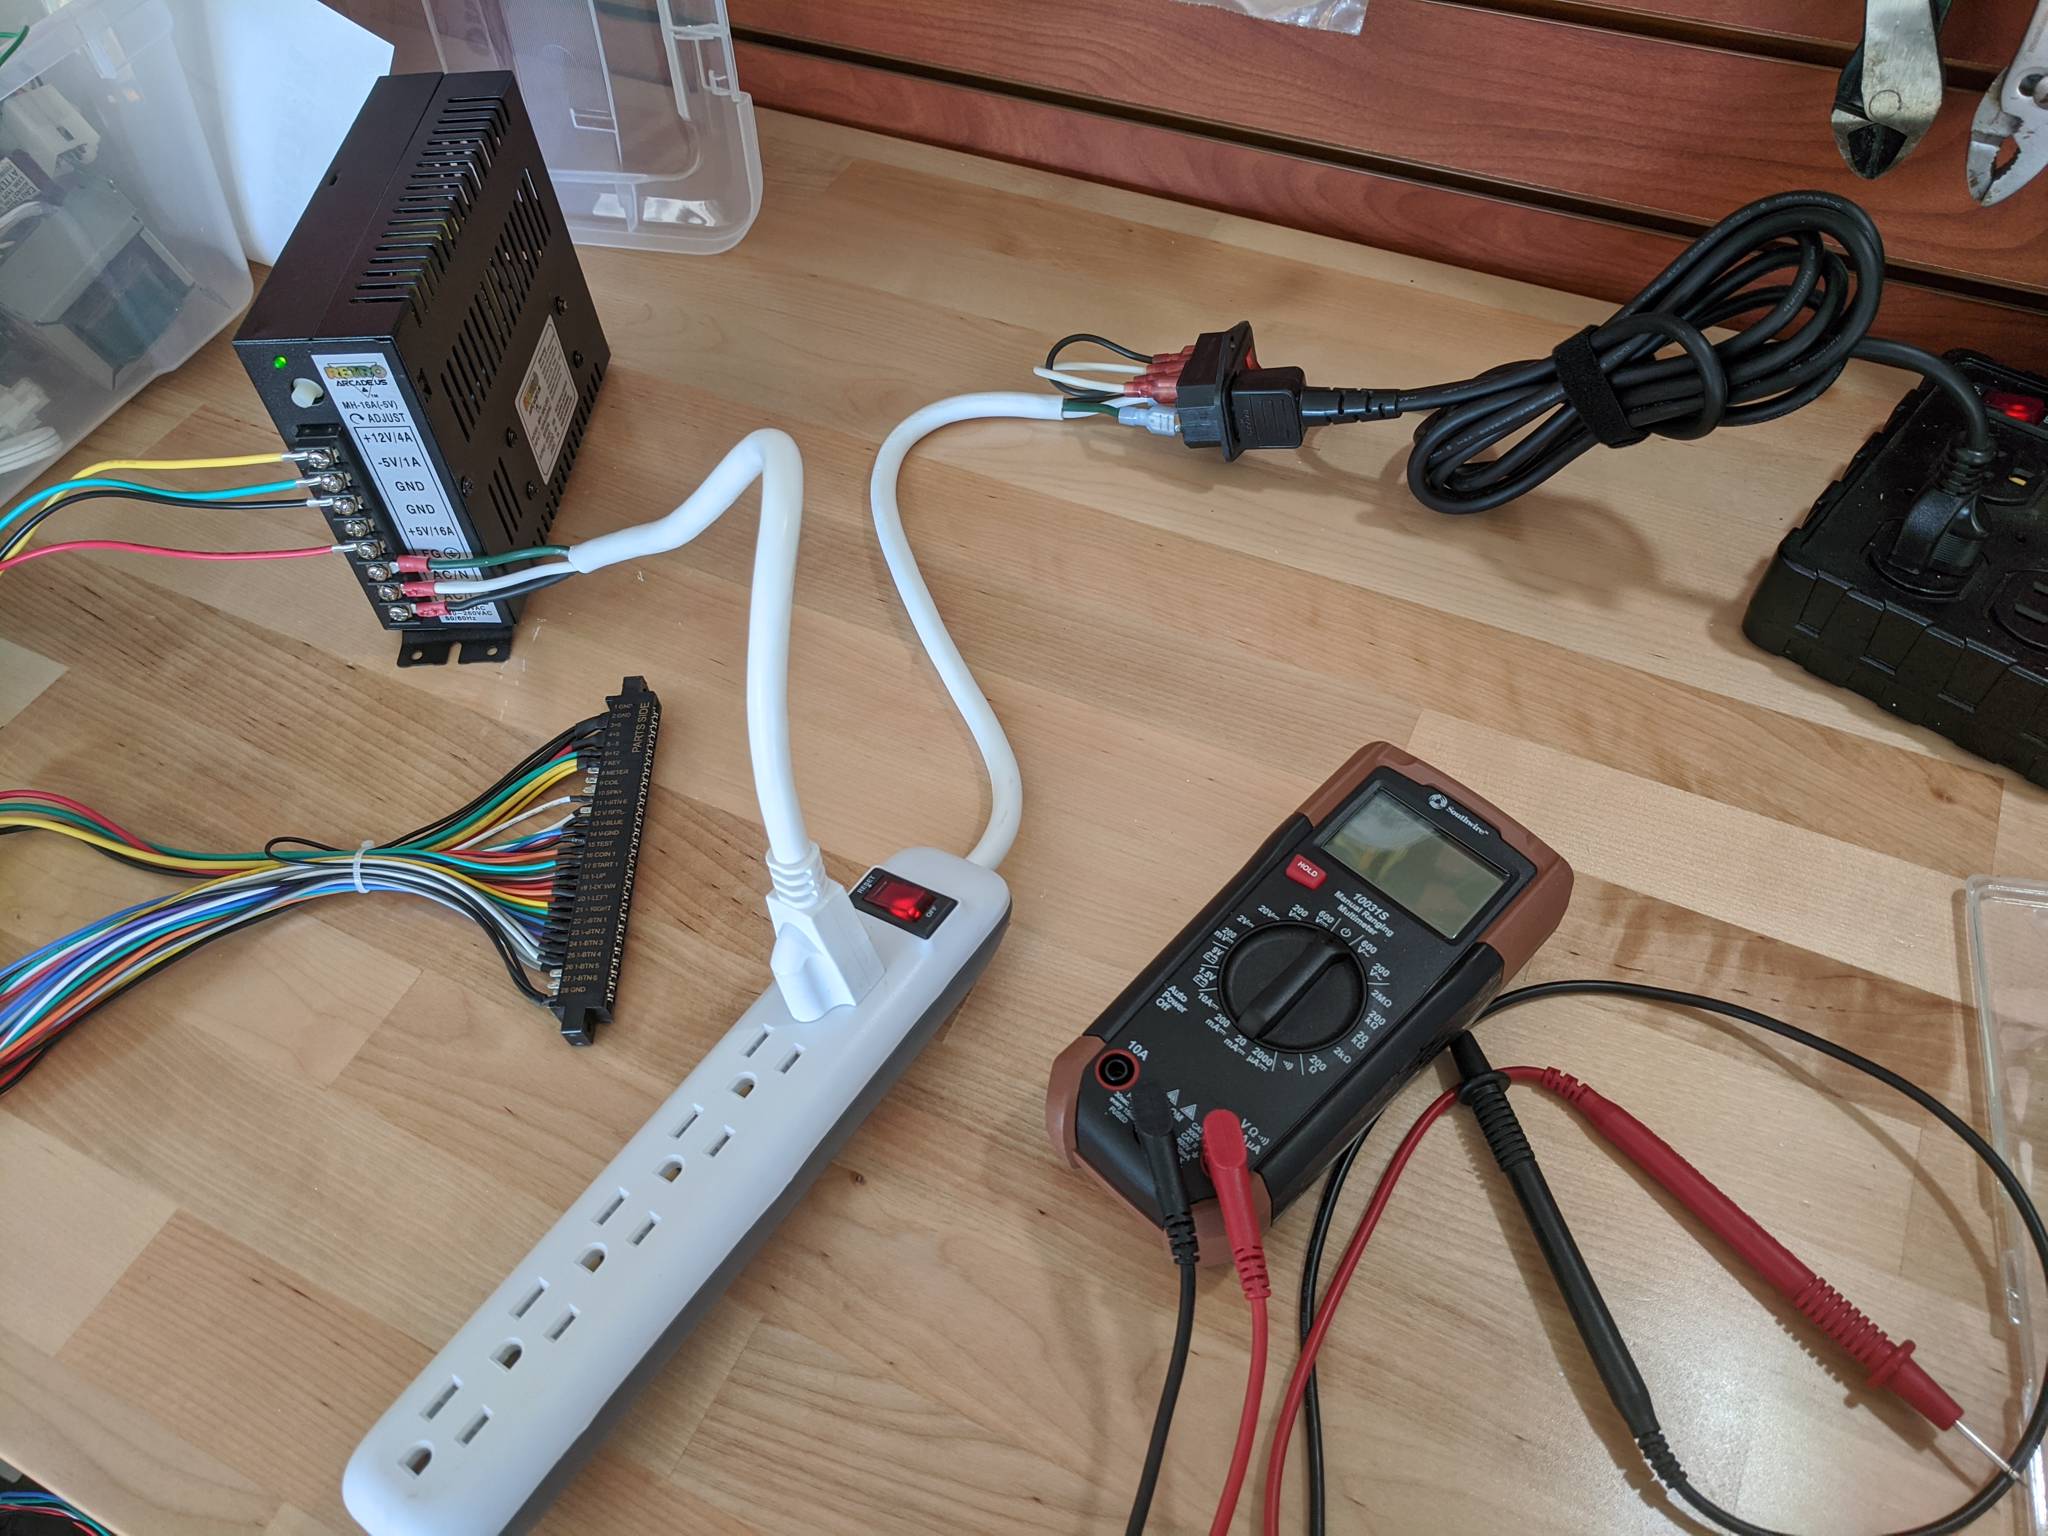

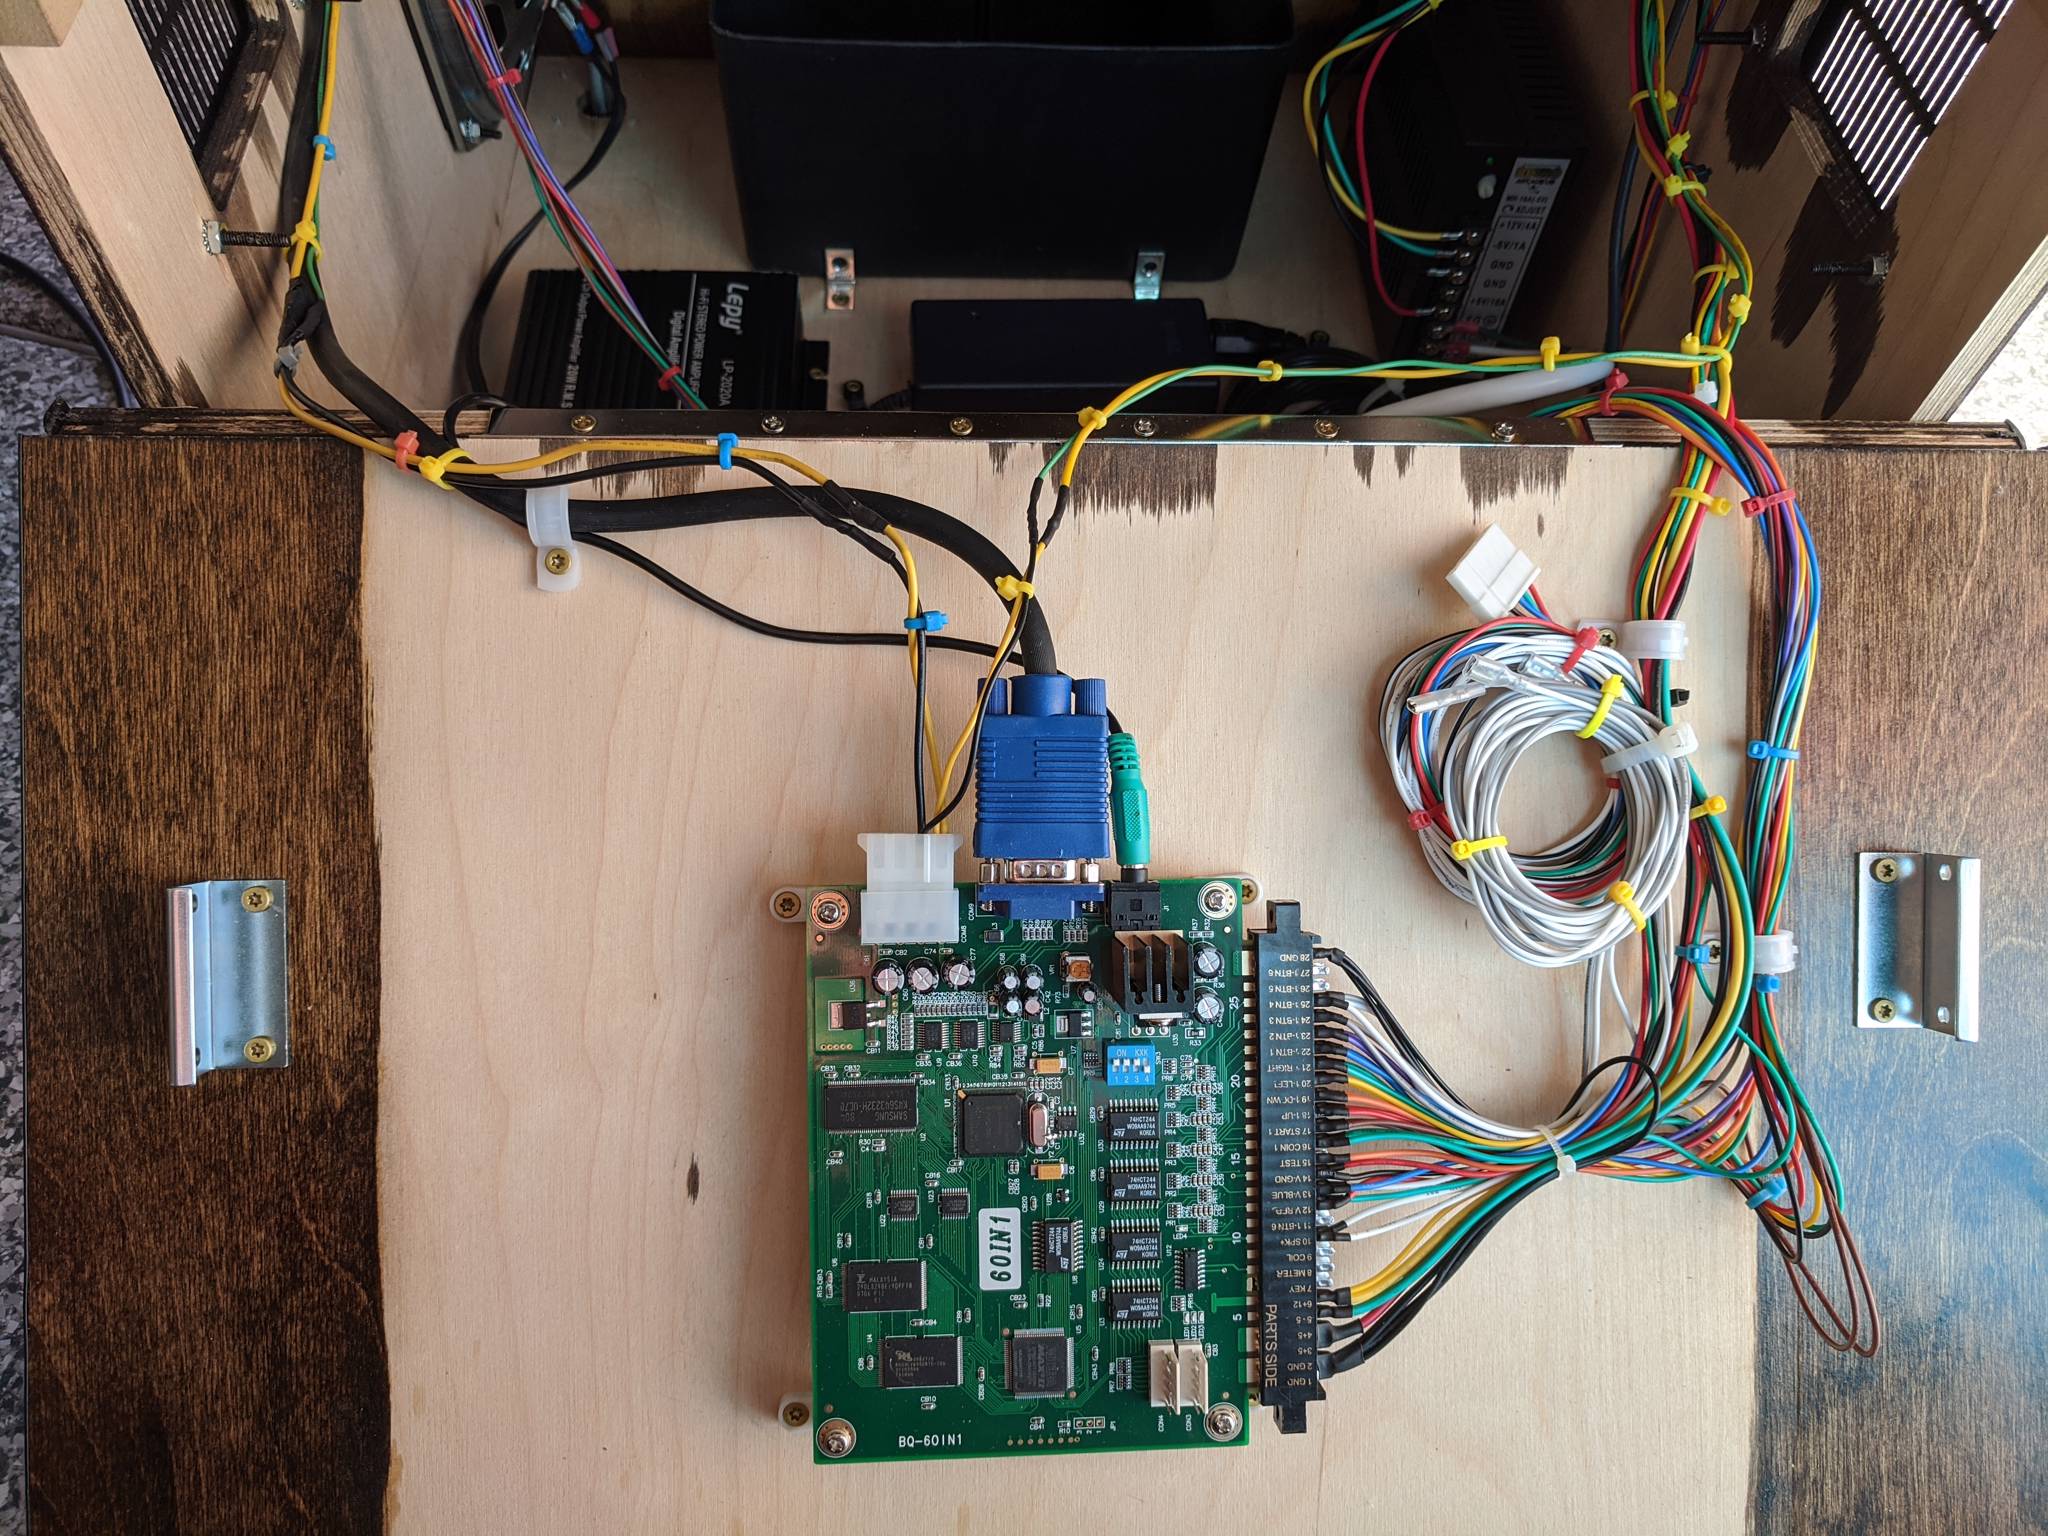
I used a switching power supply and JAMMA harness from this kit by RetroArcade.us.
The audio amplifier wasn't strictly necessary, but I like to be able to easily adjust the volume with a knob, instead of having to go into the game board's firmware menu. I used the Lepy LP-2020A amplifier.
There wasn't enough room behind the control panel plexiglass for any bulbs for backlighting, so used some LED strips with adhesive backing (similar to these) and stuck them around the plexiglass edges.
As for the game board, I went with a generic 60-in-1 JAMMA board.
Everything is accessible from a side door, which opens on a piano hinge. It is held on with these latches, which can be opened by reaching through the coin door.


Results
Overall, I am thrilled with this build. I couldn't be happier with how the finish on the baltic birch plywood turned out. The staining process was messy and time-consuming, but it looks so much better than black melamine, it was worth the extra time and clean-up.
Although I was faced with several gotcha's, I would absolutely recommend Haruman's cocktail cabinet kit, as long as you know going in that it isn't a turn-key solution and will require a bit of improvisation.